| When you're on the go and working on your laptop, it's important to back up important filesbut you may not be traveling with an external backup drive. .Mac members can log in and download an application named Backup. Note  A friend of ours had his office burglarized. The creepy burglar not only stole his Mac, but all the backup disks of his important files. Had our friend backed up to his iDisk, he'd still have his files.
Backup can automate backup tasks for you, backing up files to cd, dvd, your hard disk, or (our Road Warrior favorite) your iDisk. Keeping a current backup of your iCal, Address Book, or an important project on iDisk means you can retrieve that information in case of emergency. Choose Your Backup Plans If you haven't already downloaded Backup from the Mac.com site, log in, then download the latest version of Backup (version 3 is shown here). 1. | Open the Backup application.
| 2. | In the "Welcome to Backup" window, choose a backup plan from the list. Start with the "Personal Data & Settings" plan. This will back up your Address Book, iCal, Keychain settings, and more to your iDisk.
Click "Continue."
| 3. | The Backup window highlights your plan. Click "Back Up."
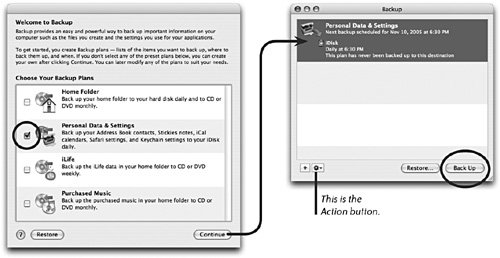 It's that simple. To see the files that are included in the plan or to set a schedule of when the backup takes place, double-click the item in the Backup window (above, right). The window shown at the top of the next page opens. It's that simple. To see the files that are included in the plan or to set a schedule of when the backup takes place, double-click the item in the Backup window (above, right). The window shown at the top of the next page opens.
| | | 4. | Click the "Back Up" button at the top of the window (circled, topright) to show the "Backup Items" and the "Destination and Schedule" panes.
To add items to this plan, click the plus button (+) at the bottom of the "Backup Items" pane. In the sheet that drops down (below-right), choose items from the "QuickPicks" list. Click the "Files & Folders" button to select a specific file or folder. Or click the "Spotlight" button to search for a file or folder.
|
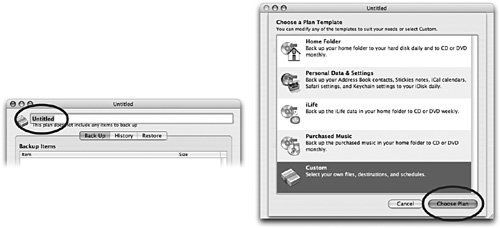
Since this backup plan is named "Personal Data & Settings" and because it will be backed up to your iDisk, it's best to add only QuickPicks to this plan. QuickPicks are relatively small files and they won't take up a big part of your iDisk storage. To back up large files or folders, create a custom backup plan and set the destination for another hard drive, cds, or dvds. 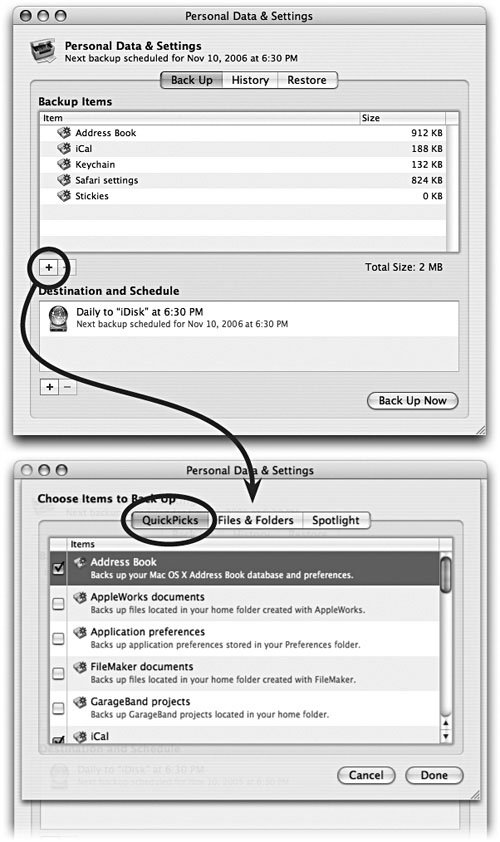 Create a Custom Backup Plan 1. | Click the Action button in the bottomleft corner of the Backup window (see the opposite page). From its menu, choose "New...." The sheet that drops down includes a "Custom" backup plan in addition to the original default backup plans (bottom-right). Select the "Custom" item, then click "Choose Plan."
| 2. | Enter a name for the custom backup plan in the window that opens (below).
 | | | 3. | Click the plus (+) button under the "Backup Items" pane (below-left). From the sheet that drops down (below-right), select a folder or file you want to back up, then click "Done." The file or folder is added to the "Backup Items" list (below-left).
| 4. | Click the plus (+) button under the "Destination and Schedule" pane. From the sheet that drops down (below-left), select a time and location to back up the selected files. Click ok to close the sheet.
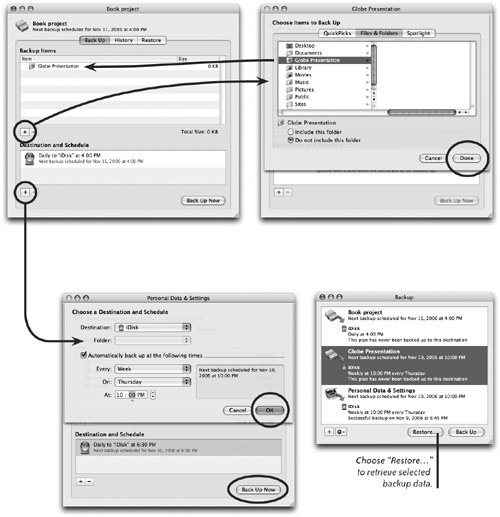 | 5. | Click "Back Up Now." The new backup plan is added to the list of backup plans (above right). To manually activate a plan instead of waiting for the scheduled backup, select it, then click "Back Up."
|
|