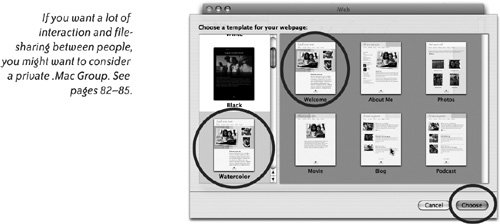
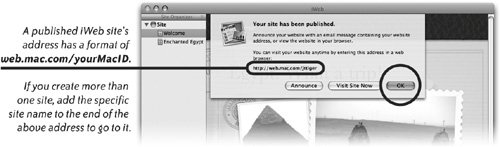
| Staying in contact while you're on the go is easy if you have a .Mac account and iLife'06 (or later). With iWeb (included in iLife'06) you can keep coworkers or family up to date with a blog, or publish a web site of your recent photos from iPhoto. You can also create and publish podcasts from your laptop. We don't cover everything in this short introduction, but the Help files are great and there are tutorials on Apple's web site for greater detail. Your blog address, after you publish it, will be web.mac.com/yourMacID. To create and publish a blog on iWeb: 1. | Open iWeb. The first thing it asks you to do is choose a template design, on the left, and then a page from that design, on the right. Choose the "Welcome" page, even though you're going to make a blog! If you don't, you will have a very lengthy web address instead of the one above.
 | 2. | See pages 9293 for the basics of how to customize the Welcome page, as well as all other pages. For now, let's add a blog page.
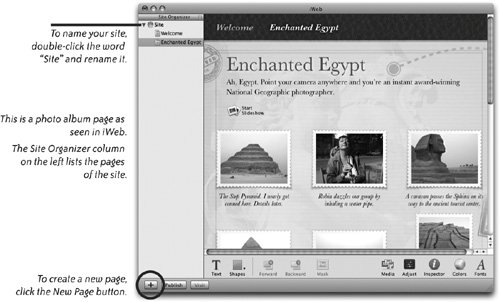
| 3. | To make the blog page, click the + sign at the bottomleft of the pane.
| 4. | You get the same template pane shown above. This time, double-click the "Blog" template page.
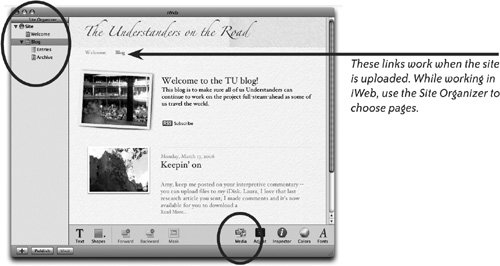
| 5. | Now in the "Site Organizer" pane on the left side of iWeb (circled on the opposite page), you see three pages for the blog.
Blog. This is the page that your visitors will see. See the next page.
Entries. This is what you click on to get the page where you will type in your blog entry. See the next page.
Archive. iWeb sets this all up for you. All you need to do is edit the placeholder text and then leave it alone.
| | | 6. | In the Site Organizer, Single-click on the "Blog" page to display it.
Double-click the title at the top of the page and rename it.
Double-click the "Welcome" placeholder text and write your own.
Click the "Media" button at the bottom of the window to access your iPhoto collection. Drag an image from there (see an illustration of the process on page 92) and drop it on the placeholder photo in the welcome area to replace the photo.
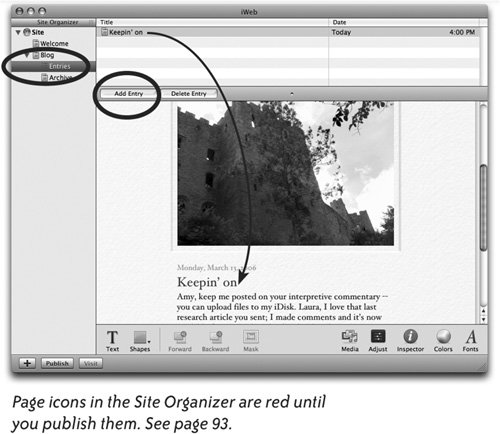
 | 7. | Now single-click the "Entries" page in the Site Organizer. This is where you will make your regular blog entries.
For your first blog, double-click the existing text and replace it with your own. To make a new entry, click the "Add Entry" button. To delete an entry, select its title in the upper portion, then click the "Delete Entry" button. | 8. | To publish your blog, click the "Publish" button at the bottom of the window. You will not be asked where to put itthe pages just go. When they are uploaded, you will get a message with a link to "Visit Site Now."
It's that easy!
|
 Create a Photo Album and Publish It to the Web iPhoto works with iWeb to help you publish collections of your photos on your iWeb site. We have to assume you know the basics of getting your photos into iPhoto and using its Library. (If not, see Cool Mac Apps or the iPhoto Help menu.) Tip If you don't want to create an album, iWeb can import a collection of selected individual photos from the Library or from any existing album.
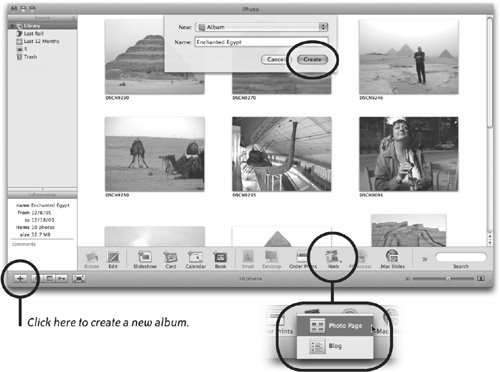
To create a new album and publish it: 1. | In iPhoto, click the New Album button (the plus sign) in the lowerleft corner of the iPhoto window. Name the album (this will also be the name of the link on the web page), and click "Create." The new album appears in the "Source" pane on the left.
| 2. | From the iPhoto Library, drag the photos into the album that you want to put on the web site.
| 3. | Single-click that new album in the Source pane to select it.
| | | 4. | Make sure you're connected to the Internet, then click the "iWeb" icon in the iPhoto toolbar (circled below). From the pop-up menu that opens (shown below), choose "Photo Page."
 Note If you choose the "Blog" option, iWeb assigns each photo (with its title) to a separate blog entry, ready for you to edit. If you have a blog page prepared, it goes on that page. If you have more than one blog in iWeb, it asks which one you want to use. If you already have an iWeb site built (or started), this process will add a "Photos" page to your existing site. If you don't have an iWeb site started, this process will make you one! Now you're in iWeb:
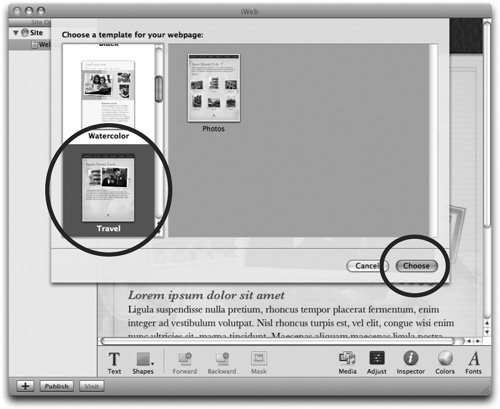
| 5. | In the iWeb window that opens, a sheet drops down (right) so you can choose a template. First choose a graphic style from the left column, then click the "Photos" template on the right.
| 6. | Click "Choose."
| 7. | iWeb imports the photos in the album you created and displays them on the iWeb template page, as shown below.
If you already have a site in iWeb, the Photos page will be added to it and a link placed on your Welcome page.
If you have more than one site, drag the Photos page to any site you like.
If you have not yet made a site, iWeb creates two pages for you: the Photos page (here named "Enchanted Egypt" because that was the name of my album) and a "Welcome" page.
 | 8. | The text on all iWeb pages is editable: Double-click a text box to select the placeholder text, then type your own narrative. Double-click on a photo, then drag to reposition it within the border. Double-click on a photo caption to highlight it, then type a new caption.
 | | | 9. | To edit the Welcome page, click the "Welcome" item in the Site Organizer pane on the left to display the page. Double-click the placeholder text and type your own text for headlines and body copy.
Reminder Don't forget to save your files along the way! | 10. | To replace the placeholder photos in the layout with your own photos, click the "Media" icon in the toolbar; this opens the Media Browser (below-right). Drag photos from the Media Browser to the placeholder photos on the iWeb page.
Or drag a photo from any window or folder on your computer.
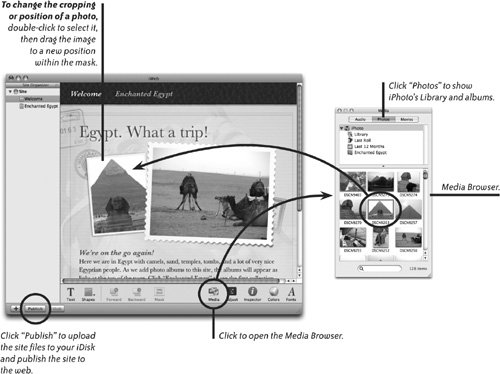 | 11. | When you finish customizing the iWeb pages, save the file once again. Click "Publish" in the bottomleft corner. After the files have uploaded to your .Mac iDisk storage, a sheet drops down to notify you that the site is published. Choose your option.
|
 The iWeb Tools The iWeb toolbar contains tools and palettes that give you an amazing amount of control over the appearance iWeb page templates. 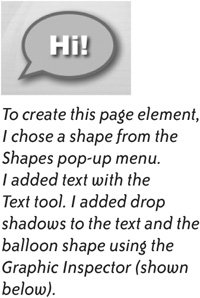 
| Text tool. This is automatically activated when you select a placeholder text box. To add text to a shape, double-click inside the shape with the Text tool (right). | 
| Shapes tool. This provides a pop-up menu of readymade shapes you can add to the page layout. You can resize or tilt the shapes. | 
| Forward and Backward. Click these tools to bring selected items forward or move them behind other items on the page. | 
| Unmask. To remove the mask around a photo and show the entire, uncropped image, select the photo, then click Unmask. | 
| Media. Click to open and close the Media Browser (shown on the previous page). From the Media Browser, you can select audio from iTunes or GarageBand, photos from iPhoto, and your own movies from your Movies folder or from iTunes to add to iWeb pages. | 
| Adjust. To adjust the appearance of a photo, select the photo, then click Adjust. The palette contains controls for brightness, contrast, saturation, sharpness, exposure, and more. | 
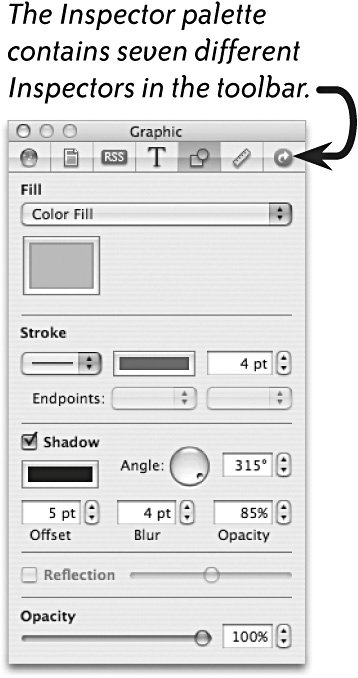
| Inspector. Click to open the Inspector palette (right). The seven Inspectors in the toolbar (across the top) give you control over all aspects of the page and site design, including drop shadows, hyperlinks, rotation, size, and orientation of images, text attributes, page size and background, site information, and more. | 
| Colors. This palette works with other Inspectors to control color of backgrounds, text, fills, and strokes. | 
| Fonts. Click to open the Font palette and choose or change the font used in headlines, captions, and body text. You can safely use any font in your list. |
 Blue or Red Page Icons The pages in the Site Organizer are colorcoded. A blue page has been published, and no changes have been made to the page since it was published. A red page has either not been published, or its most recent changes have not been published. 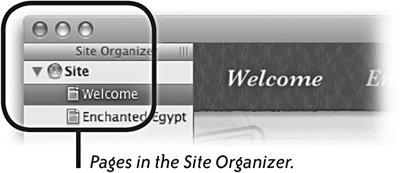 Publish a Movie to Iweb With a .Mac account, iMovie, and iWeb, you can easily publish a movie (or a few clips from a movie) while on the go. iWeb creates a web page and uploads the page and the movie (or selected clips) to your iDisk and publishes it on the Internet for others to see. All they have to do is visit your iWeb site. If folks enjoy seeing photos of your travels before you even get home, just wait until they see movies of you on the beach while you're still in Madagascar. | For detailed directions on how to use iMovie, please see Cool Mac Apps by John Tollett and Robin Williams. For quick help, check the iMovie Help menu. The Apple site has tutorials. |
To publish a movie: 1. | Import video from a digital video camera into iMovie.
If you haven't taken the time to edit your footage, just drag a few short clips from the Clips pane to the timeline. Publishing a few selected clips instead of a whole movie conserves space on your iDisk, and the short clips upload to your iDisk much faster.
To publish only certain clips of a movie, select the clips you want in the timeline: Shiftclick to select contiguous clips; Commandclick to select noncontiguous clips.
| 2. | From the Share menu in the menu bar, choose "Share...." Then:
Click the "iWeb" icon in the sheet's toolbar (circled below).
Check the button to "Share for web."
Check "Share selected clips only" (unless you want to share the entire movie).
Click the "Share" button.
Tip If you have a clip already, put it in your Movies folder in your Home folder. Then open the Media drawer in iWeb and drag the movie onto a Movie template page.  | | | 3. | iMovie compresses the moviethis may take a few minutes then launches iWeb.
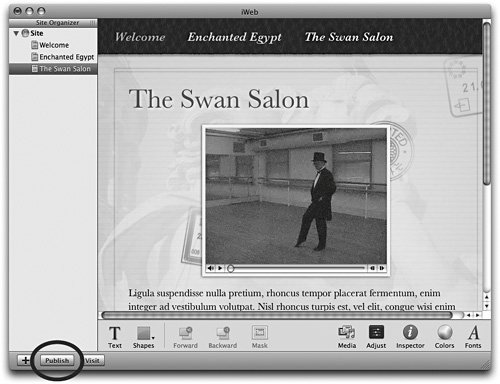
| 4. | In the iWeb window that opens, choose a template style from the left pane. A "Movie" page using the selected style is automatically selected. Click the "Choose" button (circled below).
Tip If you don't have a site already, make sure you add a "Welcome" template page! If you don't, you will have a very lengthy web address instead of the succinct one of web.mac.com/YourMemberName. 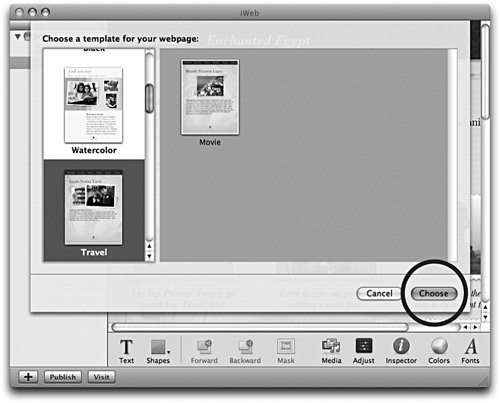 | 5. | The iWeb page opens with your movie placed on the page.
Notice that iWeb has created a new page in the Site Organizer (the left column), named for your movie.
On the page, double-click the placeholder body text and replace it with text of your own.
When you're satisfied, click the "Publish" button.
When your page is published, a notice appears with a web address that you can email to family, friends, and movie producers.
|
 |