The Settings Pane of the Customize Drawer
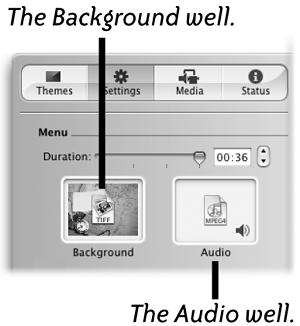
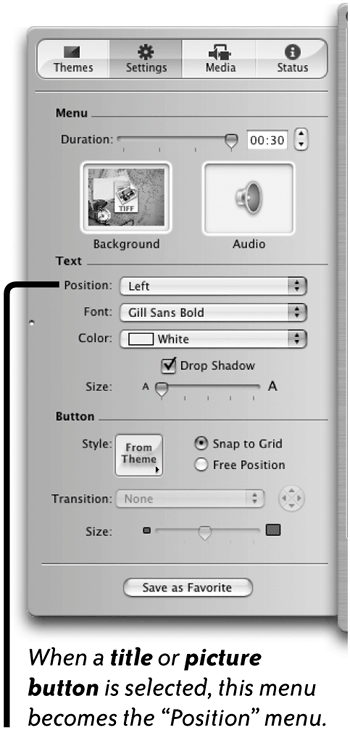
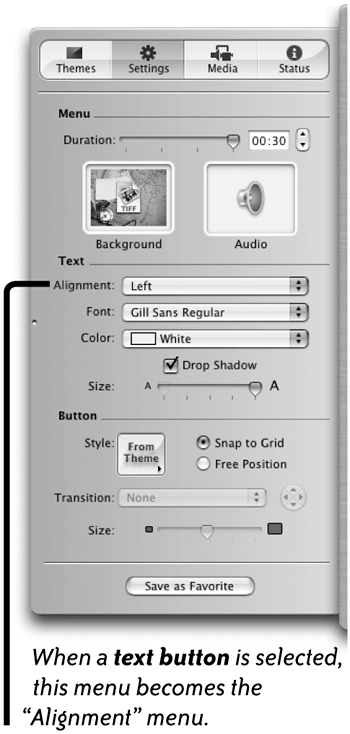
| You can adjust many settings of your iDVD menu. If the slide-out Customize drawer shown below isn't visible, click the "Customize" button to open it, then click the "Settings" button at the top of the drawer. 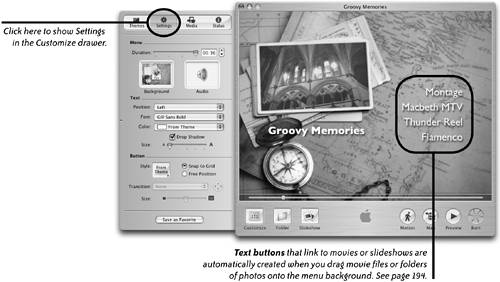 Duration settingThe "Duration" slider, shown below, sets how long a motion menu plays before it returns to the beginning and repeats, a process called looping. The maximum loop duration allowed is 15 minutes (if your media is that long). Most DVD designers create motion loops that are much shorter than that, usually a maximum of 30 seconds in duration. Longer loops are unnecessary because most people will make a selection and leave the current menu before a 30-second loop starts repeating. If you hope to get a lot of content into your DVD project, be aware that longer loops take up a lot of storage space on the final DVD. 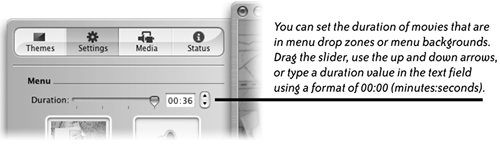 Background and audio settingsThere are a couple of ways to customize a menu background. You can drag a photo or a movie into the "Background" well (shown to the right), or you can drag a photo or movie into the background area of the existing menu. To mute a menu soundtrack, click the tiny speaker icon in the bottom-right corner of the Audio well.
When you drag a movie file or photo into the "Background" well, any drop zone that may have been included in the selected theme is removed. If you want to keep the drop zone as part of the menu design, Option-drag the movie you want to use as a menu background to the menu area, but not into the drop zone area. The drop zone remains and you can drag another movie into it. iDVD composites the two movies into one amazing menu. Some themes include a soundtrack. To change a menu's soundtrack, drag an audio file into the "Audio" well (shown above-right). In the example below we selected a wedding theme from "4.0 Themes" on the Themes pane. We Option-dragged a movie ("pool cleaner.mov") to the menu background to preserve the drop zone area. Then we dragged another movie ("bug.mov") to the drop zone (the area with a striped border). We changed the menu's default title ("Wedding Silver One") to "Costa Rica." Finally, we dragged three movies to the menu background to automatically create text buttons that link to the three movies ("Jungles," "Monkeys," and "Resorts"). The following page explains how to customize text buttons. 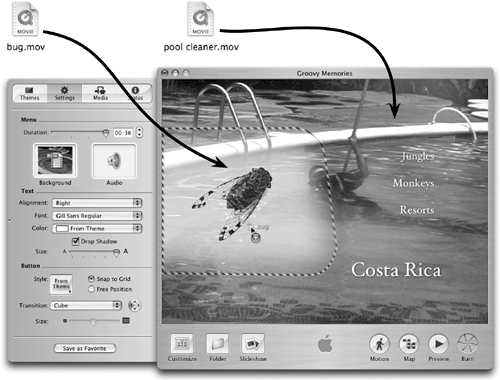 Title and Button settings
See page 194 for details about how to create buttons. Every theme includes placeholder text for a title. To customize the title text, double-click the existing placeholder text to select it, then type a new title. To remove the title, choose "No Title" from the "Position" pop-up menu. To change the title position, select the title, then choose an alignment option from the "Position" pop-up menu. To position a title anywhere, select the title, choose "Custom" from the "Position" pop-up menu, then drag the title anywhere in the menu. Edit text buttonsTo rename a button, single-click on the existing text, then type. To change the size of text buttons, select a button, then drag the "Size" slider. To change the alignment of text buttons, select a button. Click "Snap to Grid" in the "Button" section. Choose an option from the "Alignment" pop-up menu (Left, Center, or Right). To delete a text button, select the button, then go to the Edit menu and choose "Delete."
Edit picture buttonsTo change the position of picture buttons, click "Free Position" in the "Button" section, then drag the button to any position. To change the position of picture button captions in relation to a button's picture, select a button, then from the "Position" pop-up menu select one of the options. To remove picture button captions, choose "No Text" from the "Position" pop-up menu. To change the size of picture buttons, select a button, then drag the "Size" slider in the "Button" section. To apply a transition to a button, select the button in the menu, then choose a transition from the "Transition" pop-up menu. See the next page for more information about transitions. To delete a picture button, select the button, then go to the Edit menu and choose "Delete" or hit the Delete key. Text or picure buttons: To change a button font or color, select a button. Choose a typeface from the "Font" pop-up menu. Choose a font color from the "Color" pop-up menu. Transition settingsWhen you watch a DVD and click a menu button, the visual on the screen usually jumps abruptly to a movie, a slideshow, or to another menu. The "Transition" pop-up menu lets you select a transition effect to soften the jump or make it more visually interesting. Transitions can also add a touch of professional sophistication to your project.
You can apply a different transition to each button in a menu. 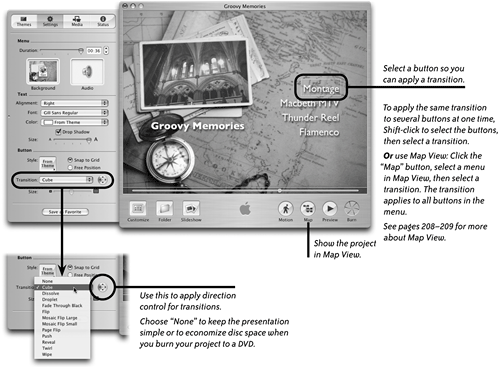 How to create buttonsTo create a button that links to a movie or slideshow, drag a movie file or a folder of photos from the Media pane of the Customize drawer (or from any Finder window) to the iDVD menu. When you drag movie files (or a folder of photos) to the menu, iDVD automatically creates text buttons that link to the corresponding file or folder. The button names are the same as the file or folder in which they were created. You can change button names after you've added them to the menu. 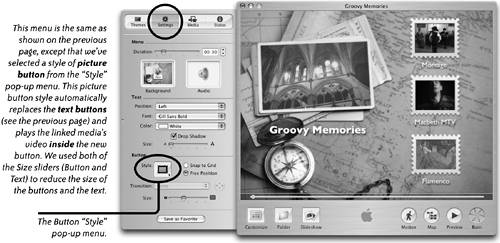 The options in the "Style pop-up button (shown above in the Customize drawer) let you customize existing buttons. Click on the pop-up menu to see a graphical menu of button choices.
Save a customized menu as a favoriteWhen you've created a custom menu that you want to use again for other menus or for other iDVD projects, click "Save as Favorite" at the bottom of the Settings pane (circled below). 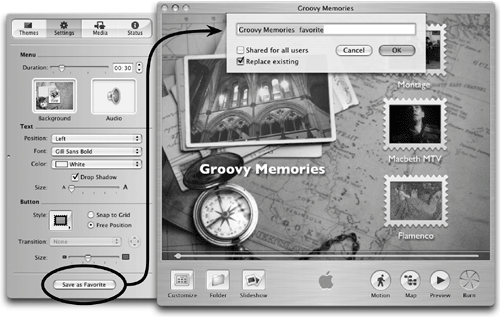 In the dialog sheet that drops down, name this menu design and select the options you want.
To use a favorite, click the "Themes" button at the top of the Customize drawer, then from the pop-up menu in the Themes pane choose "Favorites." Your customized menu design now appears as a thumbnail image in the list, shown below. Click on a favorite in the Favorites list to apply its settings to the current menu. You can also see favorites, identified by a "first place ribbon" icon, when you select "All" from the pop-up menu. 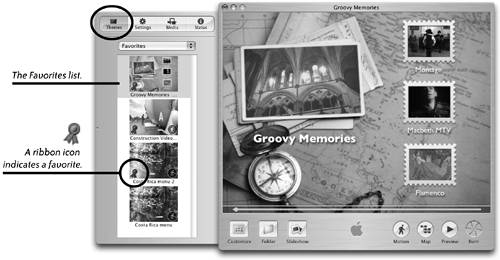 Delete a favoriteIf you decide to delete a favorite that you've created, you must go to the Favorites folder in which favorites are stored and manually throw it away.
Customize a motion buttonA motion button is a small window that contains either a movie or a slideshow, and it links to another movie, slideshow, or menu. You can set the duration of a motion button movie up to 15 minutes (if the movie or slideshow is that long), and you can also set the point at which the movie in the button starts playing.
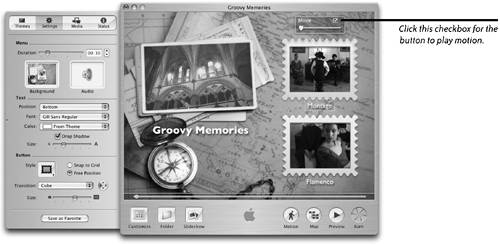 When you use the "Duration" slider in the Settings pane to set the duration of a button, it also affects the duration of the background movie and background audio. The maximum oop duration shown on the slider is determined by the longest media clip used in the current menu. |

EAN: N/A
Pages: 277