Edit Photos
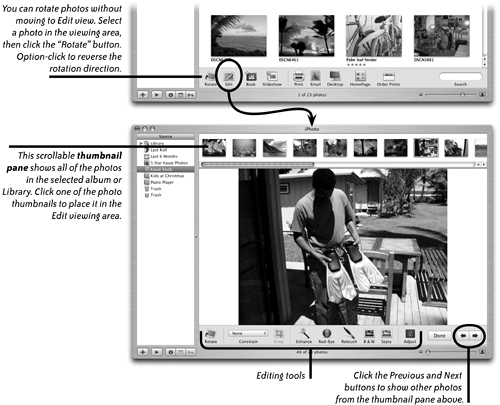
| Photos often need a little help to look their best. Your favorite shot may be a little too dark, too blue, or have a small blemish in the middle of the picture. Even photos that look great can sometimes be improved by cropping them to change the composition. iPhoto includes easy-to-use tools that enable the most common image editing procedures. To view a photo for editingSelect an album or a single photo, then click the "Edit" button beneath the viewing area. Three things happen:
 Create a duplicate photo before you do anything drasticWhen you drag a photo from the Library into an album, iPhoto doesn't make a separate copy of that photoit creates a "link" that points from the album to the original photo in the Library. This prevents your hard disk from getting stuffed full with multiple copies of the same photo. So when you edit a photo, you affect its appearance not only in the Library but in all other albums in which that photo appears. If you want to avoid changing the photo's appearance in every instance, create a duplicate of the photo and edit the duplicate.
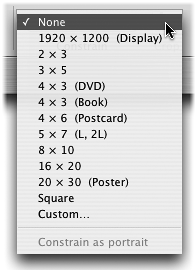
Duplicate photos take up as much room on your hard disk as the original. Use duplicates sparingly to economize your computer's storage space. 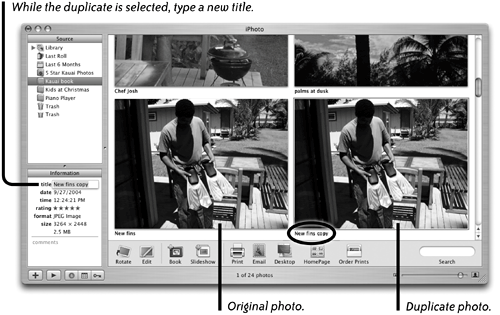 Crop an imageThe Crop tool lets you select the most important part of a picture and delete the rest of it. Thoughtful cropping makes your photos visually stronger and more interesting.
Drag the crosshair pointer diagonally to draw a cropping area within the selected photo. The "faded out" area is removed when you click the "Crop" button. 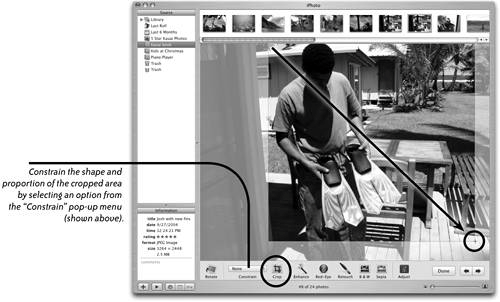 Improve photos with the Enhance toolSometimes you think photos look pretty good because you don't have a "corrected" version that you can compare them to. Colors may be dull and the contrast may be flat, but who notices? The "Enhance" tool analyzes an image and automatically adjusts the color and contrast. You might not always prefer the enhanced version, but it can often make dramatic improvements to photos. To use the Enhance tool
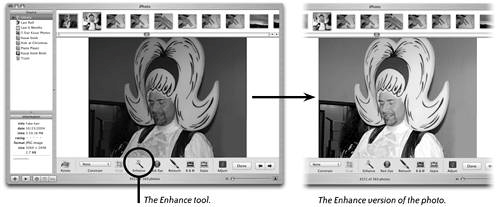 The Enhance tool is fast and easy, but it's also a hit-or-miss solutioniPhoto does its best to analyze a photo, then applies the changes. To have more control when you enhance a photo, use the Adjust tools (see pages 3435). Rotate an imageThe Rotate button.
You can rotate a photo from any view mode. Just select a photo and click the Rotate button (shown to the left) to rotate the image 90 degrees counterclockwise (if counterclockwise is what you chose in Preferences, pages 1415). Additional clicks will continue to rotate the image in 90-degree increments. Option-click the Rotate button to rotate the photo in the opposite direction indicated by the button's icon. Reduce red-eyeUse the Red-Eye tool to remove the red glare in a subject's eyes caused by a camera's flash. The results may vary with different photos.
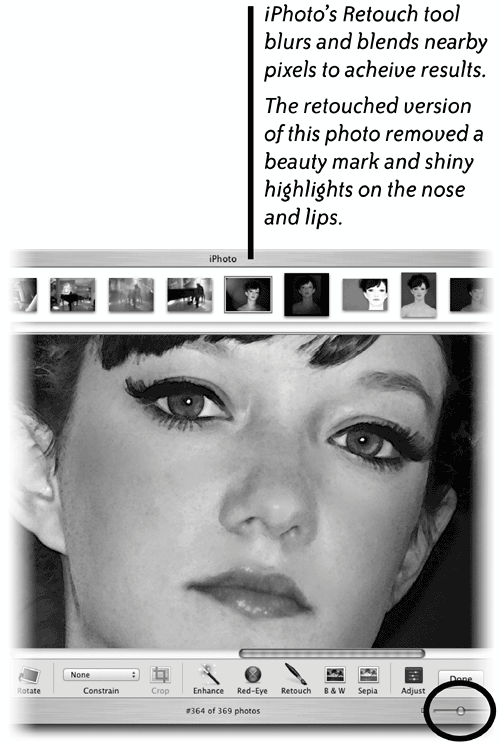
If you're not satisfied with the results, press Command Z (Undo), or from the Photos menu, choose "Revert to Original." You can also do this: Press-and-drag the cursor to select a rectangular area that encloses both eyes, or all the eyes of all the people in the photo. Then just click the "Red-Eye" button. 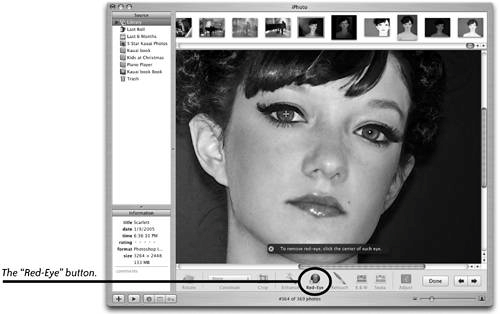 Touch up photos with the Retouch toolEven your best photos usually have some imperfections in them. If you scanned a photo, dust or scratches on the scanner glass may be visible, and digital images straight from a camera contain artifacts or digital "noise" that appears as oddly colored pixels in the image. There's also the possibility that the model or the background could have a blemish you want to remove. The Retouch tool does an excellent job of fixing minor problems. Acting like a combination blur and smudge brush, it blends the pixels under the crosshair into the surrounding area. Any retouching changes you make are applied to the original photo in the Library, even if you selected the photo from an album instead of from the Library. The retouched version will replace all occurrences of the photo in all albums in which it appears. If you want to prevent this, make a duplicate of the photo and make changes to the duplicate. To use the Retouch brush
The Retouch crosshair is positioned near the area to be retouched. 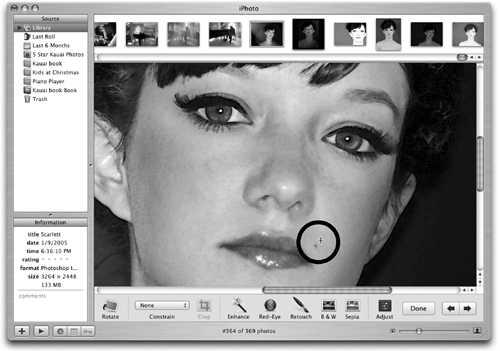 Size slider.
Convert a photo to black and white or sepiaTo convert a photo to black and white or sepia, select it, then click the "Edit" button. In the Edit toolbar, click the "B & W" or "Sepia" button. Remember, this will affect how this photo looks in every album it appears in. If you don't want to affect other occurrences, first make a duplicate of the photo, rename it, and convert the duplicate to black and white. Use the Adjust tools to edit imagesThe Adjust tools let you manually change settings to modify the appearance of photos. This gives you much more control over the results than if you use the automatic modifications of the Enhance tool.
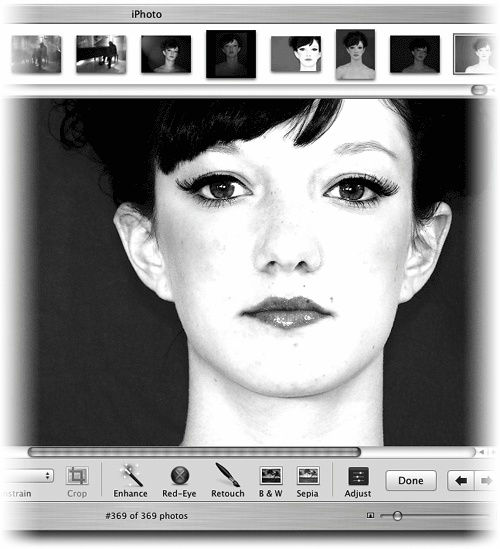
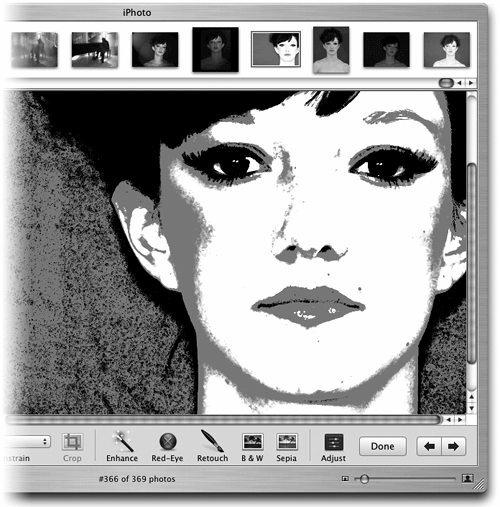
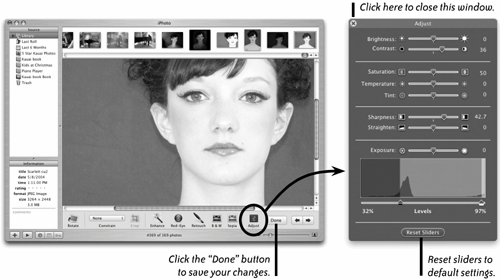 When you use the Adjust sliders to modify an image, it not only gives you more control, it allows you to experiment with effects that you wouldn't ordinarily think about. Compare the two examples below to the original image on the previous page. The version on the left shows bold changes to the Levels settings. The version on the right shows even more extreme levels settings, plus a very large amount of sharpening (moving the "Sharpness" slider to the right). It's fun to experiment with the Adjust sliders.
Straighten crooked photosThe "Straighten" adjustment slider lets you correct photos that need to be straightened (or tilt a photo for special effect).
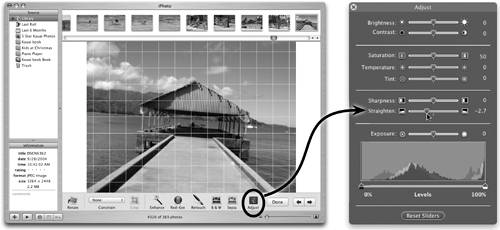 Edit a photo in a separate windowYou can choose to edit a photo in its own, separate edit window rather than in the iPhoto window. This enables you keep more than one photo open and editable at one time. If you're comparing photos or editing for color harmony between photos, working with several open windows can be helpful. To open a photo in a separate window, hold down the Option key and double-click a photo. Or Control-click on a photo, then choose "Edit in separate window" from the pop-up contextual menu. After you've made image adjustments, click the red Close button to close this window and save your changes. To revert to the original, unedited photo, Control-click on the photo and choose "Revert to Original." You can also revert to the original later from the main iPhoto window. Use the "Size" pop-up menu to choose what size the photo is shown in this window. When you choose "Fit to window" the photo automatically resizes when you change the size of the window. 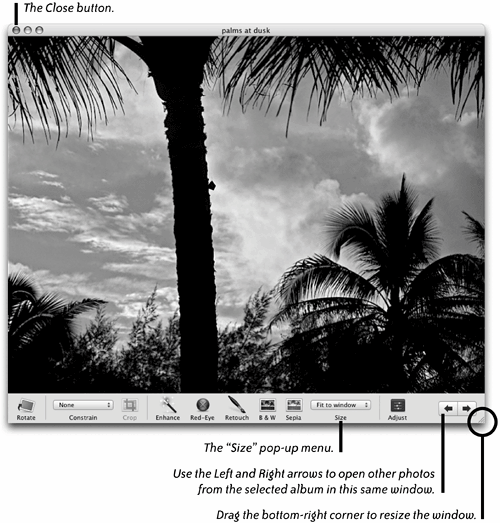
|
EAN: N/A
Pages: 277
