Defining Users
To perform authentication, you will need to define users. Defining users enables you to make use of any of the authentication schemes described above, as well as to decide upon several other useful properties for each user .
In FW-1, users are defined based on templates. Templates enable you to reduce the amount of custom configuration you need to do for every user, by predefining as much of the configuration as possible. The following sections describe the details of how to most effectively manage your user base. All user configuration is done from the Policy Editor, under Manage Users and Administrators , or via the object tree, by clicking on the Users tab.
Creating a Default User
All of abovementioned FW-1 authentication schemes can be categorized as either internal and external. Internal schemes, including FW-1 password and OS Password, have all of their users defined within the FW-1 user database. External schemes, including SecurID, RADIUS, and TACACS, inherently have their own user management systems. It would therefore create an unnecessary amount of overhead if you were required to add all users using external authentication schemes to FW-1 s user database, too.
To avoid this, FW-1 enables you to define a default user that will be used for external authentication schemes. As long as you have a default user defined for a particular external scheme, you do not need to define all users within the FW-1 user database.
To create a default user, open the Policy Editor, and select Manage Users and Adminitrators New External User Profile Match all users (see below for more information on templates). In the General tab, you will notice that there is a predefined User Profile called generic* . This will enable you to make use of external authentication schemes without duplicating your work in defining users. This functionality replaces the definition of a user named generic* and the limitations of having only one external user profile. If you require the use of multiple external user profiles, you can use the Match by domain option to add a prefix or suffix to the login name to correlate a user to a specific external user profile.
Creating and Using Templates
All users in FW-1 are defined via templates. Templates are also a convenient way to eliminate having to define the same user properties repeatedly; you define the user properties once, and create subsequent users with the same settings by simply choosing that template.
It is important to note that templates do not restrict you from changing individual users settings. Even though you may define two users based on the same template, you are free to change any of the properties of one user without affecting the other user or the template itself.
To create a new template, open the SmartDashboard, and select Manage Users and Administrators New Template (see Figure 6.4).

Figure 6.4: User Template General Properties
Enter a descriptive name for this template, such as Accounting Department template. Next, let s look at the Personal Tab, shown in Figure 6.5.
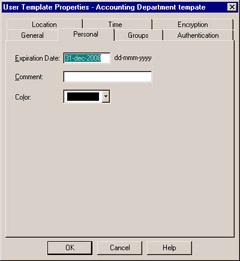
Figure 6.5: User Personal Properties
Here, you can define an Expiration Date for users defined with this template. When a user s account expires , FW-1 will no longer allow him or her to authenticate. This is useful in scenarios such as when you know a user will only require access for a limited amount of time, and you don t want to worry about remembering to disable their account. The Comment field enables you to enter any additional information regarding this user that might be useful to you, and Color enables you to define a unique color for the icon that will represent this user.
The Location tab, shown in Figure 6.6, enables you to restrict both the sources and destinations that are acceptable for this user. Defining a source means that the user will only be permitted to authenticate if their connection originates from the network object(s) you define. Defining a destination means the user will only be permitted to access the object(s) you specify. Note that you can also control the objects a user is permitted to access via the standard rule base.
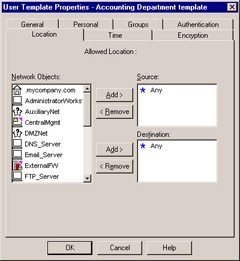
Figure 6.6: User Location Tab
If you would like the user to have access to all objects, be sure to specify Any for both Source and Destination . Otherwise, by default, the user will not have access to anything if these are left blank.
In addition to location-based restrictions, you also have the option of defining time-based restrictions via the Time tab, shown in Figure 6.7.
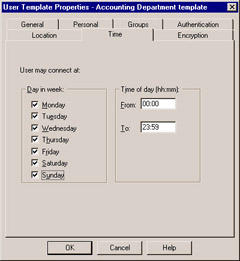
Figure 6.7: User Time Tab
Here, you can define both the days of the week as well as the times of the day that the user is permitted to authenticate. This can be useful to provide increased security, since you can ensure that a user s account is only available when you know they will be attempting to authenticate.
The Encryption tab, shown in Figure 6.8, enables you to choose to enable the available client encryption scheme, IKE. The option for FWZ was removed, as IKE is a much more proven, accepted, and widely used scheme, and is also a published public standard. For the IKE encryption scheme, you can define various properties of that scheme by choosing Edit. By default in NG AI, the advanced properties are part of the Global Properties in the Remote Access section.
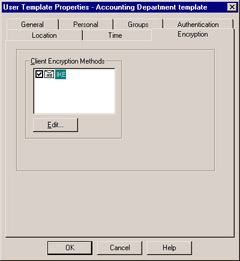
Figure 6.8: User Encryption Tab
Now that you have defined a template, you can easily create new users. Back on the main Users screen, simply choose New and then the name of your template, in this case Accounting Department template . You will see a User Properties screen that is identical to what you configured for the template. Feel free to change any settings that are unique to this user, or if this user follows the template exactly, then all you have to do is enter the login name and a password, and you re done.
Creating Groups of Users
Grouping users is an effective way of aligning users into categories when adding them to rules. Users are not added to rules individually, but as part of a group, which can consist of one or more users. To create a group of users, open the Policy Editor and select Manage Users and Administrators . Select New User Group (see Figure 6.9).
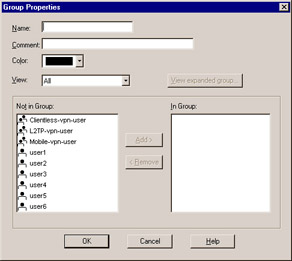
Figure 6.9: Group Properties
Here, you see a list of all your current users. Select each user that you want to add to the group, then click Add . You will see that user move from the left side ” Not in Group ”to the right side ” In Group .
In addition to adding users to a group, you can also add other groups to a group. When you do this, you will be asked by FW-1 whether or not you want to add each member of the group individually. Adding each user individually means that if you make a change to the group you are adding, that change will not be reflected in the group being added to. If you do not add users individually, then changes to the group you are adding will be reflected in the group being added to.