Passport Authentication
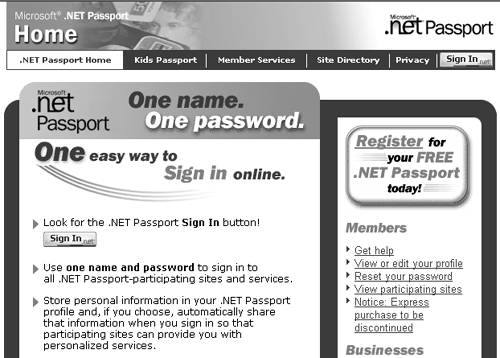
| Passport authentication is a centralized, single sign-on authentication service provided by Microsoft. At present a large number of Internet users use Microsoft services such as MSN or Hotmail. They submit their profiles during the registration process in those Microsoft services. The real benefit is that you can utilize the user profile data in your Web sites if you implement passport authentication in your site. That is, information about the user is accessible to your application through a profile that is stored with Microsoft. Many companies, such as McAfee.com and eBay, employ Passport authentication in their Web sites. The benefit of Passport authentication is that the user doesn't have to remember separate usernames and passwords for various Web sites, and the user can keep his or her profile information in a single location. .NET Passport [11] provides users with single sign-in (SSI) and stores the authentication information using encryption technologies such as Secure Sockets Layer (SSL) and the 3DES algorithm for data protection. Figure 9-4 shows the Microsoft .NET Passport home page.
Figure 9-4. Microsoft .NET Passport home page. Passport is a Forms-based authentication service. In this mechanism, when a user requests (using an HTTP GET request) a protected resource, the ASP.NET verifies whether the user has a valid Passport ticket (form). If not, the user is redirected to the Passport Logon Service, where the user has to submit the credentials (email address and a password), as shown in Figure 9-5. If the credentials entered are correct, Passport Logon Service redirects the user back to the protected resource. Otherwise , the user must register his or her profile and is then redirected to the protected resource. Figure 9-5. .NET Passport Sign In, where the user has to submit email address and password for credential verification. The PassportAuthenticationModule provides a wrapper around the Passport software development kit (SDK) for ASP.NET applications. It provides Passport authentication service and profile information from an IIdentity -derived class called PassportIdentity . You have to register your site with the Passport service, accept the license agreement, and install the passport SDK to employ passport authentication. The general procedure to implement Passport authentication in an ASP.NET application is as follows :
After installing the .NET Passport SDK and configuring the Web.config file, you will be able to access the PassportIdentity class, which is accessed by means of the IIdentity interface that it implements. The following code shows how to get an instance of a PassportIdentity object. using System.Web.Security; ... public class WebForm1 : System.Web.UI.Page { public PassportIdentity pass; private void Page_Load(object sender, System.EventArgs e) { pass = (PassportIdentity)User.Identity; } } With the instance of the PassportIdentity object, you can access the .NET Passport-specific functionality provided by the PassportIdentity class. Let us discuss how to display sign-in and sign-out buttons . Generally, you can see the .NET Passport Sign In or .NET Passport Sign Out buttons in the upper-right corner of the page, and the buttons look like those shown in Figure 9-6 Figure 9-6. Microsoft .NET Passport Sign In and Sign Out buttons. The LogoTag2 method of the PassportIdentity object returns an HTML fragment that includes an <img> tag for a Microsoft .NET Passport link. The link displays either Sign In if no valid Ticket cookie is detected or Sign Out if a valid Ticket cookie is detected. The following code illustrates how to use the LogoTag2 method in an ASP.NET page. [View full width]
The syntax for the PassportIdentity.LogoTag2 method is as follows: [View full width]
The three security-level options for the .NET Passport sign-in are shown in Table 9-11. As an alternative to the single sign-in mechanism, you can employ an Inline sign-in mechanism, which allows you to embed the sign-in dialog box directly into a page on your site instead of redirecting the user to a .NET Passport-hosted sign-in page. This Inline sign-in mechanism provides more flexibility. The compact and standard inline sign-in modules are shown in Figure 9-7. You can also employ a mobile sign-in [14] mechanism in mobile devices.
Figure 9-7. Compact and standard inline sign-in modules. Table 9-11. Three Security-Level Options for the .NET Passport Sign-In
The considerable benefit of employing Passport authentication is that, as already mentioned, you can access the Passport user's profile data, such as FirstName and Country , if the user permits his or her profile data to be used, while registering to .NET Passport. But the Passport User ID (PUID) for a .NET Passport-authenticated user is always accessible by means of the Name or HexPUID properties of the PassportIdentity class. You can use the PUID as the index for storing user-specific information at your site. Some other useful attribute names that you can access from the profile data are FirstName, LastName, Nickname, Gender, Birthdate, PreferredEmail, TimeZone, Occupation , and Country . The following code illustrates how to access the user profile data. private void Page_Load(object sender, System.EventArgs e) { if (pi.IsAuthenticated) { string name = pi["FirstName"]; if (name == "") { Label1.Text = "Warm Welcome!"; } else { Label1.Text = "Welcome" +name+ "!"; } } else { Label1.Text = "Welcome! Please Sign In!"; } } We first verify whether the user has signed in to .NET Passport by using the IsAuthenticated method, which returns true if the user is authenticated against a Passport authority. As .NET Passport employs cookies to handle state, you have to create a separate page that takes care of deleting the HTTP cookies that carry the ticket information. Your sign-out page must return an image that can be used to show a successful sign-out to the user. The following code removes the .NET Passport cookies and returns the apposite GIF image to specify a successful sign-out. <%@ Page language="c#" %> <% Response.ContentType = "image/gif"; Response.Expires = -1; Response.AddHeader("P3P", "CP=TST"); HttpCookie Cookie1 = new HttpCookie("MSPProf",""); Cookie1.Expires = Now(); Response.Cookies.Add(Cookie1); HttpCookie Cookie2 = new HttpCookie("MSPAuth",""); Cookie2.Expires = Now(); Response.Cookies.Add(Cookie2); HttpCookie Cookie3 = new HttpCookie("MSPSecAuth",""); Cookie3.Expires = Now(); Response.Cookies.Add(Cookie3); HttpCookie Cookie4 = new HttpCookie("MSPProfC",""); Cookie4.Expires = Now(); Response.Cookies.Add(Cookie4); HttpCookie Cookie5 = new HttpCookie("MSPConsent",""); Cookie5.Expires = Now(); Response.Cookies.Add(Cookie5); Response.WriteFile( "/images/signout_Clear.gif"); %> We clear the five cookies MSPProf, MSPAuth, MSPSecAuth, MSPProfC , and MSPConsent . You have to incorporate a P3P tag (Platform for Privacy Preferences Project) to clear the cookies in the 6.x generation of Web browsers. The public instance properties defined in the PassportIdentity class are shown in Table 9-12. Table 9-12. Public Instance Properties Defined in the PassportIdentity Class
|
EAN: 2147483647
Pages: 126