Creating an Executable Program - Practice
|
Creating an Executable Program—Practice
-
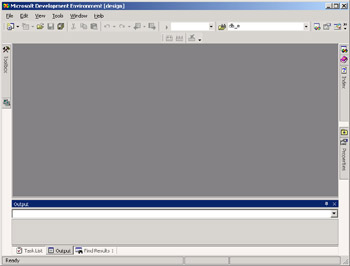
Start up Microsoft Visual Studio .NET. An invitingly blank window should be displayed.
-
This window is the powerful Visual Studio .NET integrated development environment (IDE). It contains all the tools you’ll need to create full-featured, easy-to-use applications.
Creating a Project
The first task is to create a new project for the Hello, World program. To create a project, follow these steps:
-
Under the File menu, point to New, and then click Project. (Alternatively, you can press Ctrl+Shift+N.)
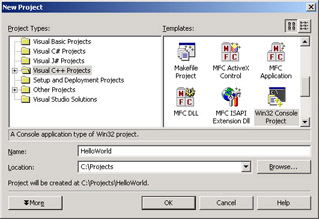
The New Project dialog box will be displayed.
-
Select Visual C++ Projects in the Project Types pane, select Win32 Console Project in the Templates pane, and then type HelloWorld in the Name text box.
-
Choose a location for your new project in the Location combo box, either by typing a directory path in the Location combo box or by clicking Browse and navigating to the appropriate directory.
-
Click OK to start the Win32 Application Wizard.
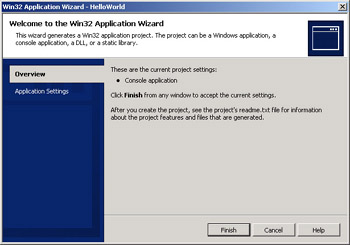
This project will possess a simple, text-based interface (similar to an MS-DOS screen from years ago) that will be adequate for our purposes. Before proceeding, though, you need to change one setting.
-
Click the Application Settings text on the left side of the dialog box. The right side of the dialog box changes to show the current wizard settings.
-
Select Empty Project under Additional Options.
-
Click Finish to create the project.
The wizard correctly initializes all the compiler settings for a console project.
Adding a C++ Source File to the Project
An empty project is not particularly exciting on its own, so let’s add a new C++ source file. As always in Visual Studio .NET, you have many ways to do the same thing.
-
Either right-click the Hello World icon in Solution Explorer, point to Add, and then click Add New Item, or click the Add New Item button on the toolbar.

Either action will open the Add New Item dialog box.

-
Select C++ File (.cpp) from the Templates pane on the right, type HelloWorld.cpp in the Name text box, and then click Open.
Visual Studio .NET creates an empty source code file and adds it to the project for you.
Now it’s time to put the mouse down, pick up the keyboard, and start typing some C++ code.
Adding C++ Code to the Source File
Type in the source code for the program, as shown here.
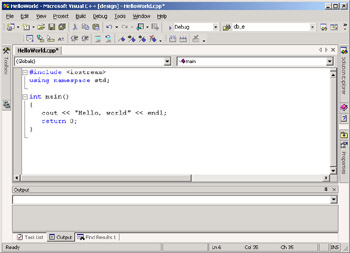
Notice that the keywords automatically turn blue (provided that you spell them correctly).
Building the Executable
The next step is to build the executable. The term build in Visual Studio .NET refers to compiling and linking the program. Visual Studio .NET compiles any source files that have changed since the last build and—if no compile errors were generated—performs a link.
To build the executable, select Build Solution from the Build menu or press Ctrl+Shift+B. An Output window displaying the build progress will appear near the bottom of the Visual Studio .NET window. If no errors are encountered, the message Build: 1 succeeded, 0 failed, 0 skipped should appear in the Output window.
If any problems occur, the Output window will contain a list of errors and warnings, as shown here.
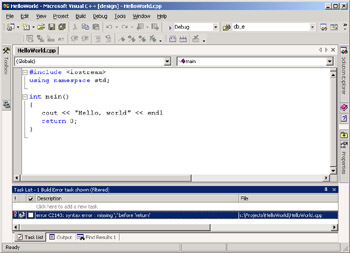
If the error or warning is generated by the compiler and not the linker, double-click the error line in the Output window to place the cursor at the line in the source file where the compiler encountered the error. Fix the error (you might have misspelled a keyword or forgotten a semicolon), and rebuild the project.
Always treat warnings as errors—in other words, get rid of them. Warnings are there for a reason—they mean your code is not correct.
Executing the Program
Once you’ve eliminated all errors and you’ve successfully built the project, you can finally execute the program. Choose Start Without Debugging from the Debug menu to run the program. You can also press CTRL+F5 to execute the program.
You’ll see the output of your program, with a line at the bottom of the output telling you to “Press any key to continue”. This line is added by the IDE so that the console window doesn’t simply disappear when the program has finished running.
|
EAN: N/A
Pages: 208