Active Directory Diagnostic Tool (NTDSutil.exe) (Sys)
|
|
This utility is automatically installed into every domain controller (in the %System-Roor%\system32 folder). One could hardly say that this tool is for everyday use, but every administrator must be familiar with its features since it is used in certain operations that are very important for Active Directory functioning, such as Active Directory restore, offline defragmentation, FSMO role manipulating, and so on. However, NTDSutil has become one of the major tools for deploying and maintaining application directory partitions introduced in Windows .NET.
Some commands on the NTDSutil's main menu can only be performed when the system is booted in the Directory Services Restore Mode (press <F8> at system startup). (If, nevertheless, you wish to enable them, set the environmental variable SAFEBOOT_OPTION=DSREPAIR, and restart the utility. This is, however, not advisable, because conflicts with the running processes will not permit you to execute most of the available operations.) The following commands are prohibited when the Active Directory services are online:
-
Authoritative restore
-
Files
-
Semantic database analysis
Windows .NET version of NTDSutil has two new commands:
-
Configurable Settings
-
Set DSRM Password
The IP Deny List command, available in Windows 2000 version, might not be included in Windows .NET.
Commands used in NTDSutil are quite long, but the utility accepts truncated syntax (or you can easily copy-and-paste commands from the built-in help messages). For example, the command
connect to server xxx could be shortened to co t s xxx
NTDSutil can be called from command files. An example of the invocation method is the DumpFSMOs.cmd file described in the Chapter 8, "Common Administrative Tasks".
Let's discuss the purpose and use of all NTDSutil's commands in the order in which the corresponding menus appear in the built-in Help.
| Note | For presentation purposes, the command's prompts in the given dialogs are shown in bold. In the Windows 2000 environment, the utility connects to DCs faster if you use the DNS rather than NetBIOS names of domain controllers. |
Authoritative Restore
This menu contains commands that allow an administrator to perform an authoritative restore of the entire Active Directory database, a selected subtree, or an object. The commands' syntax is very simple, and it is much more difficult to understand how to use these simple commands. Since using commands from the Authoritative Restore menu as well as selecting the proper values for the verinc parameter is closely related to the entire process of backing up and restoring Active Directory, all of these commands are described in detail in Chapter 8, "Common Administrative Tasks."
Here, we will only look at the command that lists all cross-reference objects associated with domain partitions instantiated on the local domain controller. You cannot restore a partition if the corresponding cross-references is absent or has not been created. The following example shows two application partitions and three basic partitions:
ntdsutil: Authoritative restore authoritative restore: List NC CRs Opening DIT database... Done. Listing locally instantiated writeable partitions and associated cross-refs: 1) Partition: DC=DomainDnsZones,DC=net,DC=dom cross-ref: CN=352cf7f5-327d-4316-9cb7-31c922273752, CN=Partitions,CN=Configuration,DC=net,DC=dom 2) Partition: DC=ForestDnsZones,DC=net,DC=dom cross-ref: CN=3d9c5cba-34b5-4692-b43a-fa7a17161785, CN=Partitions,CN=Configuration,DC=net,DC=dom 3) Partition: CN=Configuration,DC=net,DC=dom cross-ref: CN=Enterprise Configuration, CN=Partitions,CN=Configuration,DC=net,DC=dom 4) Partition: CN=Schema,CN=Configuration,DC=net,DC=dom cross-ref: CN=Enterprise Schema, CN=Partitions,CN=Configuration,DC=net,DC=dom 5) Partition: DC=net, DC=dom cross-ref: CN=NET,CN=Partitions,CN=Configuration,DC=net,DC=dom Done. authoritative restore: ...
Configurable Settings
NTDSutil allows you to tune some parameters Active Directory functioning is affected by. In the current version, this concerns only two settings that control TTL (Time-To-Live) values for dynamic objects (see details in Chapter 2, "Active Directory Terminology and Concepts" and Appendix B).
The following dialog illustrates how to view the current values of these parameters (first, you must be connected to a DC) and increase the value of DynamicObject-MinTTL:
configurable setting: Show Values Setting Current (New) Seconds DynamicObjectDefaultTTL 86400 [=1 day] DynamicObjectMinTTL 900 [=15 minutes] configurable setting: Set DynamicObjectMinTTL to 1800 configurable setting: Commit Changes configurable setting: ...
Domain Management
The Windows .NET version of NTDSutil contains a lot of new commands in the Domain Management menu, since NTDSutil is the main tool for manipulating application directory partitions (see Chapter 2, "Active Directory Terminology and Concepts").
Essentially, the process of deploying application partitions is not too complicated: you can create and remove partitions, and add and remove the replicas of these partitions. To verify all similar operations, use the DCdiag tool and repadmin /showconn command.
| Important | See also the description of the Dnscmd.exe utility in Chapter 4, "Windows .NET DNS Server," since only this utility can perform some important operations with application directory partitions. |
List Directory Partitions and Application Partition Replicas
First, you may wish to view all directory partitions stored on the selected DC. As you can see from the following sample output, the partitions list contains two built-in application partitions (DC=ForestDnsZones, DC=net, DC=dom and DC=DomainDnsZones, DC=net, DC=dom) created by default on the first DC in the forest if the DNS server is running on the same DC. These partitions are not specifically marked in the list.
domain management: List Note: Directory partition names with International/Unicode characters will only display correctly if appropriate fonts and language support are loaded Found 6 Naming Context (s) 0 - CN=Configuration, DC=net, DC=dom 1 - DC=net, DC=dom 2 - CN=Schema, CN=Configuration, DC=net, DC=dom 3 - DC=ForestDnsZones, DC=net, DC=dom 4 - DC=DomainDnsZones, DC=net, DC=dom 5 - DC=subdom, DC=net, DC=dom domain management: ...
The following command lists all replicas for the specified partition (the command is applicable to application partitions only):
domain management: List NC Replicas DC=ForestDnsZones, DC=net, DC=dom
Creating and Deleting Naming Contexts (Partitions)
The following command creates a new application partition (app-part.net.dom) on the currently connected DC (NULL is specified instead of the domain controller's DNS name):
domain management: Create NC DC=App-Part, DC=net, DC=dom NULL adding object DC=App-Part, DC=net, DC=dom domain management: List ...
When you create a new partition, the appropriate DNS entries are automatically registered on the preferred DNS server. The distinguished name (DN) of the new partition is added to the namingContexts attribute of the RootDSE object on each DC that stores a replica of that partition. So you can test creation or deleting naming contexts with Ldp.exe tool.
To delete an application partition, use the following command:
domain management: Delete NC DC=App-Part, DC=net, DC=dom The operation was successful. The partition has been marked for removal from the enterprise. It will be removed over time in the background. Note: Please do not create another partition with the same name until the servers which hold this partition have had an opportunity to remove it. This will occur when knowledge of the deletion of this partition has replicated throughout the forest, and the servers which held the partition have removed all the objects within that partition. Complete removal of the partition can be verified by consulting the Directory event log on each server. domain management: ...
Adding and Removing Partition Replicas
To provide fault tolerance or increase the performance of an application partition, you should create a copy of that partition on several domain controllers, i.e., add them as partition replicas. The following command designates the NETDC2 domain controller as a replica of the app-part.net.dom application partition:
domain management: Add NC Replica DC=App-Part, DC=net, DC=dom netdc2.subdom.net.dom domain management: List NC Replicas DC=App-Part, DC=net, DC=dom The application directory partition DC=App-Part, DC=net, DC=dom's Replicas are: CN=NTDS Settings, CN=NETDC2, CN=Servers, CN=NET-Site, CN=Sites, CN=Configuration, DC=net, DC=dom CN=NTDS Settings, CN=NETDC1, CN=Servers, CN=NET-Site, CN=Sites, CN=Configuration, DC=net, DC=dom The *'ed items are currently uninstantiated replicas. domain management:...
If the replica has been successfully created, the new context is added to the replication connection with the specified DC. You can verify this with the repadmin/showconn command or the Active Directory Sites and Services snap-in. The appropriate KCC and NTDS Replication messages should appear in the Directory Service log:
Event Type: Information Event Source: NTDS KCC Event Category: Knowledge Consistency Checker Event ID: 1903 ... User: NT AUTHORITY\ANONYMOUS LOGON Computer: NETDC1 Description: A replication link for the writable partition DC=App-Part, DC=net, DC=dom from server CN=NTDS Settings, CN=NETDC2, CN=Servers, CN=NET-Site, CN=Sites, CN=Configuration, DC=net, DC=dom has been added.
To remove a partition replica, use a command similar to the following one:
domain management: Remove NC Replica DC=ForestDnsZones, DC=net, DC=dom netdc3.net.dom
Verify the operation result with the List command and Event Viewer snap-in (Event Source: NTDS KCC; Event ID: 1482):
... The following directory partition is no longer available on the domain controller at the following network address. Directory partition: DC=App-Part, DC=net, DC=dom Domain controller: CN=NTDS Settings, CN=NETDC2, CN=Servers, CN=NET-Site, CN=Sites, CN=Configuration, DC=net, DC=dom ...
Creating Cross-Reference Objects
Creating a new domain or application directory partition (both represented by a cross-reference object in the Configuration partition of the forest) requires more administrative power than does promoting a server to domain controller or instantiating a partition on a domain controller. You may wish to divvy up the tasks of preparing a cross-reference and completing partition creation among employees with different administrative rights and not grant them full administrative power. The NTDSutil command allows you to preliminarily create a cross-reference object (in the existing forest), which could then be used by subordinate administrators.
The following dialog shows how to create a new domain (intra.subdom.net.dom) in an existing forest (net.dom):
C:\>ntdsutil ntdsutil: Domain management domain management: Connections server connections: Connect to server netdc1 Binding to netdc1 ... Connected to netdc1 using credentials of locally logged on user. server connections: Quit domain management: Precreate DC=intra, DC=subdom, DC=net, DC=dom netdc4.intra.subdom.net.dom adding object CN=intra, cn=Partitions, CN=Configuration, DC=net, DC=dom domain management: List Note: Directory partition names with International/Unicode characters will only display correctly if appropriate fonts and language support are loaded Found 7 Naming Context(s) 0 - CN=Configuration, DC=net, DC=dom ... 6 - DC=intra, DC=subdom, DC=net, DC=dom domain management: ...
As you can see from the dialog, a new domain context appears after the command has been executed. Also, note that the NETDC4 domain controller specified in the command does not yet exist in the forest and must be promoted in future.
Files: Managing Active Directory Database Files
The commands in the Files menu allow you to perform the following operations:
-
Retrieve information on the state of the Active Directory (Jet) database (the ntds.dit file) as well as the log files
-
Move database and/or log files to another location
-
Re-define paths for Active Directory files
-
Check up the Active Directory integrity
-
Perform database recovery
| Attention | You can move an already installed Active Directory database and/or log files to another location (folder or disk), but it is not possible to change the SYSVOL's location without re-installing Active Directory on a domain controller. |
Retrieving Information on Active Directory Files
The following command informs you about the size and location of all Active Directory database files. It is advisable that you use the command (and thus verify the presence of the log files) after you have restored Active Directory or done maintenance operations (offline defragmentation, moving files, etc.).
file maintenance: info Drive Information: C:\ FAT (Fixed Drive) free(551.4 Mb) total(995.9 Mb) ... E:\ NTFS (Fixed Drive) free(1.5 Gb) total(9.7 Gb) DS Path Information: Database : D:\WINDOWS\NTDS\ntds.dit - 12.1 Mb Backup dir : D:\WINDOWS\NTDS\dsadata.bak Working dir: D:\WINDOWS\NTDS Log dir : D:\WINDOWS\NTDS - 40.0 Mb total res2.log - 10.0 Mb res1.log - 10.0 Mb edb00001.log - 10.0 Mb edb.log - 10.0 Mb file maintenance: ...
Compressing the Database — Offline Defragmentation
Online defragmentation of the Active Directory database performed automatically at predefined intervals (by default, every 12 hours; see Appendix B) does not reduce the physical size of the database file (ntds.dit). To compact this file, you need to perform offline defragmentation (in the Directory Services Restore Mode). Offline defragmentation may be required when you delete a particularly large number of objects from a DC. For example, this is the case when a GC server loses this function and becomes a regular DC. The disk space saved in such a case may appear to be rather significant.
In general, the procedure of offline defragmentation is as follows:
-
Boot the DC in restore mode.
-
Start the defragmentation process — the new, compact version of the Active Directory database file will be stored in any alternative (specified) location.
-
If defragmentation is successful, copy the compacted file to its original location and delete old log files in that location.
This entire procedure is shown below. In this scenario, the database file is packed to a temporary C:\AD\CompactDB folder, and all log files are stored in the default location — D:\WINDOWS\NTDS.
file maintenance: Compact to C:\AD\CompactDB Opening database [Current]. Creating dir: C:\AD Creating dir: C:\AD\CompactDB Executing Command: D:\WINDOWS\system32\esentutl.exe /d"D:\WINDOWS\NTDS\ntds.dit" /t"C:\AD\CompactDB\ntds.dit" /p /o Initiating DEFRAGMENTATION mode... Database: D:\WINDOWS\NTDS\ntds.dit Temp. Database: C:\AD\CompactDB\ntds.dit Defragmentation Status (% complete) 0 10 20 30 40 50 60 70 80 90 100 |----|----|----|----|----|----|----|----|----|----| ................................................... Note: It is recommended that you immediately perform a full backup of this database. If you restore a backup made before the defragmentation, the database will be rolled back to the state it was in at the time of that backup. Operation completed successfully in 6.69 seconds. Spawned Process Exit code 0x0(0) If compaction was successful you need to: copy "C:\AD\CompactDB\ntds.dit" "D:\WINDOWS\NTDS\ntds.dit" and delete the old log files: del D:\WINDOWS\NTDS\*.log file maintenance: ...
Moving the Active Directory Database
You may wish to move Active Directory database files to another location due to disk space limitations or disk volume reconfiguration. The procedure for moving the database file requires the following steps:
-
Backup Active Directory.
-
Restart the DC and press <F8> at startup.
-
Select Directory Services Restore Mode and boot the DC.
-
Start NTDSutil from the command prompt and select the Files command. You may run Info to determine the current locations of the Active Directory database files.
-
Enter move DB to [drive]:\[new folder]. Run Info to verify the new configuration.
-
Quit NTDSutil and restart the DC in normal mode.
The procedure for moving log files is similar to the one described above.
Active Directory Folder Security
Security of the folder where the Active Directory database files are stored (by default — %System Root%\NTDS) is very important for proper Active Directory functioning. The Set default folder security command resets mistakenly changed permissions on that folder to default values.
Database Integrity
The Files menu also contains two commands — Recover and Integrity — that can be used to detect corruption of the Active Directory database (with respect to the ESENT database semantics) and to perform some operations for its recovery. The Windows 2000 version of NTDSutil also contains the Repair command in the Files menu. (All of these commands may require a lot of time to run; this primarily depends on the actual size of the database.) The Repair command should not be run without first consulting with service personnel, since it can result in data losses. The Recover command should be run first, prior to the Integrity command. This command scans the log files and ensures that all transactions are committed. The Integrity command can then check the database file for low-level corruption. The command's output will be similar to the following:
file maintenance: Integrity Opening database [Current]. Executing Command: D:\WINDOWS\system32\esentutl.exe /g"D:\WINDOWS\NTDS\ntds.dit" /o Initiating INTEGRITY mode... Database: D:\WINDOWS\NTDS\ntds.dit Temp. Database: TEMPINTEG1696.EDB Checking database integrity. Scanning Status (% complete) 0 10 20 30 40 50 60 70 80 90 100 |----|----|----|----|----|----|----|----|----|----| ................................................... Integrity check successful. Operation completed successfully in 4.156 seconds. Spawned Process Exit code 0x0(0) If integrity was successful, it is recommended you run semantic database analysis to ensure semantic database consistency as well. file maintenance:...
IP Deny List
The IP Deny List command is available in the Windows 2000 version of NTDSutil, but may not be in the Windows .NET version. If it is not, you can manually configure the list of IP addresses using the ADSI Edit snap-in (see Appendix B).
To increase the security of a DC, an administrator can use the IP Deny List command that is applied only to the Default-Query Policy object (see also the next section). This list contains IP addresses, from which a domain controller will not accept LDAP queries. A list entry can represent a single host or a subnet. For example, the command
Add 192.168.1.1 NODE
prevents a DC from accepting queries from the host with the address 192.168.1.1. The following command denies access from all hosts in a subnet with the address 192.168.1.0:
Add 192.168.1.0 255.255.255.0
LDAP Policies
Using the following example, let us discuss how NTDSutil allows an administrator to work with the Default-Query Policy object (see Chapter 1, "Active Directory Concepts and Terminology"). A dialog is shown that changes the Initial Receive Timeout from the default value of 120 to 30 (the changed value is put in bold italics).
ntdsutil: Ldap policies ldap policy: Connections server connections: Connect to server netdc1.net.dom Binding to netdc1.net.dom... Connected to netdc1.net.dom using credentials of locally logged on user. server connections: Quit ldap policy: List Supported Policies: MaxPoolThreads MaxDatagramRecv MaxReceiveBuffer InitRecvTimeout MaxConnections MaxConnIdleTime MaxPageSize MaxQueryDuration MaxTempTableSize MaxResultSetSize MaxNotificationPerConn ldap policy: Set InitRecvTimeout to 30 ldap policy: Show values Policy Current(New) MaxPoolThreads 4 MaxDatagramRecv 1024 MaxReceiveBuffer 10485760 InitRecvTimeout 120(30) MaxConnections 5000 MaxConnIdleTime 900 MaxPageSize 1000 MaxQueryDuration 120 MaxTempTableSize 10000 MaxResultSetSize 262144 MaxNotificationPerConn 5 ldap policy: Commit changes ldap policy: Quit
The Windows 2000 Server Resource Kit contains the ModifyLDAP.vbs script (which is included in the Remote Administration Scripts). This script allows an administrator to display policy settings, create new policies, and modify existing ones, as well as assign policies to a DC or site. Here is the screen output for the LDAP Administrative limits of the Default Query Policy, which is installed and used (even if not selected) by default on all DCs:
C:\modifyldap /P /O: "Default Query Policy" LDAP Settings for Default Query Policy InitRecvTimeout=30 MaxReceiveBuffer=10485760 MaxDatagramRecv=1024 MaxPoolThreads=4 MaxResultSetSize=262144 MaxTempTableSize=10000 MaxQueryDuration=120 MaxPageSize=1000 MaxNotificationPerConn=5 MaxConnIdleTime=900 MaxConnections=5000
| Note | To select an existing LDAP policy, use the Active Directory Sites and Services snap-in. Point to the NTDS Settings object of the necessary DC and open the Properties window. Select a policy in the Query Policy list and click Apply. |
Metadata Cleanup: Removing Defunct Domains or Domain Controllers
Normally, the process of demoting a DC involves deleting the computer account and cleaning up all metadata related to that DC from Active Directory. When the last DC in a domain is deleted, all cross-references (and other information about that domain) are also removed. There are, however, situations when a domain controller is decommissioned incorrectly (or failed and destroyed), and orphaned metadata remains in the directory. In such a case, you can remove information about the retired DC and/or domains by using NTDSutil. (You must not delete any information for existing domains and DCs!) In general, the procedure requires the following steps:
-
Connect to a working DC that holds the information about orphaned metadata.
-
Select an operation target (site, naming context, domain, and server). You may select one or more of these targets.
-
Remove the necessary metadata.
The following dialog illustrates how you can remove a retired domain controller (NETDC2) and a child domain (subdom.net.dom) from the forest (net.dom). (In this example, the shortened command syntax is used; comments are in bold square brackets. You can also learn how to select an operation target, which is used in many commands.)
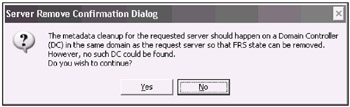
C:\>ntdsutil ntdsutil: m c metadata cleanup: c [First, we must be connected to a DC:] server connections: co t s netdc1 Binding to netdc1 ... Connected to netdc1 using credentials of locally logged on user. server connections: q metadata cleanup: s o t [Second, we must select an object to delete:] select operation target: l si Found 1 site (s) 0 - CN=NET-Site, CN=Sites, CN=Configuration, DC=net, DC=dom select operation target: s si 0 Site - CN=NET-Site, CN=Sites, CN=Configuration, DC=net, DC=dom No current domain No current server No current Naming Context select operation target: l d Found 3 domain (s) 0 - DC=net, DC=dom 1 - DC=subdom, DC=net, DC=dom 2 - DC=dotnet, DC=dom select operation target: s d l Site - CN=NET-Site, CN=Sites, CN=Configuration, DC=net, DC=dom Domain - DC=subdom, DC=net, DC=dom No current server No current Naming Context select operation target: l se f d i s Found 1 server (s) 0 - CN=NETDC2, CN=Servers, CN=NET-Site, CN=Sites, CN=Configuration, DC=net, DC=dom select operation target: s se 0 Site - CN=NET-Site, CN=Sites, CN=Configuration, DC=net, DC=dom Domain - DC=subdom, DC=net, DC=dom Server - CN=NETDC2, CN=Servers, CN=NET-Site, CN=Sites, CN=Configuration, DC=net, DC=dom DSA object - CN=NTDS Settings, CN=NETDC2, CN=Servers, CN=NET-Site, CN=Sites, CN=Configuration, DC=net, DC=dom DNS host name - netdc2.subdom.net.dom Computer object - CN=NETDC2, OU=Domain Controllers, DC=subdom, DC=net, DC=dom No current Naming Context [Now, we have selected the NETDC2 server from the subdm.net.dom domain for subsequent operations:] select operation target: q metadata cleanup: r s s [The following Server Remove Confirmation Dialog may appear - you must click Yes.]
[The Server Remove Confirmation Dialog will appear - you must click Yes.]
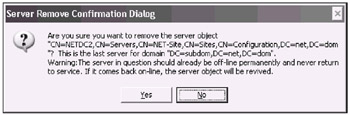
"CN=NETDC2, CN=Servers, CN=NET-Site, CN=Sites, CN=Configuration, DC=net, DC=dom" removed from server "netdc1" [Now, we will delete the entire child domain:] metadata cleanup: r s d [The Domain Remove Confirmation Dialog will appear - you must click Yes.]
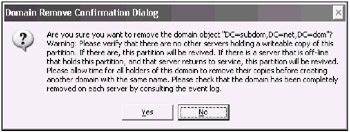
"DC=subdom, DC=net, DC=dom" removed from server "netdc1" [Verifying that the operation has been done correctly:] metadata cleanup: s o t select operation target: l d Found 1 domain (s) 0 - DC=net, DC=dom [Terminating NTDSutil] select operation target: q metadata cleanup: q ntdsutil: q Disconnecting from netdc1 ...
Now the subdom.net.dom domain has been deleted, and you can verify this by using the Event Viewer snap-in. There are many information messages (from NTDS KCC and NTDS Replication sources: ID 1123, 1104, 1270, 1658, 1746, etc.) that appear in the Directory Service log (the source is NTDS KCC) and accompany removing domain controllers, naming contexts, and replication connections. There is no need to explain them specifically.
To verify that the operation was carried off successfully, you may also check the domain configuration by using the following tools: Active Directory Domains and Trusts, ADSI Edit (the Configuration container: the Partitions and Sites | Servers nodes), and Active Directory Sites and Services snap-ins. You may also run DCdiag.exe (as well as repadmin /showreps) to ensure that there are no replication problems.
| Attention | When deleting child domains, you must also manually delete the corresponding entries from the DNS server. |
Roles: Managing FSMO Roles
NTDSutil allows an administrator to manipulate FSMO roles: to view and transfer them. See Chapter 7, "Common Administrative Tasks," to learn how to dump names of all FSMO role owners. In this section, we'll discuss how to designate a DC as a role owner by using NTDSutil. You can choose either of the following options:
-
Seize role — this command designates the connected server as the specified role master. The command must be used only when the DC — the current master — has severely crashed and cannot be repaired.
-
Transfer role — this command "moves" the specified role from the current role holder to the connected server (DC). You can perform the same operation by using various administrative snap-ins (see Chapter 7). The NTDSutil.exe also allows you to carry out the operation in batch mode (see DumpFSMOs.cmd).
Transferring a Role
If for some reason you cannot (or do not want to) use the standard administrative snap-ins, you may use NTDSutil to transfer a role from its current owner to another DC. The most common steps are the following:
-
Connect to the potential role owner.
-
Transfer a necessary role from the current owner to the selected server.
| Note | It is not advisable to seize a FSMO role if you can transfer this role. Seizing is used only when a FSMO role owner has failed and is unrecoverable. |
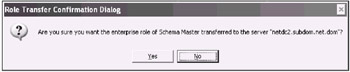
In the following dialog, the Schema Master role is transferred to the netdc2. subdom.net.dom server. (This is only an example! It is neither practical nor advisable to move the schema master role to a child domain.)
C:\>ntdsutil ntdsutil: Roles fsmo maintenance: Connections server connections: connect to server netdc2.subdom.net.dom Binding to netdc2.subdom.net.dom ... Connected to netdc2.subdom.net.dom using credentials of locally logged on user server connections: Quit fsmo maintenance: Transfer schema master [The Role Transfer Confirmation Dialog will appear - click Yes.]
Server "netdc2.subdom.net.dom" knows about 5 roles Schema - CN=NTDS Settings,CN=NETDC2,CN=Servers,CN=NET- Site,CN=Sites,CN=Configuration,DC=net,DC=dom Domain - CN=NTDS Settings,CN=NETDC1,CN=Servers,CN=NET- Site,CN=Sites,CN=Configuration,DC=net,DC=dom PDC - CN=NTDS Settings,CN=NETDC2,CN=Servers,CN=Remote- Site,CN=Sites,CN=Configuration,DC=net,DC=dom RID - CN=NTDS Settings,CN=NETDC2,CN=Servers,CN=Remote- Site,CN=Sites,CN=Configuration,DC=net,DC=dom Infrastructure - CN=NTDS Settings,CN=NETDC2,CN=Servers,CN=Remote- Site,CN=Sites,CN=Configuration,DC=net,DC=dom fsmo maintenance: ...
| Note | Notice that the same Configuration partition contains information about servers that may belong to different domains and sites. |
Even if the connected DC already possesses the specified role, the command dialog remains the same as shown above. You can verify the requested operation with the Directory Service log. A message similar to the following one should appear (Event Source: NTDS Replication; Event ID: 1458):
The operations master role represented by the following object has been transferred to the following domain controller at the request of a user. ...
Seizing a Role
Suppose a DC that holds the Infrastructure FSMO role was destroyed, and you want this role to be designated to another DC. The following dialog shows how to forcibly transfer the role to a new candidate (server netdc1.net.dom) (comments are in bold square brackets):
C:\>ntdsutil ntdsutil: Roles fsmo maintenance: Connections server connections: Connect to server netdc1.net.dom Binding to netdc1.net.dom ... Connected to netdc1.dom using credentials of locally logged on user server connections: Quit fsmo maintenance: Seize infrastructure master The Role Seizure Confirmation Dialog will appear — click Yes.]

[First, the server tries to carry out the standard role transfer operation and fails. The same error message will appear every time you want to perform a role transfer operation while the current master is not operational.] Attempting safe transfer of infrastructure FSMO before seizure. ldap_modify_sW error 0x34 (52 (Unavailable). Ldap extended error message is 000020AF: SvcErr: DSID-03210260, problem 5002 (UNAVAILABLE), data 1753 Win32 error returned is 0x20af(The requested FSMO operation failed. The current FSMO holder could not be contacted.) ) Depending on the error code this may indicate a connection, ldap, or role transfer error. Transfer of infrastructure FSMO failed, proceeding with seizure ... Server "netdc1.net.dom" knows about 5 roles ... Infrastructure - CN=NTDS Settings,CN=NETDC1,CN=Servers, CN=Site,CN=Sites,CN=Configuration,DC=net,DC=dom fsmo maintenance: ...
When a FSMO role is seized, the following message will appear in the Directory Service log (Event Source: NTDS Replication; Event ID: 1837):
... An attempt to transfer the operations master role represented by the following object failed. ...
Security Account Management
Since duplicated SIDs appear, though rarely (due to problems with the RID Master role owners), you may wish to verify a domain for conflicting SIDs. The commands in the Security Account Management menu will help you to solve this problem.
Semantic Database Analysis
The commands in this menu test the directory database with respect to Active Directory (not ESENT database!) semantics. The report generated (a file named dsdit.dmp.nnn) displays the number of active objects, including phantom and deleted records. The log file is placed in the current folder.
Notwithstanding the fact that Microsoft does not recommend that end users run semantic analysis commands themselves, it may be useful to check the database's integrity in some situations, and fix possible errors. (Be careful with the Go Fixup command — your data face a risk here!) For example, the following two consecutive commands have detected and fixed an error with deleted reference objects:
ntdsutil: Semantic database analysis semantic checker: Go Fixup mode is turned off Opening database [Current] ..... Done. Getting record count...3112 records Getting security descriptor count...105 security descriptors Writing summary into log file dsdit.dmp.0 SDs scanned: 105 Records scanned: 3112 Processing records.. Error: Missing subrefs detected. [Errors are detected!] Done. semantic checker: Verbose on Verbose mode enabled. semantic checker: Go Fixup Fixup mode is turned on Opening DIT database...Done. Done. Opening database [Current].....Done. Getting record count...3112 records Getting security descriptor count...105 security descriptors Writing summary into log file dsdit.dmp.1 SDs scanned: 105 Records scanned: 3112 Processing records.. Error: Missing subrefs detected. Error: Inconsistent refcounts detected. Done. semantic checker: Go Fixup mode is turned off ... Processing records..Done. [No errors now.] semantic checker: ...
|
|
EAN: 2147483647
Pages: 154