| In this task you will be displaying images of grocery products. To do this, you must use the Image control to load images dynamically. The Image control has the capability to load JPG, SVG, GIF, SWF, and PNG files at run time. You also have the ability to use an alpha channel with GIF and PNG files that enable you to create transparencies in images. If you are developing an offline application that does not have access to the Internet, you can use the @Embed directive to include the Image control in the completed SWF file. 1. | Open the EComm.mxml file you worked with in the last lesson. If you didn't complete the previous lesson, you can open EComm.mxml from Lesson04/start and save it in your flexGrocer directory.
| | | 2. | Switch Flex Builder to Design mode by clicking the Design icon.
| 3. | Be sure that the Components view is open. If not, choose Window > Show View > Components.
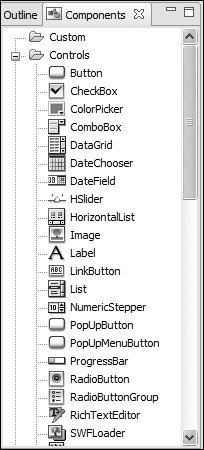
| 4. | Select the Image control and drag and drop the control between the Milk and 1.99 Label controls you already added.
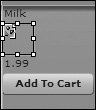
When you drag the Image control from the Components view to the container, Flex Builder automatically adds the MXML to place the Image control on the screen and position it where you indicated when you dropped it.
| | | 5. | Be sure that the Flex Properties view is open. If not, choose Window > Flex Properties.
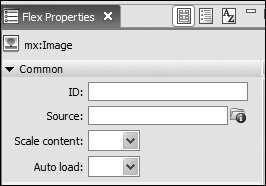
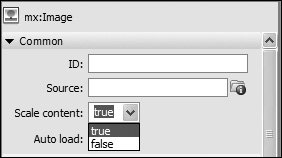
The Flex Properties view shows important attributes of the selected componentin this case, the Image control. You can see the Source property, which specifies the path to the Image file. The ID of the Image control is used to reference the instance created from the <mx:Image> tag or Image class in ActionScript.
| 6. | Click the Source folder icon and browse to the assets directory. Select the dairy_milk.jpg image and click Open. You will see the image appear in Design mode.
The image you selected in Design mode will display. The source property will also be added to the MXML tag.
| 7. | Click the Scale content drop-down list and change the value to TRue.
In an ideal world, all the images that you use in the application would be a perfect size, but this is not always the case. Flex has the capability to set the width and height of images and can scale the image to fit the size of the Image control.
| | | 8. | Switch back to Source mode and notice that Flex Builder has added an <mx:Image> tag as well as the attributes you specified in the Flex Properties window.
As you can see, it is easy to switch between Source mode and Design mode, and each one has its own advantages.
 | 9. | In the <mx:Image> tag that you added, add an @Embed directive to the Image control:
<mx:Image source="@Embed('assets/dairy_milk.jpg')" scaleContent="true"/>
The @Embed directive causes the compiler to bake the JPG into the SWF file at compile time. This technique has a couple of advantages over the default of loading the image at run time. First, the image is "preloaded" at the start of the application; so, when the image is actually displayed, the user will have no wait time. Also, it can be useful if you are building offline applications that do not have access to the Internet because the appropriate images will be included in the SWF file and will correctly display. Remember, though, that it will greatly increase the size of your SWF file.
| 10. | Save and compile the application then click Run.
You should see that the Image and Label controls and button fit neatly into the layout container.
|
|