| Up to this point, you have been working with Flex Builder in a stand-alone fashion. Flex Builder has acted as the development environment and compiler, which created stand-alone SWF files that you could deploy to your web server. To take advantage of the features of FDS, you need to create a separate project in Flex Builder. The new project will be associated with FDS, so that it can be automatically deployed to the server when it is compiled. Because the tasks in this lesson use both FDS and ColdFusion, the first thing you will do is start both of them in consoles. | | 1. | Start FDS by opening a console window (DOS prompt), moving to the driveroot:/fds2/jrun4/bin directory and entering jrun start default. Be sure that FDS starts with no errors being shown. To stop the service, press Ctrl+C or close the console window. To restart the service, if you are still in the console, just press the up arrow; you will be returned again to the prompt.
You need to leave the console window open when you are using FDS because it runs only while the console window is open.
| 2. | Start the configured ColdFusion by opening another console window (DOS prompt), moving to the driveroot:/cfusionFlexTFS/bin directory and entering jrun start cfusion. Be sure that ColdFusion starts with no errors being shown. To stop the service, press Ctrl+C or close the console window. To restart the service, if you are still in the console, just press the up arrow; you will be returned again to the prompt.
You need to leave the console window open when you are using ColdFusion.
| 3. | Find your FDS flex directory (driveroot:/fds2/jrun4/servers/default/flex on Windows) and create a new subdirectory called flexGrocer.
Having the files in a subdirectory with the FDS server enables the application to run through FDS.
| 4. | Copy the files from the flexGrocer directory you have been using up to now into the new flexGrocer directory in your FDS server.
Alternatively, you can copy the files from the Lesson20/start directory into the FDS flexGrocer directory.
| | | 5. | In FlexBuilder, create a new Flex Project by using FDS, compiled locally in Flex Builder.
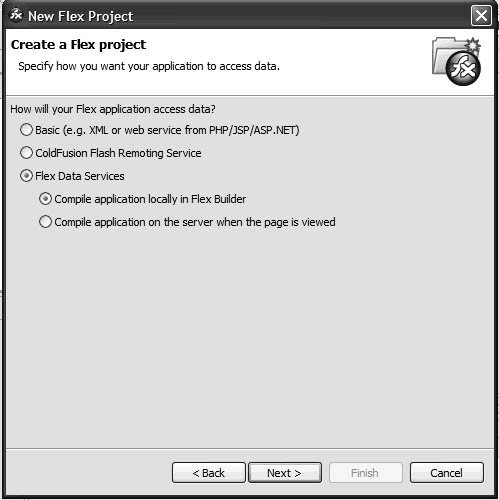
You could also choose to compile the application on the server as the page is viewed, but it is more efficient to place precompiled applications onto the server rather than have the user wait for the application to be compiled when it is first requested.
| 6. | Click Next. Ensure that the Use default location for local Flex Data Services server check box is checked.

If you installed the Flex Server to a different location, you can specify that location and URL here instead of accepting the default.
| | | 7. | Click Next. Give the project a unique name (such as FlexGrocer-FDS) and then specify the directory you created in step 3 for the Project Contents.
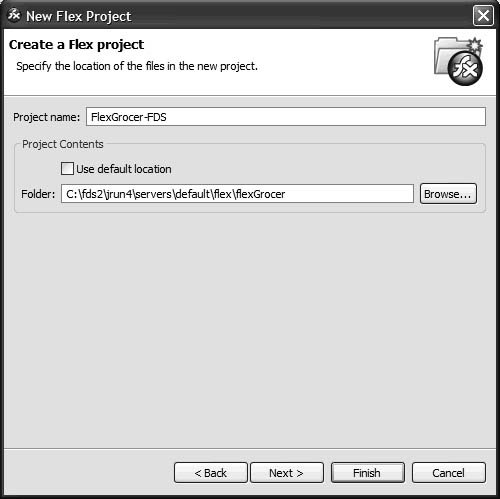
The process to create this Flex project is almost identical to the one you followed in Lesson 2, "Getting Started." In both situations you are telling Flex Builder where to find the files for your project. The only difference is that this time the files are located within a subdirectory of your FDS server.
| 8. | Click Next. Specify EComm.mxml as your Main application file and bin as your Output folder. Then click Finish.
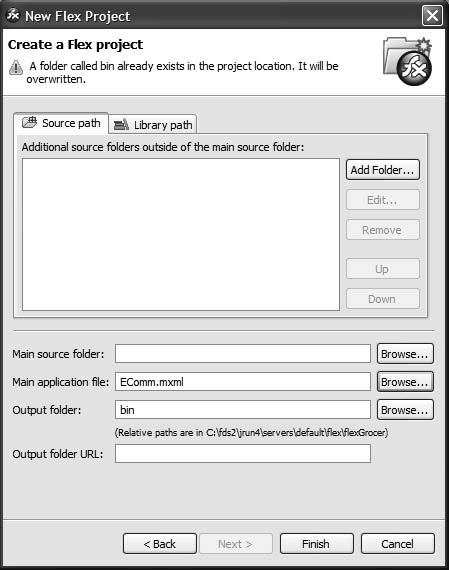
You should now be set to run the application through FDS. However, you still need to adjust the code in one file to allow the checkout process to work. This will be explained in the next few steps.
|
|