Understanding Page and Output Settings
After you have assigned a PostScript printer driver, it is time to set up the page and print setup dialog boxes in preparation for creating your PostScript file. Depending upon your operating system version, application and version, and the printer driver you have selected, the distribution and organization of the page and print setup fields will vary. However, the key settings to which you need to pay attention are common to all applications, even if they are organized differently. Here I will go through and discuss the most common settings using QuarkXPress on the Macintosh, where most of the important print settings are accessible through one window, the Print dialog. You should be able to easily adapt this discussion to your specific OS, applications, and printer drivers. These output settings will typically be found under the File menu, in either the Page Setup or Print choices.
Later in this chapter, the section Choosing Job-Specific PostScript Settings contains tables that suggest how to select these various settings for various types of output.
Document Settings
In a window or tab of layout options like the one in Figure 3.6, you will typically determine which document pages you would like to print and how those pages will be organized. Here are some descriptions of the various layout settings:
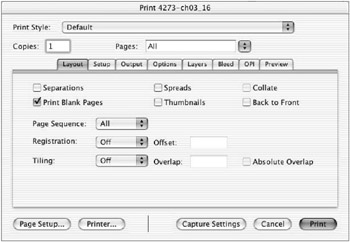
Figure 3.6: Quark s Layout tab
Separations You must define whether you want your color to print all together (unchecked) or as separate pages (checked). You should select the Separations check box when creating color-separated proofs and for final output for commercial color printing. Registration marks (see the third setting following) are often used whenever the Separations box is checked. The default is off/unchecked.
Print Blank Pages If you do not want blank pages in your document to output, leave this box unchecked. For instance, if you intend to output a facing page document, which may have some blank pages, into a single-page PDF file, the blank pages would be unnecessary. The default is usually on/checked.
Page Sequence In this drop-down list you can define whether the Even, Odd, or All pages will print. If you are hand-collating the pages, you may want to just print out either Odd or Even pages. The default is off/unchecked.

Registration Documents to be output with registration marks will have their colors separated and therefore will need to be aligned with the registration marks during the printing process. You would normally turn on this option for high-quality color-separated proofs and certainly for final output for commercial printing. Registration marks are often used when separations are printed. The default is off/unchecked.
Tiling Select Tiling whenever you want to print a document that is larger than the sheet size of your printing device and you do not want to scale down the document to fit on one page. You typically have the choice of selecting Automatic, which will allow you to define the amount of overlap, or Manual, if you intend to tile (and set the overlap) manually. The default is off/unchecked.
Spreads If you wanted to print facing pages side-by-side on the same piece of paper, such as two 8.5 ³ —11 ³ pages on a single 11 ³ —17 ³ sheet, select this check box. You should be careful not to check this box when sending in files for commercial printing, because each document page should be a separate element for imposition (print orientation) purposes. The default is off/unchecked.
Thumbnails Check this box to print small thumbnail views of document pages on single sheets. This option is useful for viewing the layout of a long document on just a few sheets of paper. The default is off/unchecked.
Collate Choose Collate when printing multiple copies of the same multipage document and you would like those pages to be printed sequentially rather than printing all copies of page 1, then all copies of page 2, etc. Collating during printing can prevent your having to collate all the pages after printing, but collation will significantly increase printing time and should be attempted only with fast printing devices. The default is off/unchecked.
Back To Front Some printers print the pages right side up. When this happens, the first page of the document ends up on the bottom of the final printed stack. In this case, it may be best to print them Back To Front so that they occur in the right order in the print tray, thereby preventing the need for manually resorting the pages. The default is off/unchecked.
Setup Settings
In a window or tab of setup options, like the one in Figure 3.7, you will typically define document print geometry such as height, width, any scaling that might occur, and placement on the output page. This window also contains a menu where you will select a Printer Description file, which may be located in a different place in your setup windows . Here are some tips on how you might use the settings in this window:
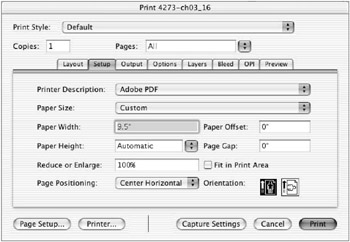
Figure 3.7: Quark s Setup tab
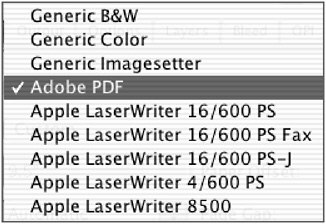
Printer Description Assigning the proper PostScript Printer Description files, commonly known as PPDs, is an important, if unexciting, part of the output process. The PPD contains specific information, such as page geometry and margins, about the output device you will be using. When you have printed directly to a specific device, not going through Distiller and PDF, you historically have chosen the PPD that matches the specific printer. But in PDF workflow it is normally best to choose the Distiller or Adobe PDF PPD. The Distiller and Acrobat PPDs are more generic PPDs that provide for flexible formatting and use of the document on output. Some custom PDF workflows may prefer that you use a more device- or process-specific PPD. If you will output your PDF to a commercial printing company or other professional output service bureau , it won t hurt to ask them if they have a specific PPD that they prefer you to use.
Orientation For setting the page orientation you will typically click an icon that indicates either Portrait/Tall or Landscape/Long. I have gotten into the habit of assigning my page orientation immediately after selecting my Distiller/Acrobat PPD. I do this because it is critical to have the orientation of my document ”Portrait or Landscape ” match my final output. And if I don t check for the match right away, I find that I forget to do it, with unpleasant results (only part of my document page may image).
| Note | In some PDF workflows in commercial printing, you may receive a request to always output your pages as Portrait pages, but this will be the exception rather than the rule. |
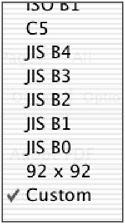
Paper Size In this menu you can select a specific page size such as Letter. If you input a custom value such as 9.5 ³ in the width (which you would do if wanted to output an 8.5 ³ —11 ³ document at 100 percent while still keeping registration and/or crop marks or create a custom page size with a border for display on the Web), Custom will automatically appear here. You may also want to create a custom page size for placing your PDF on the Web. Most of these page geometry settings are related to and often affect one another. ( Please see the sidebar on paper size, width, and positioning.)
Paper Width and Paper Height Here again, as with the Paper Size setting, you will likely have either a standard size (for normal viewing or printing) or a custom size (such as printing with registration marks or adding a border to your document).
| Note | One of the nifty characteristics of outputting a document to a PDF file is that you have the ability to change the final page size without affecting the size of the original document. This capability is very handy when you want to add extra page elements such as crop, trim, or fold and/or registration marks and borders, while keeping the original document size at 100 percent. |
| |
The paper size, width, and height and page positioning are all tied together and are affected by the settings you assigned in the Document tab, as well as the intended use of the PDF. For example, if you have activated the Registration check box, then you will need to assign a larger page size (typically at least an inch) than if you left it unchecked. In addition, page positioning typically differs for desktop and web use (Left Edge) than for commercial print use (Center). And while it is common to scale a document or use Fit To Print on the desktop and in a web environment, this is considered heretical in commercial printing.
To clearly illustrate the difference between a standard print setup and a commercial print setup, I will show two side-by-side setups, one for desktop and web use and one for commercial printing. This will allow you to clearly see the differences between the two. I will include varying setups in the Document tab as well as the current Setup tab and show how both of these settings will affect what you see in the View tab.
| |
Reduce or Enlarge Here you control any scaling that might occur during output. An 85% reduction is commonly assigned to show registration marks and bleeds when printing an 8.5 ³ —11 ³ document on a standard letter- sized laser printer. You would set this field at 100% for commercial proofing and printing (along with increasing the PDF document size to accommodate any crop, trim, fold, or separation marks.) Or this field may contain a reduction percentage to reduce the size of the page for use on the Web. You can choose Fit In Print Area to automatically size the page to fit a specific imaging area on a specific output size of paper.
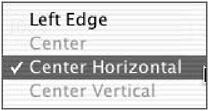
Page Positioning This setting will determine where your document page will be placed on the PDF page. If your document and PDF pages are the same size, there will be no visual difference between the document and PDF page sizes. However, for creating PDFs destined for commercial printing and for documents on which you want to create a PDF border, select Center Horizontal. For unbordered PDF documents destined for the display on the Web, a Left Edge selection is typical.
| Note | At any time you can visually (as well as numerically ) check the page positioning by activating the Preview tab. |
Paper Offset and Page Gap Unless you are instructed to do so by your printing company, you typically will not need to make any adjustments to the Paper Offset and Page Gap field values, as these are nearly always set at the printing company.
| |
For the most predictable and dependable results, you should output your document elements in the same color spaces in which they were placed in the document. For instance, if you have RGB images in your page layout document, then your most predictable results will come from choosing RGB for your output colors. However, you will note that you could choose grayscale or CMYK and, if you have color gamut conversion capabilities built into your application, your application will make a conversion to grayscale or CMYK on-the-fly during output. The same applies to converting assigned spot colors to process colors during output. While this option is convenient , you are leaving the gamut conversion choices up to the application, so your results may not be what you like. If you want the most predictable RGB to grayscale or CMYK and spot to process results, you must convert your RGB images to grayscale or CMYK in an application such as Photoshop prior to placing them in the page layout application and then assign process colors in your page layout program.
| |
Output Settings
A window or tab of output options, similar to the one in Figure 3.8, controls which colors will print and some technical details, such as line screen and angles that will be used to print those colors. Following are some insights into controlling color output:
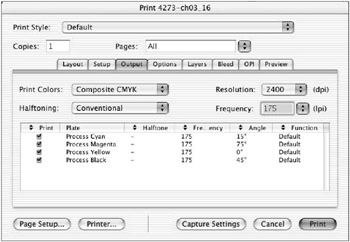
Figure 3.8: Quark s Output settings
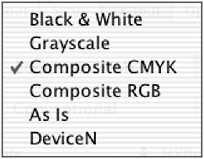
Print Colors When you output a file you will typically be able to tell your page layout application which color space you would like to use for output. Most applications will conveniently allow you to make mode conversions, such as from RGB to grayscale or CMYK, on-the-fly during output. This is very convenient, but there is some uncertainty as well (please see the sidebar on color conversion). At the very least you will want to choose the color space that is consistent with the output device to which you are printing, such as RGB for web use and CMYK (or DeviceN for multitonal images) for commercial printing.
| Note | Many desktop color printers prefer to perform their own RGB to CMYK conversion, so find out which color set (RGB or CMYK) your color device prefers to receive. |
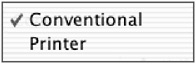
Halftoning Printed images are typically reproduced as a pattern of dots, known as halftone dots. There are many different ways to create the halftone dots that are used to re-create your halftone images. The choices you have here will be largely dependent upon the printer driver and the PPD you selected earlier (see the Setup Settings section on assigning printer drivers and PPDs earlier in this chapter). Shown here are two typical choices, Conventional and Printer. When in doubt select Printer, which will allow the final output device to control the halftoning (which will likely occur anyway).
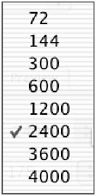
Resolution Next you will assign the output resolution of the final output device. Resolution here refers to the output resolution in dots (or spots actually) per inch of the output device for which you are preparing your document to print. Here you see values ranging from 72 to 4000. Web devices require low-resolution values of 72 “96 ppi (for viewing on a monitor); desktop printing intermediate values of 300 “1200 dpi; and commercial printing the highest of 2400 “4000 dpi.
Frequency Frequency refers to the density or resolution of the halftone pattern, commonly called the line screen, which is measured in lpi (lines per inch). Values range from 50 “60 lpi for 300 dpi laser printers to 175 “200 lpi for commercial printing presses. If you intend to send out your PDF to be printed, you will want to call your service bureau or printing company to find out the line screen at which they intend to print your images.
| |
Resolution, frequency, and halftoning refer to the screen frequency (aka line screen or lines per inch or lpi) at which your contone images will be printed. This is a measure of how many halftone dots will be printed in each inch. Resolution and (screen) frequency are linked to each other because the dots (spots) are combined to create the halftoned dots that are used in the printing of contone images. The specific output characteristics ”or resolution, frequency, and halftoning ” are typically controlled directly at the specific RIP (RIP = Raster Image Processor, the print processor that converts your document components into printed spots and dots) that drives a particular printing device. However, it is a good idea to set values here for the highest-quality device on which you intend to output your final PDF document.
Resolution and screen frequency are directly linked to each other; often when you select the resolution, your application will recommend a typical line screen, such as the 2400/175 lpi pair shown in Figure 3.8.
| |
Options Settings
The Options settings, like those in Figure 3.9, include a number of special output capabilities. Below is an overview of some of the common choices:
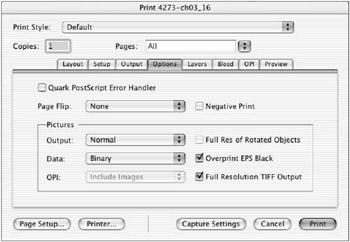
Figure 3.9: Quark s Options settings
Quark PostScript Error Handler If you are experiencing output problems, you can turn on an error handler, which will provide you with feedback as to possible problems that are occurring during output. Various output problems are assigned specific PostScript codes. Some of these messages are more useful than others.
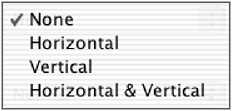
Page Flip If you want pages to be flipped (you can accomplish this for some pages but not others by printing those pages you want flipped separately), then choose one of the flip choices from this drop-down list.
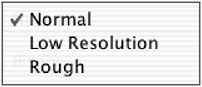
Output (quality) This handy function allows you to control the quality of output. I commonly select Low Resolution, which prints images at screen resolution, when I want to print low-resolution content proofs to my laser printer and image quality is not important (rough completely suppresses printout of graphics and boxes). This dramatically reduces processing times both during initial output to a PostScript file (or printing) and during distilling if you want to make a low-resolution PDF content proof.
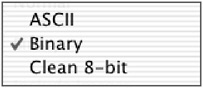
Data (type) This option determines the format of the PostScript code, with Binary being a smaller simpler shorthand version, while ASCII is fully written out PostScript code. Most PostScript printing devices handle Binary well, so try this setting first, as it will result in significantly smaller PostScript and PDF files. If, on the other hand, you ever receive binary file error messages from your network servers or print devices, which is somewhat common in the Windows world, then start using ASCII and these problems will abate. The third choice, Clean 8-bit, is a portable combo file that combines ASCII and Binary. This setting is useful if you intend to send the data file itself rather than print it or convert it to a PDF.
OPI Open Prepress Interface (OPI) is used when you want to place only the low-resolution proxy/placeholder/FPO (for position only) images rather than link them to their high-resolution link files. This is sometimes used when creating large documents such as catalogs, containing hundreds or thousands of images, where the links to the high-resolution files typically occur only during final output. This keeps the page layout document small and easy to manage. This option will not be available unless you are using an OPI image swap system (see instructions on OPI below as well).
| Note | Since you will likely be using OPI only in a commercial print setting, it s a good idea to consult your prepress manager for specific instructions on how they would like the OPI settings handled. |
Full Res of Rotated Objects This setting ensures that rotated images will be printed if they are sent to non-Postscript printers. It will be inactive unless a non-PostScript printer driver is selected.
Overprint EPS Black This is a commercial printing object trapping setting that, if checked, will force all black inks in imported EPS graphics to be overprinted (typically a good idea).
Full Resolution TIFF Output When you check this option, no subsampling of graphics will occur during output (typically a good idea if you are sure that your graphics resolution is set the way you want it). If you do not check this option, any graphics that exceed a 2xLPI resolution value will be subsampled to 2xLPI.
Layers Controls
Many page layout applications allow you to construct documents with text and graphics elements on various layers. A layers output setting window like that seen in Figure 3.10 will allow you to deselect any layers you do not want to output.
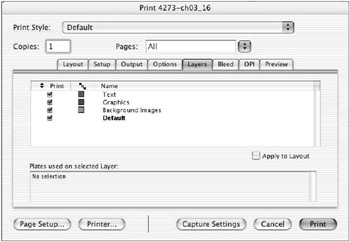
Figure 3.10: Quark s Layers settings
Bleed Controls
Bleed is a setting (see Figure 3.11) used in offset printing that will control how far any page elements that you want to extend ( bleed ) past the edge of the printable page (print box) will overlap this print box. You use this option to make sure that slight variations in trimming accuracy do not create unbled images.
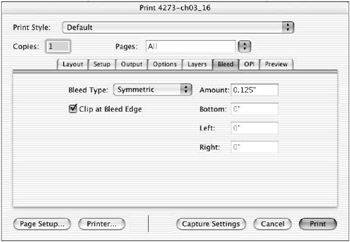
Figure 3.11: Quark s Bleed settings
A common value used here is 1/8 ³ or 0.125 ³ . You can also assign the bleed to be symmetrical (the most common choice, with an equal bleed on all four sides), asymmetrical (you assign settings for each side of the document), or by page element (where the actual placement of each bleeding page element will control its bleed). Once again, a short consultation with your prepress manager will provide the specifics you need here.

OPI Settings
Sometimes, and this is one of those times, settings that should be all together are separated into different areas. Quark has an additional OPI control tab (Figure 3.12) that, if you are using OPI (see the previous discussion of OPI under the Options tab), you would need to activate and set as follows :
OPI Active Check this box if you will be using OPI.
TIFF Include Images Check this setting if you want to include your TIFF formatted images (typically this will be turned on).
TIFF Low Resolution Check this box if you want to include only the low-resolution versions of your images.
EPS Include Images Check this option if you want to include your placed EPS format images (typically this will be turned on).
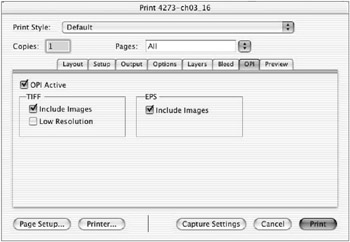
Figure 3.12: Quark s OPI settings
| Note | Remember that when working in the world of PostScript you will have the best and most predictable output results if you stick to using TIFF and EPS file format graphics. |
Preview Setting
Nearly all page layout applications provide some sort of preview similar to what the Preview tab shows in Figure 3.13. Using these previews is a good way to make sure that the output looks right. You can see major and minor mistakes at a glance, prior to output, preventing time-consuming and costly mistakes.
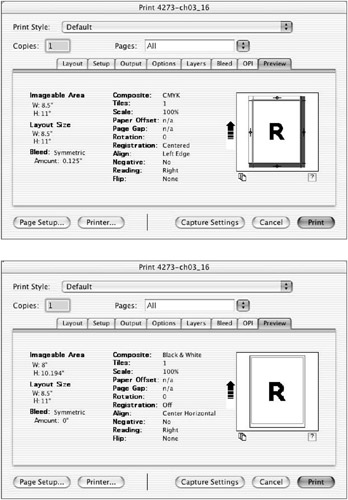
Figure 3.13: Quark s Preview settings: a problem preview (above) and with page size fixed (below)
Checking Page Size and Position
One common problem is the mismatch between input document size and output page size. This problem often occurs when creating PDF files that use custom page size settings, such as documents with registration marks. Registration marks typically add a full inch (with a 6 pt (1/2 ³ ) offset) to the dimension on a document. It is easy to forget this increase in page size, as we do not think about registration marks on a regular basis. These previews often use colors ”red for problems, green for okay ”to highlight major problems or signal that all is well. Figure 3.13 shows an obvious problem preview (left) where the output page size (8.5 ³ —11 ³ ) is too small for the input document size, which should be at least 9.5 ³ wide to accommodate the registration marks. The lack of space is shown as a red margin on the right side.
A subtler potential problem seen here is that the placement of this document is on the left margin, rather than in the center, where it should be for imposition purposes if this document is destined for prepress use (discussed earlier in this chapter). A centered document would show smaller red warning margins on both sides rather than one large red margin on the right side. You might also note that no bleeds have been set, which may or may not be a problem depending upon whether there are any bleed elements in the document. The second preview in Figure 3.13 shows green all around, with the page size fixed, the alignment changed to Center Horizontal, and the bleed set. Take time to review the list of document characteristics as well as the color visuals to make sure your settings are accurate before making your final PostScript file preparations .
| Note | Remember that an incorrect setting will not be visible in the PostScript file because it is nothing but code. Mistakes will not be apparent until you create and sometimes even output the PDF. This is why good preflighting and checking your output settings can prevent so many mistakes and save so much time. |
EAN: 2147483647
Pages: 102