Recipe 3.16. Rounding Corners (Mountaintop Technique)
ProblemYou want to create one set of graphics for rounded graphics while being able to display many background colors within the column. SolutionUse the Mountaintop technique that was popularized by web designer Dan Cederholm. Create a small graphic that will act as basis for the rounded corners (see Figure 3-38). Figure 3-38. The top-left corner graphic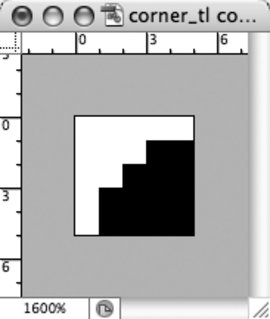
Export the image as a GIF with the filename of corner_tl.gif. Then rotate the image 90 degrees (see Figure 3-39) and export as a GIF image, naming it corner_tr.gif. Repeat the last two steps to create the bottom corners, corner_br.gif and corner_bl.gif. Figure 3-39. Rotating the image 90 degrees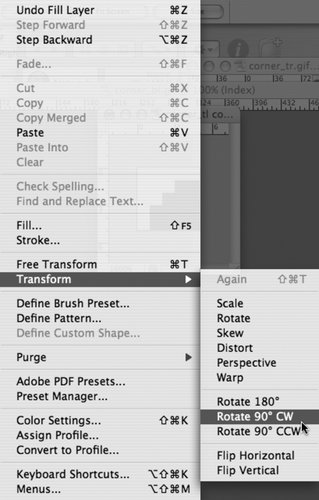 Add additional div elements around the column content: <div > <div > <div > <h2> I Met a Girl I’d Like to Know Better </h2> </div> </div> <p>Lorem ipsum dolor sit amet, consectetuer adipiscing elit, sed diam nonummy nibh euismod tincidunt ut laoreet dolore magna aliquam erat volutpat. Ut wisi enim ad minim veniam.</p> </div> Then place the four corner graphics within the id and p selectors (see Figure 3-40): div#box { width: 55%; background-color: #999999; background-image: url(corner_bl.gif); background-repeat: no-repeat; background-position: bottom left; } #head_outer { background-image: url(corner_tl.gif); background-repeat: no-repeat; } #head_inner { background-image: url(corner_tr.gif); background-repeat: no-repeat; background-position: top right; } div p { margin: 0; padding: 7px; font-family: Verdana, Arial, Helvetica, sans-serif; font-size: 1.1em; background-image: url(corner_br.gif); background-position: bottom right; background-repeat: no-repeat; color: #333333; font-size: .8em; line-height: 1.5; }Figure 3-40. Mountaintop corner example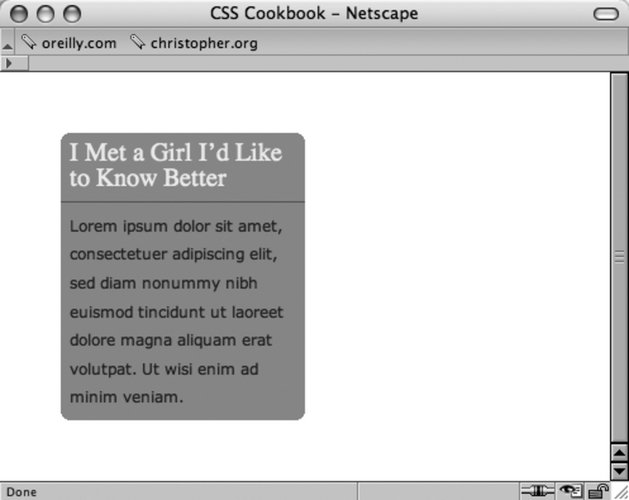 DiscussionThe beauty of the mountaintop technique rests in its simplicity. Four small graphics are made with low file-sizes thanks to the GIF compression algorithms that are placed in the background of four block-level elements. Also, there isn't the need to expand a couple of images to make sure the design integrity is maintained because the column resizes such as in the Solution for Recipe 3.15. Plus, the Mountaintop technique allows for quickly changing the column's background color without revising the corner graphics as you see in Figure 3-41. However, the corner graphics will need to be changed if the background color of the web page or column's parent element changes. Figure 3-41. The column maintains integrity even with the color change and resizing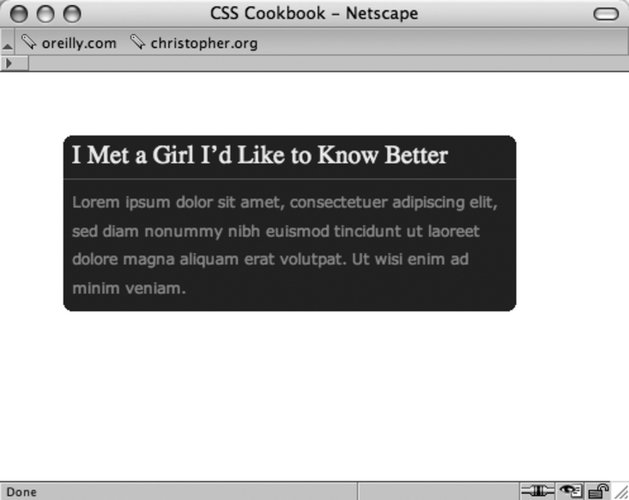 See AlsoRecipe 3.17 for automatically adding corners on columns without custom-made images. |

EAN: 2147483647
Pages: 235