Recipe 1.5. Understanding the Box Model
ProblemYou want to better understand the box model and how margins, borders, and padding work around content. SolutionEvery block level element, like a p or div element, contains a top, right, bottom, and left edge. These sides of block elements are composed of three layers surrounding the content. So, therefore each block element contains four sections:
The default margin value is 0, which lines up with the edge of the border. A border with a value of 0 lines up with the padding edge. Obviously, a padding value of 0 lines flush against the content. Values above 0 expand the boxes. Take a look at Figure 1-21 to see views of a box model. Figure 1-21. Box model viewed straight on and off to the side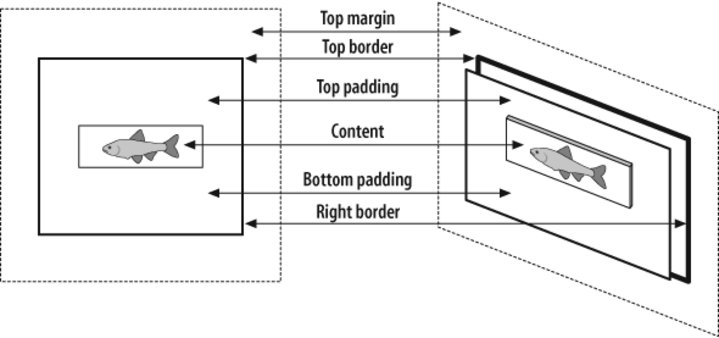 DiscussionFor a mental image of the box model, picture a cardboard box on the floor. Looking down at the box and you see its four sides: top, right, bottom, and left. The box can be big or small as you can modify the height and width properties. div { height: 150px; width: 150px; }Add as many books as you want into the box until you fill the space with the contents that you see in Figure 1-22: Figure 1-22. Content placed within a block level element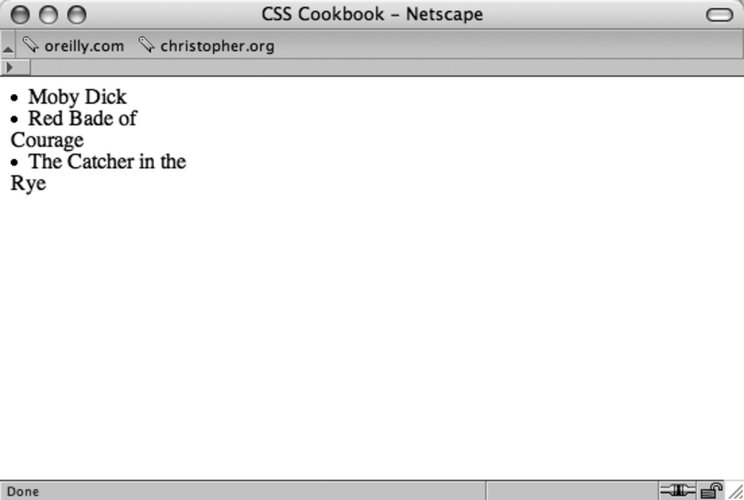 <div> <li>Moby Dick</li> <li>The Red Badge of Courage</li> <li>The Catcher in the Rye</li> </div> To help see the edges of the box, I'll place a thin border around the box (see Figure 1-23): div { border: thin solid #000000; height: 150px; width: 150px; }Figure 1-23. A border is placed around the content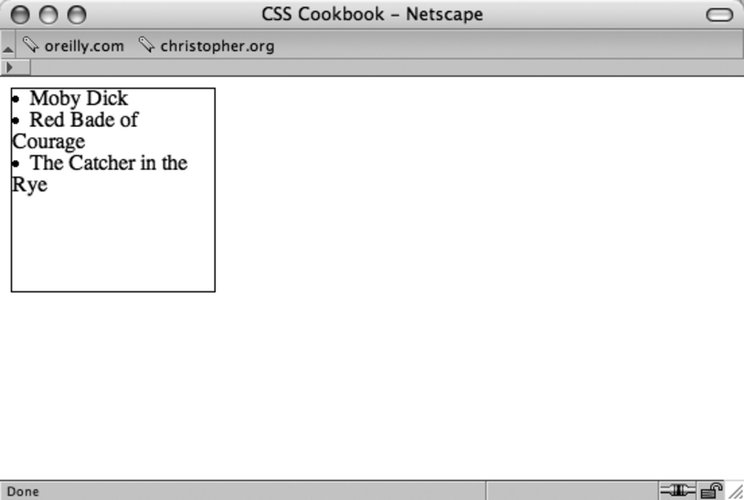 The books overlap or sit next to each other and that's not good for the books especially since, in this example, they're collector's items. So, I'll add padding between the books and the box with the padding property for a little breathing room and protection. As you use more padding, you also reduce the number of books you can place into the box. Some padding has been added to the example in Figure 1-24: div { border: thin solid #000000; height: 150px; width: 150px; padding: 10px; } Figure 1-24. Padding is added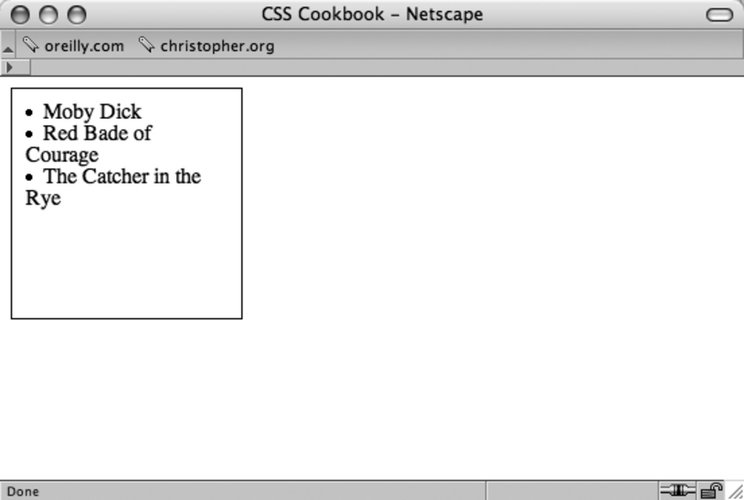
You need another box to fit the contents that didn't fit in the first box. So create another box, and enter the rest of the books or contents. Put the new box next to the original (see Figure 1-25): <div> <li>Moby Dick</li> <li>The Red Badge of Courage<li> <li>The Catcher in the Rye</li> </div> <div> <li>The Red Queen</li> <li>The Awakening</li> <li>The Scarlet Letter</li> </div> Figure 1-25. An additional listing of books is added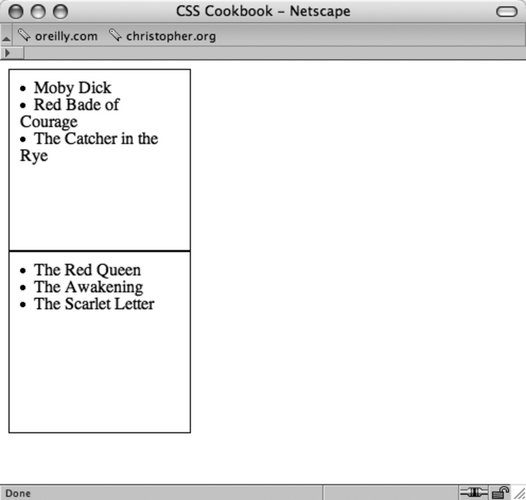 However, you want to space out the boxes so that they aren't on top of each other. So, modify the space between the boxes by using the margin property (see Figure 1-26): div { border: thin solid #000000; height: 150px; width: 150px; padding: 10px; margin: 25px; } Figure 1-26. Adding margins to the block level elements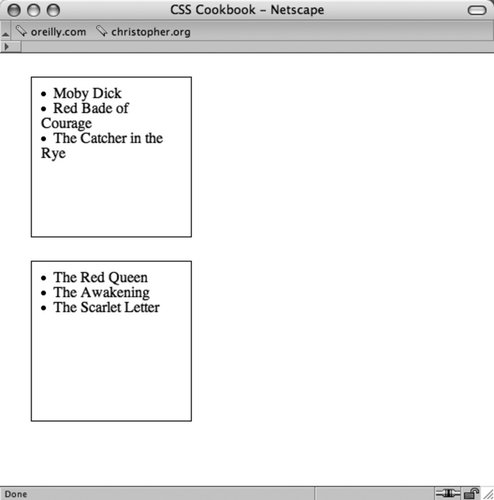 To help you distinguish the two boxes, modify the border property. Like the margin and padding, the border can be as thick or thin as you want (see Figure 1-27): div { border: 5px double #000000; height: 150px; width: 150px; padding: 10px; margin: 25px; } Figure 1-27. Border increased to five pixels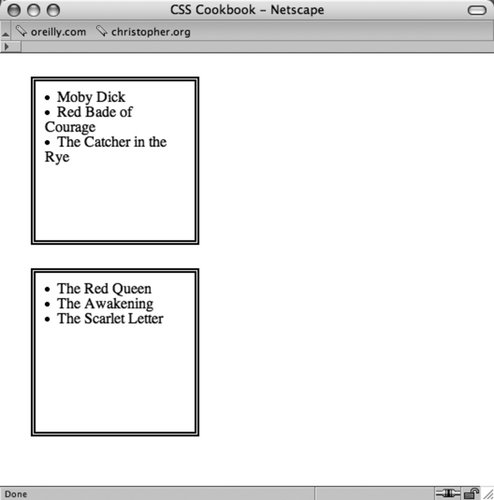 At this point, you've modified the box model fairly consistently across two elements. You've adjusted the margin, padding, and borders around each side. However, you can also modify specific edges of the box model. For example, if you want to adjust the right side of the div element (see Figure 1-28), but keep the same values for the other sides, the code could look something like the following: div { border: 5px solid #000000; height: 150px; width: 150px; padding: 10px; margin: 0px; border-right: 1px solid #000000; padding-right: 1px; margin-right: 1px; } Figure 1-28. Adjustments to the right side of the box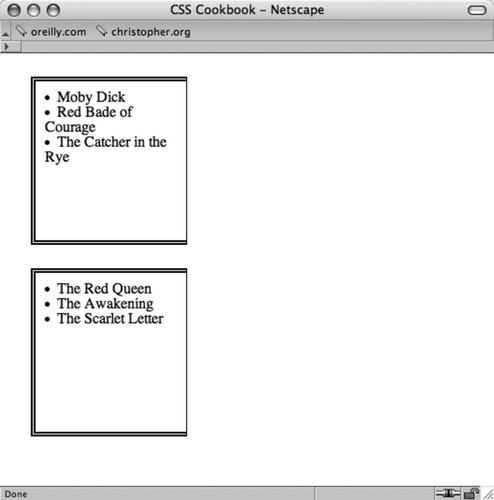 You could also modify the other sides of the edges specifically as well. For example, using the margin property, the code might look like the following: div { margin-top: 1px; margin-right: 1px; margin-bottom: 1px; margin-left: 1px; }By adjusting the sides and different properties of the box model, developers are able to better format the presentation of their web pages.
See AlsoThe CSS 2.1 box model http://www.w3.org/TR/CSS21/box.html; the Brain Jar box model at http://www.brainjar.com/css/positioning/default.asp; and the interactive CSS Box Model at http://www.redmelon.net/tstme/box_model/. |

EAN: 2147483647
Pages: 235