Project 6.2: The Grass Generator
Project Overview
Our next project comes from an actual real-world challenge. A request was made for a tool that would create a field full of grass. Doing any type of nature simulation within the realm of computer graphics is difficult. Nature has both a complexity and detail that can challenge the capabilities of both artist and hardware when an attempt is made to bring it into the digital realm. While there are solutions both within Maya and from third parties, they were eliminated for a variety of reasons, based on the required qualities needed for the grass.
Definition and Design
The grass generated had three required qualities:
-
Raytraceable
-
Maya native
-
Detailed enough to hold up to film resolution renders
The project, a short film, was being done on a shoestring budget, and those shoes were actually slippers ”so, in actuality there was no budget. Because of this, the project had to be created in Maya alone without the aid of third-party solutions, like outside renderers. The design of the project also required that the grass had to appear in raytraced reflections, refractions, and shadows. This eliminated possible Maya native solutions like Paint Effects and Maya Fur, which are applied as post effects. This, combined with the plan to render the final project to film, precipitated using actual geometry as the grass. We are lucky in that all our action takes place within a field; therefore, we do not need to do any type of surface detection.
At this point, we can draw a simple flowchart, which will outline the structure of our script, represented in Flowchart 6.2.
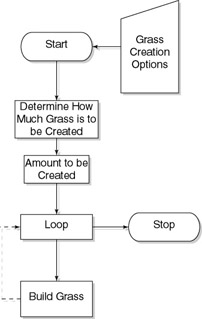
Flowchart 6.2: Grass generator flowchart.
With this structure in place, we now have enough to begin work on the research needed for our script.
Research and Development
Grass is actually something easy to research. Sure, we could go to the library and check out some botany books. Or, we could just head outside. The amazing thing about nature and the human eye is how much detail there is, and how much of that detail we see. Even from a long distance, we can make out variations of color and shading. Like hair, grass is a mass of objects that are essentially the same color, that due to their specular nature, along with their shadows and shading, give away their nature as tiny individual objects. The look of a blade of grass is determined by geography and whether it is wild or cultivated. The grass found growing in a front yard is distinctly different from that growing in the middle of a field in a national park. Cultivated grass is usually healthier, with a deeper green from years of fertilizer and regular watering. Looking more closely at an individual blade, it is likely truncated from a lawn mower blade. Wild grass, like that which we want to create, tapers to a point. Moreover, because areas of cultivated grass are seeded , the grass is much more dense. Wild grass has more dirt space than cultivated grass. Grass, unless cropped to an extremely short length, is also not straight. Its blades bend and flop about. A long blade of grass cannot bear its own weight, so it bends, often more toward the tip than the base.
At this point, we should define what the needed qualities of our actual grass geometry are:
-
Uniqueness
-
Shape
-
Placement
-
-
Detail
-
User definable detail
-
-
Control of the look
-
Length
-
Curl
-
Amount
-
Assignment of a shader
-
Now is also a good time to put some thought into how we are going to create the blades of grass. While we could take an approach similar to the creation of our icosahedron, building each blade polygon by polygon, that is not the best way to accomplish this task.
Instead of creating the blades with the createPolyFacet command, we will use the polygonal cone primitive. Open Maya and create a polygonal cone, with Construction History active. Either in the Channel Box or in the Attribute Editor, modify the Cone Creation attributes so that it has only three sides. If we then adjust the Height and Radius attributes, as well as scale the cone in X to a value of 0.25, we can achieve a very blade-like shape. Size is not really important here, the ratio of Height to Radius is. We can create a couple of different types of grass this way, from the short and stout crab grass to the long and graceful swamp grass, along with a variety of looks in between seen in Figure 6.7. It is handy to move the cone up half the Height attribute, to place it on the ground plane.
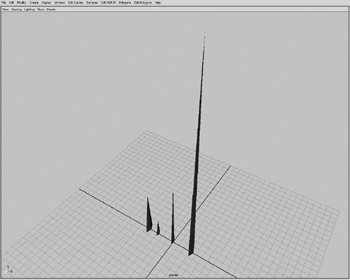
Figure 6.7: Variety of grass looks.
While settings might vary depending on what scale a user is working in, Figure 6.8 shows us some settings that produce a generic piece of grass.
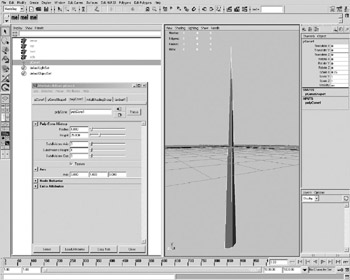
Figure 6.8: The creation settings for the blade of grass.
Of course, the pieces of grass created so far appear to give us good cause to call them blades. People walking in a field of this grass would have their feet ripped to bloody shreds. While this might be a useful look in a music video for the latest nihilistic speed metal band , it is not the look we re after. As we previously discussed, a long blade of grass bends under its own weight.
Although it is somewhat hidden, Maya does have procedural deformers. Found under Animation>Deformers>Create Non-Linear>Bend, we can add a bend deformer to our cone. However, unless detail is added along the length of our grass blade, our blade will become deformed in a way that is visually unpleasant. If we now create a cone with 10 subdivisions along its length, we have enough detail to represent our bend, which we ll add and set its Curvature to 1. This produces the geometry seen in Figure 6.9.
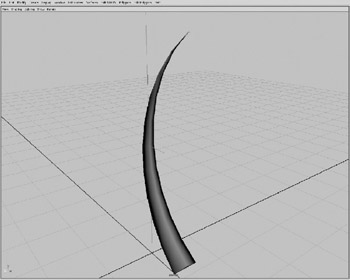
Figure 6.9: The bend result.
The bend deformer by default bends around the medial axis of the object to which it is added. We, however, want the base of the blade of grass to stay at ground level, so we alter the High Bound and Low Bound values to be 2 and 0, respectively. Now, only one half of our blade of grass is bent, so we have to move our bend deformer so that its center, the origin of the bend, is at the base of the cone. We can do this by setting the translate Y value of the deformer to 0. We can now try various settings on both the Curvature and Envelope settings to produce an amazing variety of grass, some examples of which can be seen in Figure 6.10. We use negative values for the Curvature value so the flat side of the blade faces toward the ground.
Figure 6.10: Using negative bend to put the flat side down.
| On the CD | While it likely wouldn t hold up to serving as the main set pieces in an animated feature starring ants or bugs , this geometry serves our purposes quite well. If we add the shader found on the companion CD-ROM in Projects\Chapter06\Grass\grass.ma, which uses a ramp to soften the tip, we take advantage of the UV coordinates provided by using the cone primitive to create our grass. |
The final step to perfect the look of our grass is to harden the edges of our geometry. However, the results can be somewhat unpredictable if done at this point, after the cone has been scaled and bent. Instead, we should do this process after the creation of the cone, but before it is scaled or bent.
We now have the process worked out to produce a decent piece of grass:
-
Create a three-sided polygonal cone with suitable detail.
-
Position it on the ground plane.
-
Harden the edges.
-
Scale by .25 in X.
-
Add a bend deformation.
-
Move that deformation to the base of the cone.
Now that we have a process worked out for creating a specific piece of grass, we need to develop a way to randomize the attributes used to create the grass. This challenge is actually a fairly simple one within the realm of the computer. Computers, unlike people, are completely objective when it comes to randomness. If a person is asked to place a handful of marbles within a square painted on the floor, short of tossing them down to scatter, chances are the human brain will start to impede. For example, the person will think, This marble is bigger, so it needs more empty space around it. These three marbles are a similar red and would look nice all clustered together. But a computer is completely impartial. MEL provides the ability to generate random numbers through the rand command. For example, simply typing rand 10 at the command line produces a random number between 0 and 10. No matter how often we execute it, we never get the same number twice. We will be able to use this command to apply randomness to the cone s height, radius, and the settings on the bend modifier, and use it to randomly place our grass.
Now that we have worked out both the process for building a blade of grass and how to apply randomness, we can write out our flowchart, seen in Flowchart 6.3.
Flowchart 6.3: The flowchart for our procedure.
Although we might need to do some experimentation to figure the best way to distribute our blades of grass, we can now move on to creating our script.
Implementation
Open a new script file, and save it within your scripts directory as ![]() generateGrass.mel .
generateGrass.mel .
In this new file, declare the global procedure generateGrass , as seen in Example 6.16, and save your file.
Example 6.16: Declaration of our procedure.
global proc generateGrass () { } We now can add a button to our MEL_Companion shelf to source and execute the script. We should run this to make sure the script is found within our script paths.
Looking at our flowchart, the first step in creating our grass is to create a base cone object. By either referring to the online documentation or by harvesting the command from the Script Editor, we learn that the MEL command to create a polygonal cone is polyCone . In our script file, we can add the polyCone command, using any of the settings from our earlier experimentation in the Maya workspace. Our first iteration of the script will create a standard blade of grass; we will add functionality to make variations on the commands in a later iteration. It is often beneficial, even with a fleshed-out plan, to build scripts in such a manner. See Example 6.17.
Example 6.17: Adding the cone creation to the procedure.
global proc generateGrass () { // Creation of Poly Cone polyCone -radius 0.04 -height 1 -subdivisionsX 3 -subdivisionsY 10 -subdivisionsZ 0 -axis 0 1 0 -texture 1 -constructionHistory off ; } Saving, sourcing, and executing the script will now create a small cone. We have once again turned Construction History off for the creation of our cone. Our next step is to position the cone on the ground plane, by moving it up half the height. Of course, to do this we need to capture the name of the created polygonal cone, which we capture in a string array, since the polyCone command returns the name in this format, to accommodate returning the name of the polyCone node if the cone is created with construction history. We then use the captured name in a setAttr statement, all seen in Example 6.18.
Example 6.18: Catching the names of the created cones and moving them to the ground plane.
global proc generateGrass () { // Creation of Poly Cone string $blades[] = `polyCone -radius 0,04 -height 1 -subdivisionsX 3 -subdivisionsY 10 -subdivisionsZ 0 -axis 0 1 0 -texture 1 -constructionHistory off ` ; // Bring the bottom of the cone to ground level setAttr ($blades[0] + ".translateY") .5; } Next, we want to harden the edges of our cone. Unfortunately, this is more complex to execute in MEL than it is in the Maya interface. If a user has the option set to automatically convert a selection, under Polygons>Tool Options>Convert Selection, and a user has an object selected when he executes the Edit Polygons>Normals>Soften/Harden, Maya automatically selects all the edges of the object, and then executes the command. Within our script, we must do something similar. We can issue the command without having the edges selected, though Maya will then leave us with those edges as the current selection, so we must switch back to object select mode after executing the polySoftEdge command. After the setAttr command we add the two commands, and we re-select the polygon cone to ensure it is the active selection. See Example 6.19.
Example 6.19: Harden the edges of the cone.
// harden the edges of cone polySoftEdge -angle 30 -constructionHistory off ($blades[0] + ".e[0:59]") ; changeSelectMode -object; select r $blades;
Again, save, source and execute the script. After adding the polySoftEdge command, we can now add the rest of the commands to scale our cone, adding and positioning our bend deformer. Because the deformers cannot be created without construction history, we delete the construction history on our cone before ending the script. After adding these commands, the script should resemble that in Example 6.20.
Example 6.20: Adding the deformer.
global proc generateGrass () { // Creation of Poly Cone string $blades[] = `polyCone -radius 0,04 -height 1 -subdivisionsX 3 -subdivisionsY 10 -subdivisionsZ 0 -axis 0 1 0 -texture 1 -constructionHistory off ` ; // Bring the bottom of the cone to ground level setAttr ($blades[0] + ".translateY") 0.5 ; // harden the edges of cone polySoftEdge -angle 30 -constructionHistory off ($blades[0] + ".e[0:59]") ; // go back to object mode // and ensure the cone is selected changeSelectMode object ; select replace $blades ; // make the blade thin; setAttr ($blades[0] + ".scaleX") 0.25 ; // add the bend deformer, capture the name to move it string $bend[] = `nonLinear -type bend -lowBound 0 -highBound 2 -curvature (0.5) ` ; setAttr ($bend[1] + ".ty") 0 ; setAttr ($bend[0] + ".envelope") 0.8 ; // select the cone object and delete the history select replace $blades ; delete constructionHistory blades ; } Now, when the script is executed, we create our blade of grass.
To add some variety to our grass, we will replace various attributes with variables. Replace the values for the cones radius and height with variables called $grassRadius and $grassHeight . Also replace the curvature value with a variable called $grassCurl . All three variables are stored as floating-point numbers, which must be declared at the beginning of the script. At this time, assign our previous values to the variables at declaration. See Example 6.21.
Example 6.21: Using variables in place of explicit values.
global proc generateGrass () { // Declaration of variables float $grassRadius = 0.04 ; float $grassHeight = 1.0 ; float $grassCurl = -0.5 ; float $envelopeVal = 0.8 ; // Creation of Poly Cone string $blades[] = `polyCone -radius $grassRadius -height $grassHeight -subdivisionsX 3 -subdivisionsY 10 -subdivisionsZ 0 -axis 0 1 0 -texture 1 -constructionHistory off ` ; // Bring the bottom of the cone to ground level setAttr ($blades[0] + ".translateY") 0.5 ; // harden the edges of cone polySoftEdge -angle 30 -constructionHistory off ($blades[0] + ".e[0:59]") ; // go back to object mode // and ensure the cone is selected changeSelectMode object ; select replace $blades ; // make the blade thin; setAttr ($blades[0] + ".scaleX") 0.25 ; // add the bend deformer, capture the name to move it string $bend[] = `nonLinear -type bend -lowBound 0 -highBound 2 -curvature $grassCurl ` ; setAttr ($bend[1] + ".ty") 0 ; setAttr ($bend[0] + ".envelope") $envelopeVal ; // select the cone object and delete the history select replace $blades ; delete constructionHistory blades ; } | Note | We will now just refer to the process of saving, sourcing, and executing a script simply as executing the script. This does not mean you can neglect the sourcing of a script. |
| On the CD | The text for this script is found on the companion CD-ROM as /project_02/v01/generateGrass.mel. |
Executing this new version of the script should produce the same result, but should not cause an error. We can now alter the variable assignments to implement the random command. See Example 6.22.
Example 6.22: Adding the rand command to give our variables a new value with each execution.
// Declaration of variables float $grassRadius = `rand 0.02 0.06`; float $grassHeight = `rand 0.7 1.2`; float $grassCurl = `rand (-0.25) (-1.25)`; float $envelopeVal = `rand 0.6 1.0`;
Now, with every execution our script, our blade of grass is slightly different. Notice, however, that each blade of grass is slightly below or above the ground plane This is because when we move the cone up, we are still moving it by 0.5. Since our height is no longer necessarily 1.0, we need to adjust this value to be half of the randomly determined height. See Example 6.23.
Example 6.23: Bringing our random height into the flooring code.
setAttr ($blades[0] + ".translateY") ($grassHeight * 0.5) ;
In Figure 6.11, we see 10 different executions after this revision, each moved in X to allow for easy comparison.
Figure 6.11: Ten random blades of grass.
Although each blade of grass now created with the script is unique, they are all generally the same type, a short, generic piece of grass. In order for a user to control the look of the grass, we need to add a way to pass data to the script.
We now have to make a choice, in what type of control we want to give the artist working with ![]() generateGrass.mel . We could allow the user to individually set the values used in the rand command, but with three rand commands, that would mean passing six numbers every time we execute the command. It would also essentially nullify all the hard work we put in to figuring out various looks for the grass. Instead, we will pass the command a style of grass. To do this, we first modify the procedure declaration. See Example 6.24.
generateGrass.mel . We could allow the user to individually set the values used in the rand command, but with three rand commands, that would mean passing six numbers every time we execute the command. It would also essentially nullify all the hard work we put in to figuring out various looks for the grass. Instead, we will pass the command a style of grass. To do this, we first modify the procedure declaration. See Example 6.24.
Example 6.24: Adding a passed value to the procedure.
global proc generateGrass (string $style)
If we now source the file, we receive a warning from Maya. See Example 6.25.
Example 6.25: An example of the warning issued by Maya.
// Warning: New procedure definition for "generateGrass" has a different argument list and/or return type . //
This is, of course, true. If we source the script once more , there is no warning. Anytime we alter the declaration of a procedure, we should source the file twice, to be assured that Maya recognizes the changes. In addition, if we simply execute generateGrass , Maya returns an error. See Example 6.26.
Example 6.26: A command must always be passed the correct number of arguments.
// Error: Wrong number of arguments on call to generateGrass
We now have to pass generateGrass a string whenever we call the command. This string could be anything at this point, since the script does not yet use the passed string in any way. We will now add this functionality using a switch statement. See Example 6.27.
Example 6.27: Implementing our $style variable with a switch command.
{ // Declaration of variables float $grassRadius = `rand 0.02 0.06`; float $grassHeight ; float $grassCurl ; float $envelopeVal ; // Change height and bend values to accommodate // user input. switch ($style) { case "normal": { $grassHeight = `rand 0.7 1.2`; $grassCurl = `rand (-0.25) (-1.25)`; $envelopeVal = `rand 0.6 1.0`; } break; } // Creation of Poly Cone . . . We kept the randomization of the radius outside the switch statement because grass is pretty much uniform in its radius, with shorter grass being stockier, and longer grass being very thin, relative to their length.
By using the switch statement, we can quite easily add any number of presets, including putting in specific species of grass, like calling generateGrass kentuckyBluegrass . For now, we will add only four options. See Example 6.28.
Example 6.28: Adding more style options.
global proc generateGrass (string $style) { // Declaration of variables float $grassRadius = `rand 0.02 0.06`; float $grassHeight ; float $grassCurl ; float $envelopeVal ; // Change height and bend values to accommodate // user input. switch ($style) { case "short": { $grassHeight = `rand 0.4 0.8`; $grassCurl = `rand 0 (-.1)`; $envelopeVal = `rand 0.9 1.0`; } break; case "normal": { $grassHeight = `rand 0.7 1.2`; $grassCurl = `rand (-0.25) (-1.0)`; $envelopeVal = `rand 0.6 1.0`; } break; case "long": { $grassHeight = `rand 1 1.6`; $grassCurl = `rand (-0.35) (-1.25)`; $envelopeVal = `rand 0.5 1.0`; } break; case "very_long": { $grassHeight = `rand 2 3.5`; $grassCurl = `rand (-1) (-1.5)`; $envelopeVal = `rand 0.5 0.85`; } break; } // Creation of Poly Cone . . . It would also be wise to add a default setting to the switch statement. If a user passes the command an unknown value, it will still work, using what we define as the default settings. After the very_long case, we add what is seen in Example 6.29.
Example 6.29: Adding a default value.
default: { warning ("Type " + $style + " is unknown. Using default settings.") ; $grassHeight = `rand 0.7 1.2`; $grassCurl = `rand (-0.25) (-1)`; $envelopeVal = `rand 0.6 1.0`; } break; | On the CD | The text for this script is found on the companion CD-ROM as /project_02/v02/generateGrass.mel. |
We ve added a warning command to the default statement to inform the user that the argument used was not valid. If we wanted to instead completely stop the user from using unknown values, we would put an error command in the default case statement.
We can now create variety of different grasses by executing generateGrass and passing it either short , normal , long , or very_long . We use the underscore in very_long so that it counts as a single string when passed at the command line.
We now have our final script for generating a single blade of grass. See Example 6.30.
Example 6.30: The final script to build a single blade of grass.
global proc generateGrass (string $style) { // Declaration of variables float $grassRadius = `rand 0.02 0.06`; float $grassHeight ; float $grassCurl ; float $envelopeVal ; // Change height and bend values to accommodate // user input. switch ($style) { case "short": { $grassHeight = `rand 0.4 0.8`; $grassCurl = `rand 0 (-.1)`; $envelopeVal = `rand 0.9 1.0`; } break; case "normal": { $grassHeight = `rand 0.7 1.2`; $grassCurl = `rand (-0.25) (-1.0)`; $envelopeVal = `rand 0.6 1.0`; } break; case "long": { $grassHeight = `rand 1 1.6`; $grassCurl = `rand (-0.35) (-1.25)`; $envelopeVal = `rand 0.5 1.0`; } break; case "very_long": { $grassHeight = `rand 2 3.5`; $grassCurl = `rand (-1) (-1.5)`; $envelopeVal = `rand 0.5 0.85`; } break; default: { warning ("Type " + $style + " is unknown. Using default settings."; $grassHeight = `rand 0.7 1.2`; $grassCurl = `rand (-0.25) (-1)`; $envelopeVal = `rand 0.6 1.0`; } break; } // Creation of Poly Cone string $blades[] = `polyCone -radius $grassRadius -height $grassHeight -subdivisionsX 3 -subdivisionsY 10 -subdivisionsZ 0 -axis 0 1 0 -texture 1 -constructionHistory off ` ; // Bring the bottom of the cone to ground level setAttr ($blades[0] + ".translateY") ($grassHeight * 0.5) ; // harden the edges of cone polySoftEdge -angle 30 -constructionHistory off ($blades[0] + ".e[0:59]") ; // go back to object mode // and ensure the cone is selected changeSelectMode object ; select replace $blades ; // make the blade thin; setAttr ($blades[0] + ".scaleX") 0.25 ; // add the bend deformer, capture the name to move it string $bend[] = `nonLinear -type bend -lowBound 0 -highBound 2 -curvature $grassCurl ` ; setAttr ($bend[1] + ".ty") 0 ; setAttr ($bend[0] + ".envelope") $envelopeVal ; // select the cone object and delete the history select replace $blades ; delete constructionHistory blades ; } | On the CD | The text for this script is found on the companion CD-ROM as /project_02/v03/generateGrass.mel. |
The next step to creating our grass is to add functionality to generate large volumes of grass automatically. While we could add this to the generateGrass procedure, this situation is perfect for splitting into multiple procedures.
Modify the current generateGrass procedure to be a non-global procedure called generateBlade . See Example 6.31.
Example 6.31: Turning our global procedure into a local procedure.
proc generateBlade (string $style)
After the last curly brace of our procedure, add a new global procedure called generateGrass . See Example 6.32.
Example 6.32: Adding a global procedure that calls the local procedure.
global proc generateGrass (string $style) { generateBlade $style ; } By adding the generateBlade command to our script, the functionality remains the same. To create multiple copies of our grass, we enclose the command in a for loop. See Example 6.33.
Example 6.33: Adding a simple loop to create 10 blades of grass.
global proc generateGrass (string $style) { // for loop to create multiple blades of grass for ($i = 0; $i < 10; $i++) generateBlade $style ; } Executing the script will create 10 blades of grass. Obviously, this is a number we will want to put under user control, by adding in an int variable to be passed to generateGrass . We separate the declaration of the variables with commas, but we do not separate the arguments passed to generateGrass with anything other than spaces. See Example 6.34.
Example 6.34: Passing a value from the command line to the loop.
global proc generateGrass (string $style, int $density) { // for loop to create multiple blades of grass for ($i = 0; $i < $density; $i++) generateBlade $style ; } | Note | The amount of grass that can be created and the time it takes to do so is highly dependent on the hardware running Maya. Use lower amounts of grass for testing purposes. |
| On the CD | The text for this script is found on the companion CD-ROM as /project_02/v04/generateGrass.mel. |
We now have the capability of creating any number of blades of grass. At this point, however, each blade is at the origin. We will want to move the blades to a new, random location.
To this point, whenever we wanted to address anything about a node we created in a script, we captured the name of the node on creation by enclosing the command in single forward quotes. However, our generateBlade command does not return any data upon execution. We need to rectify that before proceeding.
The first step to add return data to a procedure is to decide what type this data should be. A procedure can return any type of data that can be stored as a variable. Therefore, in our grass procedure, we want to return the name of the newly created blade of grass, a string. We alter the declaration of the generateBlade procedure to return a string. See Example 6.35.
Example 6.35: Adding a return value to the procedure.
proc string generateBlade (string $style)
We also need to add the command to actually return the data. At the very end of the script, just before the closing curly brace, add the command to return the variable holding the name of the geometry s transform node. See Example 6.36.
Example 6.36: The return statement must be included in any procedure with a return value in its declaration.
. . . return $blades[0]; }
Now, when we call the procedure generateBlade from within generateGrass , we can capture it in a string variable. We use the iteration variable of the for loop, the int $i to assign the returned string to ever-increasing index values of the array. At the end of the script, we select the created geometry, partially because we should always select newly created geometry, but also to check to make sure we are capturing the data returned by generateBlade . See Example 6.37.
Example 6.37: Capturing our own return value to an array variable.
global proc generateGrass (string $style, int $density) { // Declare Variables string $createdGrass[]; // for loop to create multiple blades of grass for ($i = 0; $i < $density; $i++) $createdGrass[$i] = `generateBlade $style` ; // Select the created geometry select replace $createdGrass; } | On the CD | The text for this script is found on the companion CD-ROM as /project_02/v05/generateGrass.mel. |
Executing the command now should result in the requested number of grass blades to be created and left selected when the script is finished running.
Now, we can again use the Rand command to produce random translate attributes for our grass. Before doing so, however, we need to modify the generateBlade command to freeze the transform values of the generated grass. The MEL command to do this, as well as to reset the pivot point to the origin, is makeIdentity . In the generateBlade procedure, after the scale and translate attributes are set, use makeIdentity twice; the first freezes the transforms, and the second resets the pivot to the origin. See Example 6.38.
Example 6.38: Cleaning the transformations of our created geometry.
// Reset transformations and pivot point makeIdentity -apply true -translate true -rotate true -scale true $blades[0] ; makeIdentity -apply false -translate true -rotate true -scale true $blades[0] ;
Once this is done, we are free to use the rand command to generate a new position for each new blade of grass. We turn our for statement into a command group , and place the setAttr commands within. See Example 6.39.
Example 6.39: Randomly positioning the grass.
global proc generateGrass (string $style, int $density) { // Declare Variables string $createdGrass[]; // for loop to create multiple blades of grass for ($i = 0; $i < $density; $i++) { $createdGrass[$i] = `generateBlade $style` ; // Generate Random Values for translation float $randomX = `rand -5 5`; float $randomZ = `rand -5 5`; // Assign the random values to the translate values setAttr ($createdGrass[$i] + ".translateX") $randomX; setAttr ($createdGrass[$i] + ".translateZ") $randomZ; } // Select the created geometry select replace $createdGrass; } | On the CD | The text for this script is found on the companion CD-ROM as /project_02/v06/generateGrass.mel. |
Executing the command at this point, to generate 500 blades of grass produces a result similar to Figure 6.12.
Figure 6.12: Five hundred blades of grass.
Although we could nest the rand commands directly within the setAttr command, assigning them to a variable keeps the clutter of our setAttr command down. We have hard coded the dimensions to generate the grass within the script. We will next turn this over to user control.
Although it adds a large amount of complexity to the command, we must add four new float variables to the procedure declaration, and use those variables in the rand commands generating the translate X and translate Z values. See Example 6.40.
Example 6.40: Adding the variables to allow the user to pass values for the positioning of the grass.
global proc generateGrass (string $style, int $density, float $minX, float $maxX, float $minZ, float $maxZ) { . . . // Generate Random Values for translation float $randomX = `rand $minX $maxX`; float $randomZ = `rand $minZ $maxZ`; . . . We can now generate any number of grass blades, in any dimensions. The problem that now becomes apparent is we have given perhaps too much control to the user. If we create 1000 pieces of short grass between “1 and 1 in X and Z, we get a result similar to Figure 6.13.
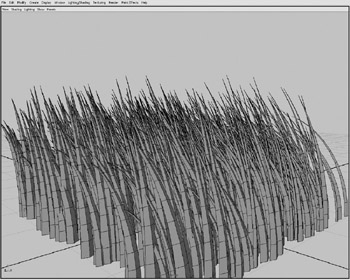
Figure 6.13: Densely packed grass.
However, if we now create 1000 pieces of short grass between “10 and 10 in X and Z, our result is similar to Figure 6.14, where the grass is much sparser.
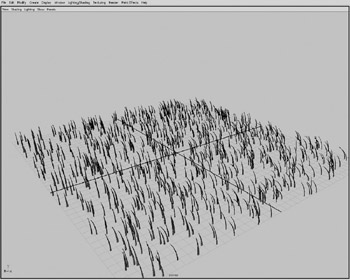
Figure 6.14: Generating 1000 pieces in a much sparser area.
| On the CD | The text for this script is found on the companion CD-ROM as /project_02/v07/generateGrass.mel. |
What we now need to do is generate a number that will produce the same density of grass if we create a 1x1 square patch, or a 20x30 patch.
Our first step is to determine the area we are trying to cover with grass. The area of a rectangle is defined by its width x height, as seen in Figure 6.15.
Figure 6.15: Determining area.
To determine the area we are trying to fill with grass within our script, we subtract the minimum vales from the maximum values, and then multiply those results together. See Example 6.41.
Example 6.41: Determining the area to be filled with grass.
float $area = (($maxX - $minx) * ($maxZ - $minZ)) ;
We can then multiply that number by our $density variable to relate the user input to the number of blades of grass. See Example 6.42.
Example 6.42: Calculating the amount to create.
int $amountToCreate = ($area * density) ;
We can then optimize this to one variable assignment, eliminating the $area variable. See Example 6.43.
Example 6.43: Combining the two equations into one.
int $amountToCreate = ((($maxX-$minx) * ($maxZ-$minZ)) density) ;
At this stage, the script creates enough grass to put within each 1x1 square unit space the number passed to the script in the $density variable. This does not mean that each square unit will have an equal amount of grass. Because the results of the rand command truly is random, while the placement is generally even dispersed, there might be small patches that are a little more dense or a little more sparse. This is a very organic quality, and one for which we should be thankful. Creating organic material in the computer is never easy, and these irregularities help dispel that computer look. In Figure 6.16, we see the results of executing the latest version of our script with the following settings (see Example 6.44):
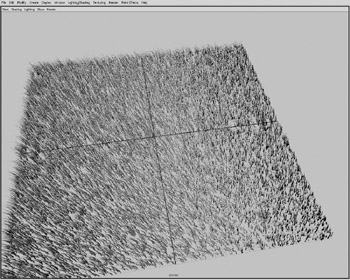
Figure 6.16: 40,000 pieces of grass.
Density: 100
Minimum X; “10
Maximum X: 10
Minimum Z: “10
Maximum Z: 10
Style: Normal
Example 6.44: The command to create the grass.
generateGrass normal 100 10 10 10 10;
We have now produced 40,000 pieces of grass.
Note: On the CD
The text for this script is found on the companion CD-ROM as /project_02/v08/generateGrass.mel.
While this version of the script produces some decent results, and could be considered a pre-Alpha version, we notice a series of problems, some associated with design, and some with implementation. Our design called for user definable detail; although this can be defined through grass types, it can also be added as a user variable. Another issue when looking at our grass is that all the blades are bending the same direction. Unless our scene is taking place in a wind tunnel, it is doubtful that this would occur. Moreover, because we are creating an enormous number of nodes, scenes created with our tool are very unwieldy. Finally, while we have given the user a great amount of control over the density of the created grass, there is still too much ambiguity left to the user.
| Note | In the implementation of software, certain terms are often used to refer to various stages of development. The more complex and complicated the tool, the more important these terms become. Pre-Alpha: Functional software which, while it might not support every feature to be found in the finished product, will have the ability to have this functionality added without destroying previous work. Alpha: All features in and supported, but some functionality will need refinement. Beta: All aspects of the software complete, including any UI, but bugs might be present and should be dealt with before release. Often distributed to select users for testing. Release Candidate: Usually only used in situations where a tool will be distributed to a team or to the public. All known major bugs eliminated, but possible issues might come up when put into full production use. Release: The finished software. |
The first problem we will address is that of all the grass facing the same direction. This is easily addressed by adding a new rand statement to our script, and assigning that value to the Y rotation of each blade. We add this to the script in the same section as the random translation values. See Example 6.45.
Example 6.45: Randomly rotating the grass.
// Generate Random Values for translation float $randomX = `rand -5 5`; float $randomZ = `rand -5 5`; float $randomRotation = `rand 0 360`; setAttr ($createdGrass[$i] + ".translateX") $randomX; setAttr ($createdGrass[$i] + ".translateZ") $randomZ; setAttr ($createdGrass[$i] + ".rotateY") $randomRotation;
Although we could put in a check to generate and assign a rotation value based on whether the user is working in radians or degrees, it is largely irrelevant, because the generated number is random.
Note: On the CD
The text for this script is found on the companion CD-ROM as /project_02/v09/generateGrass.mel.
Now, the generated grass appears to be much more realistic and organic, as can be seen in Figure 6.17.

Figure 6.17: Organic-looking grass.
While it would be a simple matter to add the capability for an end user to control the rotation amount, there is no reason to do so. Unless the grass is being created for a very specific groomed location, such as a sports field, the grass rotation should be completely random. In the rare instances that the grass does need to face in a specific direction, those changes can easily be put directly into the script. This is one of the major advantages of a script over a compiled plug-in; the quick changes that can be made, both during creation of a tool, as well as by an end user familiar with MEL.
The next issue we will tackle is that of the distribution of the grass. While the density argument is functional now, we can tweak its behavior so that the user does not have to guess what a good number of objects to create is. We will do this by converting the $density variable into a percentage value.
Before we make any changes to our code, we should do some experimentation within Maya using our existing code. Create a small patch of grass with a variety of density settings. Our goal is to find the number that achieves the maximum density that will reasonably be requested by a user. The important thing is to not go overboard with our density values. In Figure 6.18, we see a patch of grass created with the settings:
Density: 100
Minimum X; “1
Maximum X: 1
Minimum Z: “1
Maximum Z: 1
Style: Normal
See Example 6.46.
Example 6.46: The command used to create the grass seen in Figure 6.18.
generateGrass normal 100 1 1 1 1;
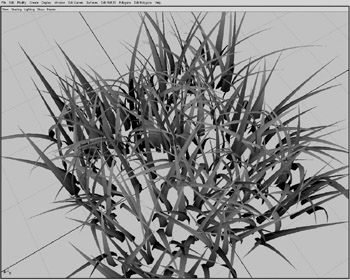
Figure 6.18: A density setting of 100.
The amount of grass is much too light, so let s try a significantly larger number a blades, seen in Figure 6.19, which was created with the following settings :
Density: 1500
Minimum X; “1
Maximum X: 1
Minimum Z: “1
Maximum Z: 1
Style: Normal
See Example 6.47.
Example 6.47: The command that gives the results in Figure 6.19.
generateGrass normal 1500 1 1 1 1;
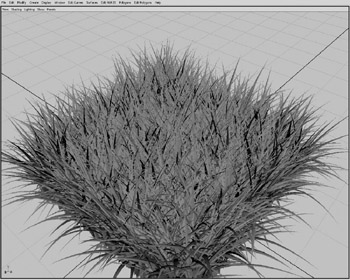
Figure 6.19: A density of 1500.
This is obviously much too dense to look real. There is a simple but laborious task ahead of us: we must go through multiple iterations of the tool, each time attempting to narrow in on a number for the density argument that works well. After some experimentation, we discover that a density value of 325 seems to work well, as seen in Figure 6.20. While a somewhat arbitrary choice, occasionally in the design of tools, choices have to be made by the software engineer.
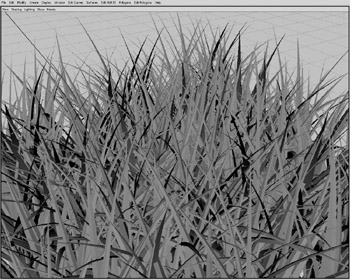
Figure 6.20: Density of 325.
To bring this number, our new maximum density value, into the equation determining the number of blades of grass to create in the for loop, we will now use the density value as a percentage value, instead of an explicit number. We will divide our passed density argument by 100, and multiply 325 by the result. See Example 6.48.
Example 6.48: Implementing our new density equation.
int $amountToCreate = ((($maxX-$minx) * ($maxZ-$minZ)) * (($density/100) 325));
Now, if we pass the script a density value of 100, it creates 325 blades of grass in each 1x1 square. If we pass a density value of 50, no blades will be produced, which is curious .
Whenever MEL computes a floating-point number, if all the contributing factors are integers, the result, while stored as a floating point, is an integer value. For example, when we divide 100 by 50, we get .5, but since both 100 and 50 are integers, this result is converted to 0. To rectify this, we assure that at least one number involved in the equation is a floating point. See Example 6.49.
Example 6.49: Whenever we want to calculate a floating point and use an explicit value in the equation, we must use it as a floating point rather than an integer.
int $amountToCreate = ((($maxX - $minx) * ($maxZ - $minZ)) * (($density/100.0) * 325));
| Tip | The text for this script is found on the companion CD-ROM as /project_02/v10/generateGrass.mel. |
Now, we can create grass of any size and be assured that the density of the grass created is irrelevant to the dimensions called. We can confirm this by making two separate calls to generate grass. The first we will create a 2x2 patch, with the density set to 50%. See Example 6.50.
Example 6.50: Issuing our command with 50% density.
generateGrass normal 50 1 1 1 1;
Giving us the result in Figure 6.21, which has 650 pieces of grass, or 162.5 per 1x1 square.

Figure 6.21: A 1x1 patch of grass with our new density setting at 50%.
Then, in a new file, we make a call to create a 6x6 patch of grass, again with the density set to 50%. See Example 6.51.
Example 6.51: Making a larger patch of grass also at 50%.
generateGrass normal 50 3 3 3 3;
Giving us the results in Figure 6.22, which produces 5850 pieces of grass, again creating 162.5 blades per 1x1 square.
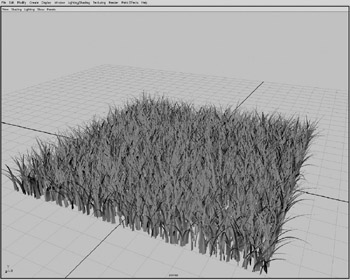
Figure 6.22: A 6x6 patch of grass with our new density setting at 50%.
The best aspect of using this method is it still does not take away the ability to have more than 325 pieces of grass per square unit. A user can overcrank the density value, creating 150%, 200%, or even 1000% density if he chooses to. The only limitation is the capabilities of the hardware on which an artist is working
The next issue to be addressed is that of controlling the level of detail for the blades of grass. Leaving out the detail call was not so much an oversight as it was a specific choice to serve as an example of how a script can easily evolve during implementation. We had put the detail feature in the design, but we could just as easily added a feature that became evident during the programming of the tool.
There are multiple ways to deal with the detail problem:
-
Explicit declaration of detail.
-
Level of Detail Groups, similar to how game developers create levels of detail.
-
Leaving the polyCone node intact and adjusting the Y subdivisions on-the-fly .
While each of the three methods has its advantages, for now, we will keep things simple, and just use the first method and explicitly declare the detail of our created grass. The other two solutions are viable , but require a more advanced level of programming than we currently possess.
We could simply ask the user to pass a number to the tool to use as a subdivision in the polyCone , but we raise all the same issues we had with the density argument. Leaving that much control to the artist is both confusing and unnecessary. Instead, we will pass a value of low, medium, or high.
The first step is to add the argument to pass the user s level of detail choice to the tool. We will have to add the argument to both the generateGrass global procedure and the generateBlade local procedure. We will place the argument call between the style and density arguments of the generateGrass procedure. See Example 6.52.
Example 6.52: Adding the detail argument.
global proc generateGrass (string $style, string $detail, int $density, float $minX, float $maxX, float $minZ, float $maxZ)
The second step is the call to generateBlade function. See Example 6.53.
Example 6.53: Adding the same argument to the grass blade creation procedure.
proc generateBlade (string $style, string $detail)
The only change we have to make to the generateGrass procedure is to pass the detail call to the generateBlade function. See Example 6.54.
Example 6.54: Adding the argument call to our command in the loop.
. . . $createdGrass[$i] = `generateBlade $style $detail` ; . . .
The changes that we need to the generateBlade function are much more extensive . We need to replace the subdivisionsY flag value with a variable, making sure to declare it at the beginning of the file. We then nest a switch statement inside each of our presets for grass style, so that we can set appropriate detail for each. Obviously, even the high-detailed short grass does not need to be as detailed as the medium-detailed long grass. Again, use of the switch statement allows a user to add possible arguments, such as an ultra -high detail level, with little trouble. See Example 6.55.
Example 6.55: Implementation of our detail argument in the creation step.
proc generateBlade (string $style, string $detail) { // Declaration of variables float $grassRadius = `rand 0.02 0.06`; float $grassHeight ; float $grassCurl ; float $envelopeVal ; float $grassDetail ; // Change height and bend values to accommodate // user input. switch ($style) { case "short": { $grassHeight = `rand 0.4 0.8`; $grassCurl = `rand 0 (-.1)`; $envelopeVal = `rand 0.9 1.0`; switch ($detail) case "low" : $grassDetail = 1; break; case "medium" : $grassDetail = 3; break; case "high" : $grassDetail = 5; break; } case "normal": { $grassHeight = `rand 0.7 1.2`; $grassCurl = `rand (-0.25) (-1.0)`; $envelopeVal = `rand 0.6 1.0`; switch ($detail) case "low" : $grassDetail = 3; break; case "medium" : $grassDetail = 5; break; case "high" : $grassDetail = 10; break; } break; case "long": { $grassHeight = `rand 1 1.6`; $grassCurl = `rand (-0.35) (-1.25)`; $envelopeVal = `rand 0.5 1.0`; switch ($detail) case "low" : $grassDetail = 4; break; case "medium" : $grassDetail = 7; break; case "high" : $grassDetail = 11; break; } break; case "very_long": { $grassHeight = `rand 2 3.5`; $grassCurl = `rand (-1) (-1.5)`; $envelopeVal = `rand 0.5 0.85`; switch ($detail) case "low" : $grassDetail = 5; break; case "medium" : $grassDetail = 8; break; case "high" : $grassDetail = 13; break; } break; default: { warning ("Type " + $style + " is unknown. Using default settings."; $grassHeight = `rand 0.7 1.2`; $grassCurl = `rand (-0.25) (-1)`; $envelopeVal = `rand 0.6 1.0`; switch ($detail) case "low" : $grassDetail = 3; break; case "medium" : $grassDetail = 6; break; case "high" : $grassDetail = 10; break; } break; } // Creation of Poly Cone string $blades[] = `polyCone -radius $grassRadius -height $grassHeight -subdivisionsX 3 -subdivisionsY $grassDetail -subdivisionsZ 0 -axis 0 1 0 -texture 1 -constructionHistory off ` ; | On the CD | The text for this script is found on the companion CD-ROM as /project_02/v11/generateGrass.mel. |
Now, when we execute the script, we can define how much detail each blade has. This, combined with our revised density control, allows the user to construct a scene optimized for rendering speed, but also with a consistent look to the amount of grass. While the user has to create the grass in separate passes to create separate levels of detail, this is a minor hassle at best, and many artists will like the control over the look, as well as the ability to optimize rendering speed.
The final task we face is to overcome a limitation of Maya itself. You might notice, even when creating relatively small patches of grass, that Maya experiences a rather intensive slowdown and can become quite unstable. This is due to Maya s handling of scenes with large numbers of nodes. We are asking Maya to keep track of an obscenely large number of nodes at this point, so it is somewhat excusable, but should be rectified. We do this by again implementing the polyUnite command. However, rather than waiting until the end of the for loop, we will place a conditional if statement within the for loop to combine the objects in 3000 object groups. Because we will be creating a new object, we will have to reset the array holding the names of our created objects. Since we are currently using the for loop iterator $i to assign the name of the created object to the proper index, we will instead nest a size command within the index value. Since the size of an array is always one number larger than the last index value, using the size command in this way allows you to assign values to an array based on the size of the array, regardless of any outside factors. After the polyUnite command we clear the array, and assign our newly united object to the first index of the array so that it will then be combined in our next combine command. The use of the flushUndo command is to free up memory, which can become quite full and cause Maya to crash. See Example 6.56.
Example 6.56: Attempting to optimize memory usage.
// for loop to create multiple blades of grass for ($i = 0; $i < $density; $i++) { $createdGrass[`size $createdGrass`] = `generateBlade $style $detail` ; // Generate Random Values for translation float $randomX = `rand -5 5`; float $randomZ = `rand -5 5`; // Assign the random values to the translate values setAttr ($createdGrass[$i] + ".translateX") $randomX; setAttr ($createdGrass[$i] + ".translateZ") $randomZ; { string $united[] = `polyUnite -constuctionHistory off $createdGrass` ; clearArray $createdGrass; $createdGrass = $united; flushUndo; } } // Final Combine polyUnite -constuctionHistory off $createdGrass` ; flushUndo; | On the CD | The text for this script is found on the companion CD-ROM as /project_02/finished/generateGrass.mel. |
The final polyUnite command, which is outside the for loop, combines any blades created that did not meet the if condition, such as if less than 3000 total objects are requested, or if the number created is not evenly divisible by 3000. Again, we use flushUndo to clear memory.
At this point, our script can be considered complete. The final results can be seen in Figure 6.23. While there is more that could be done, a very wise man once said that creative work is never finished, just abandoned . Because our tool now satisfies all the requirements of our design, we can call the grass generator done.
Figure 6.23: The results.
Project Conclusion and Review
This project introduced us to real-world uses of conditional statements, the use of loops , and using separate procedures to aid in the programming process. We also learned how to overcome problems that might arise from the limitations in Maya. While there are third-party commercial solutions that can produce grass-like structures, we can use MEL to produce similar effects without adding to our production costs.
Project Script Review
proc string generateBlade (string $style, string $detail) { // Declaration of variables float $grassRadius = `rand 0.02 0.06`; float $grassHeight ; float $grassCurl ; float $envelopeVal ; float $grassDetail ; // Change height and bend values to accommodate // user input. switch ($style) { case "short": { $grassHeight = `rand 0.4 0.8`; $grassCurl = `rand 0 (-.1)`; $envelopeVal = `rand 0.9 1.0`; switch ($detail) case "low" : $grassDetail = 1; break; case "medium" : $grassDetail = 3; break; case "high" : $grassDetail = 5; break; } break; case "normal": { $grassHeight = `rand 0.7 1.2`; $grassCurl = `rand (-0.25) (-1.0)`; $envelopeVal = `rand 0.6 1.0`; switch ($detail) case "low" : $grassDetail = 3; break; case "medium" : $grassDetail = 5; break; case "high" : $grassDetail = 10; break; } break; case "long": { $grassHeight = `rand 1 1.6`; $grassCurl = `rand (-0.35) (-1.25)`; $envelopeVal = `rand 0.5 1.0`; switch ($detail) case "low" : $grassDetail = 4; break; case "medium" : $grassDetail = 7; break; case "high" : $grassDetail = 11; break; } break; case "very_long": { $grassHeight = `rand 2 3.5`; $grassCurl = `rand (-1) (-1.5)`; $envelopeVal = `rand 0.5 0.85`; switch ($detail) case "low" : $grassDetail = 5; break; case "medium" : $grassDetail = 8; break; case "high" : $grassDetail = 13; break; } break; default: { warning ("Type " + $style + " is unknown. Using default settings."; $grassHeight = `rand 0.7 1.2`; $grassCurl = `rand (-0.25) (-1)`; $envelopeVal = `rand 0.6 1.0`; switch ($detail) case "low" : $grassDetail = 3; break; case "medium" : $grassDetail = 6; break; case "high" : $grassDetail = 10; break; } break; } // Creation of Poly Cone string $blades[] = `polyCone -radius $grassRadius -height $grassHeight -subdivisionsX 3 -subdivisionsY $grassDetail -subdivisionsZ 0 -axis 0 1 0 -texture 1 -constructionHistory off ` ; // Bring the bottom of the cone to ground level setAttr ($blades[0] + ".translateY") ($grassHeight * 0.5) ; // harden the edges of cone polySoftEdge -angle 1 -constructionHistory off ($blades[0] + ".e[0:59]") ; // go back to object mode // and ensure the cone is selected changeSelectMode object ; select replace $blades ; // make the blade thin; setAttr ($blades[0] + ".scaleX") 0.25 ; // Reset transformations and pivot point makeIdentity -apply true -translate true -rotate true -scale true $blades[0] ; makeIdentity -apply false -translate true -rotate true -scale true $blades[0] ; // add the bend deformer, capture the name to move it string $bend[] = `nonLinear -type bend -lowBound 0 -highBound 2 -curvature $grassCurl ` ; setAttr ($bend[1] + ".ty") 0 ; setAttr ($bend[0] + ".envelope") $envelopeVal ; // select the cone object and delete the history select replace $blades ; delete constructionHistory $blades ; return $blades[0]; } global proc generateGrass (string $style, string $detail, int $density, float $minX, float $maxX, float $minZ, float $maxZ) { // Declare Variables string $createdGrass[]; int $amountToCreate = ((($maxX-$minx) * ($maxZ-$minZ)) * (($density / 100.0) * 325)) ; // for loop to create multiple blades of grass for ($i = 0; $i < $amountToCreate; $i++) { $createdGrass[$i] = `generateBlade $style $detail`; // Generate Random Values for translation float $randomX = `rand -5 5`; float $randomZ = `rand -5 5`; float $randomRotation = `rand 0 360`; // Assign the random values to the translate values setAttr ($createdGrass[$i] + ".translateX") $randomX; setAttr ($createdGrass[$i] + ".translateZ") $randomZ; setAttr ($createdGrass[$i] + ".rotateY") $randomRotation; if (`size $createdGrass` > 3000) { string $united[] = `polyUnite -constuctionHistory off $createdGrass` ; clearArray $createdGrass; $createdGrass = $united; flushUndo; } } // Final Combine polyUnite -constuctionHistory off $createdGrass` ; flushUndo; } EAN: 2147483647
Pages: 101