Lesson 3: Controlling Access Through Restricted Groups
Lesson 3: Controlling Access Through Restricted Groups
In large environments where authority to create user accounts and add members to groups is broadly delegated, keeping strict control of the membership of highly sensitive groups can be difficult but essential for the security of your network. Membership in security groups provides user accounts with wide-ranging access to secure resources throughout the network. If users are accidentally (or otherwise) made members of security groups to which they shouldn't belong, they can exceed their authorization for using the system. Group Policy provides a mechanism for creating predefined restricted groups, which help ensure that users are not inappropriately added to sensitive security groups.
After this lesson, you will be able to
-
Understand the restricted groups mechanism
-
Use restricted groups to control security group membership
Estimated lesson time: 15 minutes
Applying Restricted Group Settings
Using restricted groups is simple: at each policy update interval, the actual membership of the security group is changed to match the membership list in the restricted group settings of the policy. Users who have been inappropriately added are removed, and valid users who have been removed are restored.
When you configure a group as a restricted group, new membership into the group can be revoked by the system at each Group Policy refresh interval, which by default is about every 90 minutes. Therefore, if a user is inappropriately added to a membership-restricted group, the membership will be revoked within 90 minutes.
To make membership changes to a restricted group, you change the membership in the GPO and let the application of Group Policy change the security membership. In this way, membership is changed throughout Active Directory uniformly rather than just in those areas you remember to directly change.
You can also enforce which groups the restricted group is a member of by including those groups in the policy setting on the Member Of tab in the GPO's Properties dialog box. However, the restricted groups feature adds only the restricted group to other groups it does not remove it from groups where it appears. To remove a restricted group from another group, you must remove the other group from the Member Of list in the restricted group's GPO, and then manually remove the restricted group from the containing security group.

In this practice, you limit the members of a restricted group. At Fabrikam, Inc., the only valid domain administrators are those working in the IT department. Membership in the Domain Admins group should be limited to members of the Information Technology Users group. When you are done, the members of the Information Technology Users group will be made members of the Domain Admins group at the next Group Policy refresh interval.
To create a restricted group
-
Click Start, point to Programs, point to Administrative Tools, and click Active Directory Users And Computers. The Active Directory Users And Computers management console appears.
-
Right-click domain.fabrikam.com, and choose Properties. The domain.fabrikam.com Properties dialog box appears.
-
Click the Group Policy tab.
-
Double-click Domain Security Policy. The Group Policies management console appears with the Domain Security Policy GPO opened.
-
Expand Computer Configuration, then Windows Settings, and then click Security Settings.
-
Right-click Restricted Groups, and click Add Group. The Add Group dialog box appears, as shown in Figure 3.7.
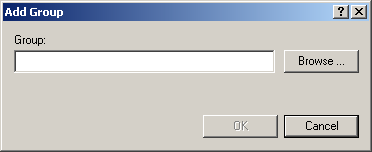
Figure 3-7. The Add Group dialog box
-
Click Browse. The Select Groups dialog box appears.
-
Select Domain Admins from the domain.fabrikam.com list, and then click OK to close the Select Groups dialog box.
-
Click OK to close the Add Group dialog box.
Domain Admins is now added to the list of restricted groups.
-
Double-click Domain Admins in the list of restricted groups. The Configure Membership dialog box appears as shown in Figure 3.8.
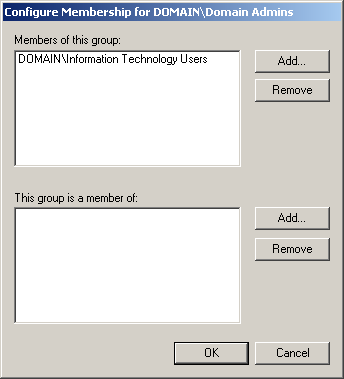
Figure 3-8. The Configure Membership dialog box for restricted groups
-
Click Add to open the Add Member dialog box.
-
Click Browse. The Select Users Or Groups dialog box appears.
-
Double-click Information Technology Users from the list, and click OK to close the Select Users Or Groups dialog box.
-
Click OK to close the Add Member dialog box.
-
Click OK to close the Configure Membership dialog box.
The Information Technology Users security group is now a member of the Domain Admins restricted group.
-
Close the Group Policies management console.
-
Click OK to close the domain.fabrikam.com Properties dialog box.
-
Close the Active Directory Users And Computers management console.

The following questions are intended to reinforce key information in this lesson. If you are unable to answer a question, review the lesson and try the question again. Answers to the questions can be found in the appendix.
-
What is the primary purpose of restricted groups?
-
What subtle difference exists between the way that restricted groups handle members and the way they handle being members of another group?
-
How should you create members of a restricted group?
Lesson Summary
-
Restricted groups are implemented by Group Policy to limit the membership of security groups according to strictly defined and controlled lists and to automatically correct membership discrepancies at the Group Policy refresh interval.
-
The restricted groups feature can be used to ensure that restricted groups are also members of other groups.
EAN: 2147483647
Pages: 82