| Few things are more moving than putting together pictures taken over the course of a lifetime. Looking at all the photos together, showing the passage of time, is a powerful experiencewhether you're celebrating a life that's unfolding or making a memorial video of a life well lived. Getting Organized The easiest way to make a family memory movie is to edit photographs together and add music. Here's how you get organized to make a photo slideshow family memory movie: Get your undigitized photos onto your computer. The more choice images you have to select from, the better your photo slideshow will be. Every picture tells a storyand a series of pictures tells a bigger, better story. Pull your photos out of family albums, scan them, and put them back in the albums. This can be a time-consuming process, but you can do it gradually over time. Digitizing is satisfying, almost mindless work that can be a relaxing chore on weekday night or other off-time, especially if you only do it in hour-long sessions. Pace yourself so you can enjoy the task itself and don't feel resentful about having to do this grunt work. Listening to music or the radio may make the work more enjoyable. As you scan and import the images into the computer, name the images and organize them in a Movie Maker collection (if you are using Movie Maker to edit your video). You can make one collection or several separate collections, organized chronologically or around a time period or theme (for example, you can organize your photos by decade or holidays).
When you have all your images in collections, you're ready to use Movie Maker or other editing software to create a slideshow movie, as described in the following sections. Tip You can find more details on importing photos in Chapter 3. And you can find more detailed instructions on making a slideshow movie at the Microsoft website, at www.microsoft.com/windowsxp/using/moviemaker/expert/northrup_02december02.mspx.
A Sample Slideshow Movie: A Memorial Figures 9.1 through 9.17 are some images from a memorial movie I helped make for a friend and her family when her father, a professor, passed away. During the last few months of his life, my friend's family recorded audio with him and took hundreds of photos of him, of family gatherings, and of visits from friends. Now that he is gone, all those memories are all the more precious. Figure 9.1. As a child. 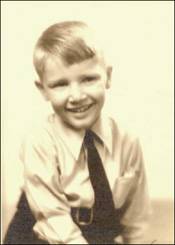
Figure 9.2. His parents. 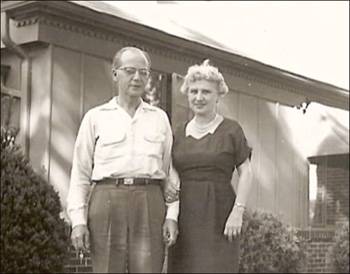
Figure 9.3. During the war. 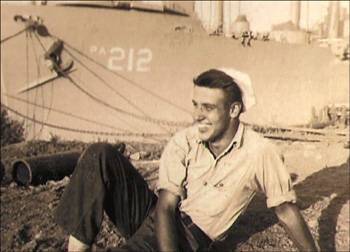
Figure 9.4. Vintage film from postwar France. 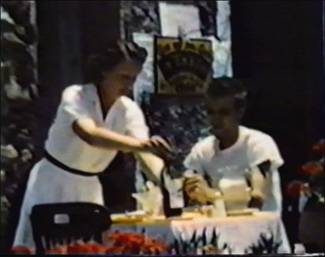
Figure 9.5. The Paris years. 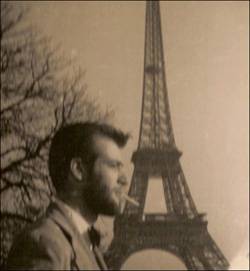
Figure 9.6. More from the Paris years. 
Figure 9.7. With his future bride. 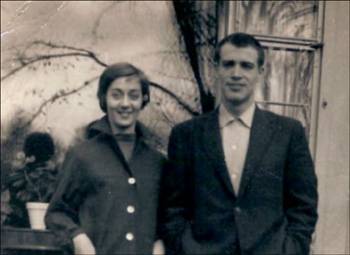
Figure 9.8. Marriage. 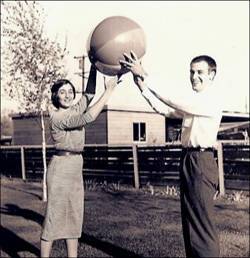
Figure 9.9. Holiday photo. 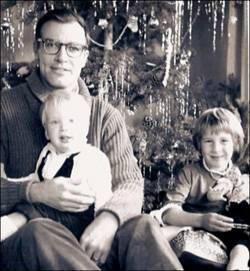
Figure 9.10. The professor at his desk. 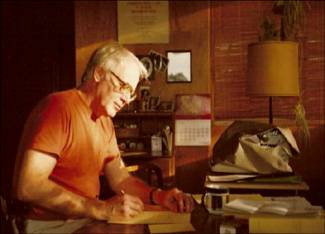
Figure 9.11. At the same desk many years later. 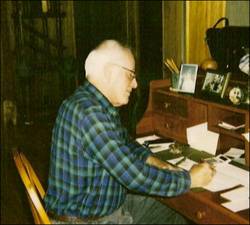
Figure 9.12. A trip to Russia. 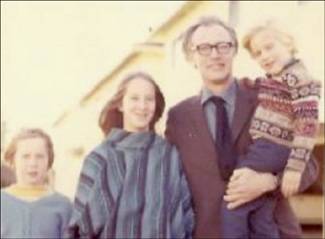
Figure 9.13. With his grandchildren. 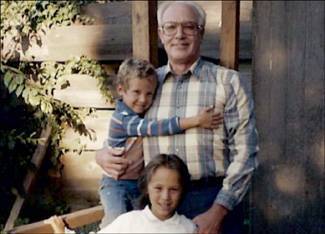
Figure 9.14. With his daughter on his birthday. 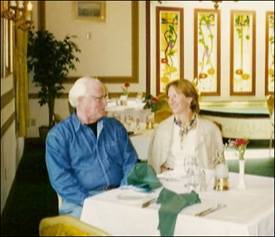
Figure 9.15. With a friend. 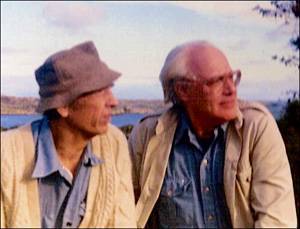
Figure 9.16. In the garden. 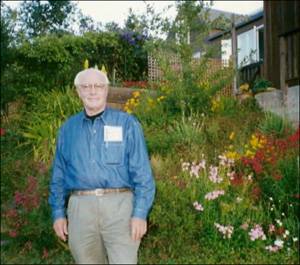
Figure 9.17. Memorial DVD Menu. 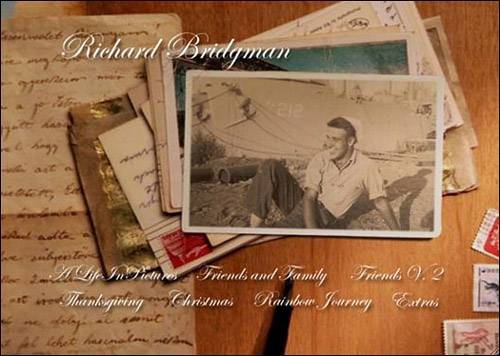
To make this video, we scanned hundreds of old family photos, imported digital photos, recorded audio interviews, imported old film footage from the 1940s, and edited all the elements together in a series of slideshows, audio, and video. All the work paid off in the three-DVD set we made. Adding Motion to Photos in Your Slideshow Movies Want to make an awesome slideshow movie that looks more like a video? While a Movie Maker slideshow movie is easy to create, it still seems a bit like, well, a slideshow. To make a cinematic slideshow, you can add motionpans and zoomsto your photos. This adds a lot of life to your slideshow. This is the same technique that PBS filmmaker Ken Burns's popular documentaries use to create entire programs, although his films are also interspersed with interviews. (Although filmmakers have used this technique for decades, many people now think of panning and zooming across photos as the "Ken Burns effect.") You can view video trailers of Ken Burns's programs at www.pbs.org. Or you can rent his documentaries (on topics such as baseball, jazz, and the U.S. Civil War) to see how powerfully you can use this technique. Although Movie Maker doesn't offer this feature, you can easily add motion to your photos by using Microsoft Photo Story 3 (see Figure 9.18). You can download a copy at www.microsoft.com/windowsxp/using/digitalphotography/photostory/default.mspx. Figure 9.18. Microsoft's Photo Story 3 website. 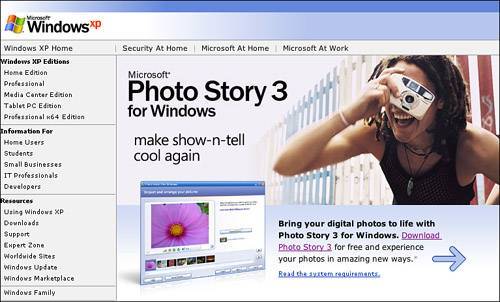
You can use Photo Story 3 alone to make a video CD (that plays on a DVD player) or to import finished Photo Story movies into Movie Maker for further editing. In addition, most of the advanced editing software programs listed in Chapter 10, "Resources for Learning," can also add motion to your photos. You can see online demos of these products for more examples of what adding motion to your video can add to your movie. You'll be surprised at how much entertainment value you get from adding motion to photos in a slideshow. |
Editing Photo Slideshow Memory Movies To edit a slideshow movie in Movie Maker, you first need to import your scanned photos on your computer and place them in a Movie Maker collection. To do so, you follow these steps: Tip Movie Maker's AutoMovie is great for making photo slideshows with music. In AutoMovie, you can select the Movie Video setting if you want Movie Maker to time your slides to the pace of the music, which adds a professional touch to your movie. See Chapter 3, "Editing Basics: Movie Maker and More," for more detailed information about AutoMovie.
1. | In the Movie Tasks pane, in the Capture Video section, select Import Pictures and then select the photos you want to import.
| 2. | When Movie Maker imports your photos, it automatically makes each one into a fivesecond video clip.
| 3. | After you have imported all the photos you want to use, drag the photos into the order in which you want them in the Storyboard view at the bottom of your screen. You can edit the length of the clips if you want to by using the Timeline or Storyboard view.
| 4. | If you want to add music, use Import Audio or Music under Capture Video (in the Movie Tasks pane) to add it to your collection.
| 5. | Drag the music into the storyboard. If you want to move the music around, select the Timeline view to control the music more easily.
| 6. | If you like, add titles, effects, and transitions.
| 7. | Preview your movie.
| 8. | When you have all your clips and music in the order and length you want them, save and share your movie.
|
|