Running Macros
![]() There are three standard methods for running a macro. First, you can run a macro by selecting it from the list of available macros in the Macros dialog box. In the Macros dialog box, select the name of the macro you want to run and then click the Run button.
There are three standard methods for running a macro. First, you can run a macro by selecting it from the list of available macros in the Macros dialog box. In the Macros dialog box, select the name of the macro you want to run and then click the Run button.
The other two methods are to press a keyboard shortcut assigned to a macro and to click a toolbar button created for a macro.
Creating Keyboard Shortcuts
Key commands such as Ctrl+C are the oldest and most common shortcuts to access software features, especially for displaying dialog boxes or performing some quick action. Unfortunately, as more and more keyboard shortcuts are assigned to software features, fewer of these simple combinations are left over to be used for macros.
In Microsoft Project, a keyboard shortcut for a macro must be a combination of the Ctrl key and a letter. Because Microsoft Project has many built-in keyboard shortcuts, the only letters available for macro shortcuts are A, E, J, M, Q, T, and Y.
You can assign a keyboard shortcut to a macro when you record it, as described in "Creating Macros" earlier in this chapter. You can also assign a keyboard shortcut to a macro any time after you create it by using the Macro Options dialog box.
Follow these steps to open the Macro Options dialog box:
-
Click Tools, Macro, Macros.
-
In the Macro Name list, click the name of the macro you want to modify.
-
Click the Options button.
The Macro Options dialog box appears (see Figure 27-3).
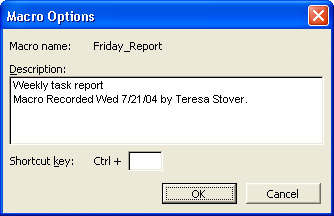
Figure 27-3: Change a macro's description or shortcut key with the Macro Options dialog box. -
Add a shortcut key combination and then click OK.
You can also edit the macro description if you want.
Tip Use keyboard shortcuts for frequently used macros To gain the most advantage of the quick access provided by keyboard shortcuts, assign them to frequently used macros that perform simple tasks such as opening a dialog box.
Creating Toolbar Buttons
The most common shortcut for running a macro is to create a toolbar button for it. This is true for the following reasons:
-
You don't have to memorize a key combination.
-
You can display the name of the macro as part of the button.
-
You can add it to both a menu and a toolbar, and you can group it with other buttons that are related in some way.
Note Customize menus just like toolbars Beginning with Microsoft Project 2000, menus are treated just like toolbars; you can add, modify, or even delete menus and menu commands as desired.
A macro is not associated with a toolbar button when you record it. Instead, you actually customize the Microsoft Project interface by using the Customize dialog box.
Follow these steps to create a new toolbar button for a macro:
-
Click View, Toolbars, Customize. You can also simply right-click in the toolbar area and then click Customize on the shortcut menu.
The Customize dialog box appears.
-
Click the Commands tab and then click All Macros in the Categories list (see Figure 27-4).
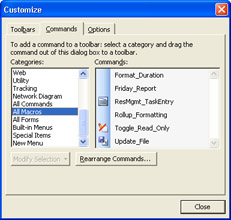
Figure 27-4: Open the Customize dialog box to choose a macro to add as a toolbar button. -
Click the name of a macro in the Commands list and then drag it to the desired location on any toolbar or menu (see Figure 27-5).

Figure 27-5: Add your macro to any toolbar or menu in Microsoft Project.
When you create a toolbar button for a macro, the button initially displays just the name of the macro. You can modify the new button in many ways, including renaming it, assigning an image to it, or changing its display style. You can even edit the image used for a button or draw your own.
Follow these steps to assign an image to the button:
-
Click View, Toolbars, Customize.
-
While the Customize dialog box is open, click the toolbar button for which you want to display an image.
When the Customize dialog box is displayed, clicking a toolbar button doesn't run the macro or command; instead, it selects the button. When selected, the button has a black border.
-
In the Customize dialog box, click the Commands tab.
-
Click the Modify Selection button.
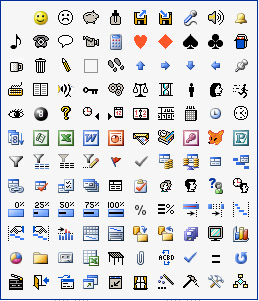
-
Point to Change Button Image and then click the graphic you want to use for your selected toolbar button.
-
Click the Modify Selection button again and then click Default Style.
The button displays the image you selected, but the name of the macro appears only as a ScreenTip when you move the mouse pointer over the button.
Note Change the button name The Name box on the Modify Selection menu is used for both the caption and the ScreenTip of the button you're modifying. You can change this text to whatever suits you without also changing the name of the macro itself.
Cross-References For more information about customizing Microsoft Project toolbars and menus, see Chapter 26, "Customizing the Microsoft Project Interface."
EAN: 2147483647
Pages: 268