What to Do When Things Go Awry
Given the complexity of Windows, the ambitious scope of current programs, and the multitude of potentially conflicting hardware devices that Windows has to support, it's almost inevitable that some component of your system, at some time, will not work exactly the way you expect or intend. When that moment of perplexity arrives, you'll need to know a few basic troubleshooting procedures.
Using the Help File's Troubleshooters
The Help text supplied with Windows 2000 includes troubleshooters for a number of common problems, including problems with networks, modems, printers, and displays. To see which troubleshooters are available, choose Help from the Start menu. Click the Contents tab in the main Help document that appears, click the Troubleshooting And Maintenance topic, and then click Windows 2000 Troubleshooters. The Help text for this topic includes a link to each of the available troubleshooters. (You'll also find troubleshooting buttons in many of the Windows 2000 dialog boxes.)
Each of the Help file's troubleshooters presents a branching series of questions about your current problem. At each step in the process, the troubleshooter suggests a remedy you can try. If the suggested remedy doesn't solve your problem, the troubleshooter asks another question or offers another suggestion.
The troubleshooters won't solve every problem that might arise, but they provide a good, interactive way to start your search for help.
Using Microsoft's Online Help Resources
If your cry for help isn't answered by the Help file's troubleshooters or other local Help documents, the next place to shout is online. Choose Help from the Start menu and then click the Web Help button on the Help application's toolbar. From the list of links that appears, click Contact Product Support. On the next page that appears, click Microsoft Web Site. These actions take you to the home page of Microsoft's Product Support Services (PSS), shown in Figure 31-6. To get help on Windows, point to the All Products heading, and then choose Windows Family from the list that appears.
From the PSS home page, you can also get to Microsoft's Knowledge Base (see Figure 31-7), a database of help articles that have been compiled by PSS. You can search the Knowledge Base for useful information, either by entering a specific article number (if you know it) or by typing plain-English questions. To get to the Knowledge Base from the PSS home page, click Where Is The Knowledge Base (or another similar link, if the PSS home page has changed by the time you read this).
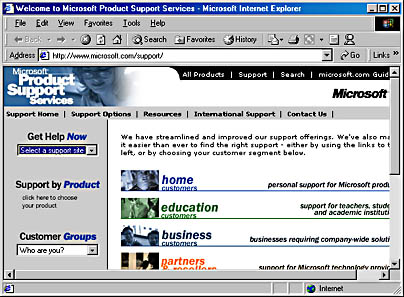
Figure 31-6. The Help application's Web Help button takes you here—to the home page of Microsoft's Product Support Services.
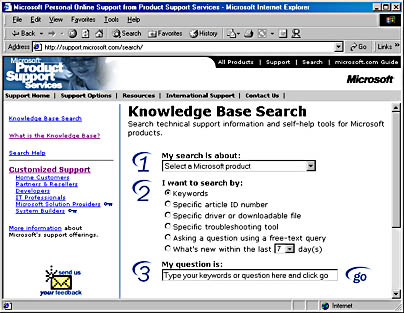
Figure 31-7. The Knowledge Base provides a wealth of technical help information.
What to Do if a Program Stops Running
If your immediate problem is that a program stops responding, or hangs, you'll want to close the program so that you can either try running it again or get on with something else. Windows provides a mechanism that lets you terminate an errant program without affecting other running programs or Windows itself. To remove a hung program, hold down the Ctrl and Left Shift keys and then press Esc. On the Applications tab of the Windows Task Manager window that appears, select the name of the program that has hung, and then click End Task.
Using Device Manager to Track Hardware Conflicts
If two hardware devices are both trying to make use of the same I/O address, direct memory access (DMA) channel, or interrupt request (IRQ) level, odds are one or both of those devices aren't going to work optimally. If you suspect that a resource conflict of this kind is causing some component of your system to malfunction, you can follow up on your suspicion with the help of Device Manager. For information about using Device Manager, see Chapter 25, "Managing Devices and Drivers."
Where Is System File Checker?If you have used Windows 98, you might be familiar with a tool called System File Checker, which could inform you if any of the operating system's critical files had been changed or deleted since they were installed. You won't find System File Checker in Windows 2000, because Windows 2000 performs this maintenance duty for you automatically. If any protected system file is changed, deleted, or overwritten, the operating system checks the current version's digital signature to determine whether the current version is correct. If it isn't, Windows restores the original file, prompting you for the Windows 2000 CD if necessary.
What to Do if You Get a Blue-Screen Crash
It's unlikely in Windows 2000 that you'll see the fabled "blue screen of death" (a message screen appearing on a solid blue background that informs you Windows has stopped running and must be restarted), but it's by no means impossible. Under certain conditions—such as when an errant device driver tries to write into an improper memory address—Windows 2000 might simply quit, after displaying a screen full of apparently inscrutable information.
If that happens, resist the temptation to turn off the power and throw the box in the river. Before you do anything else, read the blue screen. Look for an error number and some descriptive text. Write that information down. Then get out the Windows 2000 Professional Getting Started booklet that came with your Windows 2000 CD. In Appendix B, "Troubleshooting Specific Stop Errors," look for information about the error number your system reported. You'll find troubleshooting information there, as well as information about where to look for further help on the Microsoft Product Support Services Web site.
TIP
If you can't find a printed copy of Windows 2000 Professional Getting Started, look for an online copy of it, assuming you can restart your system. Open the Start menu, choose Help, and click the Contents tab. Open Introducing Windows 2000 Professional and click Getting Started Online Book. Finally, click the Windows 2000 Professional Getting Started link.
![]()
What to Do if Windows 2000 Doesn't Start
If Windows 2000 doesn't start at all, you can try the following remedies:
- Start the system in safe mode.
- Use the Windows 2000 Recovery Console.
- Repair your installation with an ERD.
- Reinstall Windows 2000.
Starting Windows in Safe Mode
Some circumstances—a resource conflict between peripherals, a problem with network settings, or a problem with display settings—might prevent Windows from starting in its normal mode. You might, however, be able to start Windows in safe mode. In safe mode, the operating system loads only the most essential drivers—for keyboard, mouse (but not a serial mouse), basic video, disk drives, and certain system services. Everything else is disabled. Once the system restarts in this scaled-down manner, you can open Control Panel, change display settings, check Device Manager for resource conflicts, and so on. After making changes of this sort, you can try again to start Windows normally.
To start Windows in safe mode, press F8 while Windows is starting. From the menu that appears, choose Safe Mode.
Safe Mode Options
In addition to the basic safe mode just described, the menu that appears when you press F8 offers the following options:
- Safe Mode With Networking. Adds networking drivers to the basic set of drivers enabled by safe mode.
- Safe Mode With Command Prompt. Works like safe mode,except that you end up at a command prompt instead of in Windows 2000.
- Enable Boot Logging. Creates a log file %windir%\ntbtlog.txt listing successful and failed driver initializations. Opening this file in any plain-text editor (Notepad, for example) might help you determine whether a specific driver is malfunctioning.
- Enable VGA Mode. Works like safe mode, except that a default VGA driver is installed instead of your own video card's basic driver. This mode is particularly useful if your system fails immediately after you have installed a new video adapter.
- Last Known Good Configuration. Doesn't start your computer in safe mode, although this option appears on the menu with the safe mode options. Instead, it starts Windows 2000 with the registry as it existed the last time you successfully started your system. Use this option if your registry appears to be corrupted. Also use it after a power failure or if someone turns your computer off without going through the normal shutdown procedure.
- Debugging Mode. Works like safe mode, except that Windows 2000 sends debugging information through a serial computer to another computer.
Using Recovery Console
The Windows 2000 Recovery Console program is a command-line program that you can start if Windows itself fails to start. Recovery Console requires that you log on with an administrator's password, and its use requires a high level of expertise. But it might be your best option in the event that Windows refuses to start even in safe mode.
You can perform a variety of administrative tasks from Recovery Console, including the following:
- Start and stop Windows 2000 services
- Enable or disable device drivers
- Format drives
- Create or delete partitions
- Read and write data on local drives (including NTFS volumes)
- Repair the system partition's boot sector
- Repair the master boot record
- Change file attributes
- Execute batch files
- Copy files (including compressed files) to your system from floppy disks or CD-ROMs
You can start Recovery Console by running it from the Windows 2000 setup disks. Alternatively, you can install Recovery Console on your system in advance.
To run Recovery Console from the Windows 2000 setup disks:
- Insert the Windows 2000 Professional Setup Disk 1 (a 3.5-inch floppy disk) in drive A. Or, if your system can boot from a CD-ROM drive, insert the Windows 2000 Professional CD in your CD-ROM drive.
- Turn on the computer and follow the screen prompts.
- Choose the option to repair your Windows 2000 installation.
- Choose the option to use Recovery Console.
To install Recovery Console in advance:
- Be sure you're logged on as an administrator.
- Insert the Windows 2000 CD.
- Say No when the Setup program asks whether you want to upgrade to Windows 2000.
- Open the Start menu, choose Run, and type
- Follow the instructions that appear.
d:\i386\winnt32.exe /cmdcons
(where d is the drive letter of your CD-ROM drive).
To run Recovery Console if you have installed it in advance, restart your computer. Then choose Recovery Console from the list of available operating systems that appears.
Repairing a Damaged Installation with an Emergency Repair Disk
If you have created an Emergency Repair Disk, the Windows Setup program might be able to use the information on that disk to repair a damaged installation. Follow these steps:
- Insert the Windows 2000 Professional Setup Disk 1 (a 3.5-inch floppy disk) in drive A. Or, if your system can boot from a CD-ROM drive, insert the Windows 2000 Professional CD in your CD-ROM drive.
- Turn on the computer and follow the screen prompts.
- Choose the options to repair your Windows 2000 installation.
- When prompted, insert your ERD and follow the on-screen instructions.
Reinstalling Windows 2000
If all else fails, you can reinstall Windows 2000. Note that if you have installed one or more service packs since your original installation of Windows 2000, you will need to reinstall those as well. And you will need to reinstall your applications once Windows 2000 is running again.
EAN: 2147483647
Pages: 317