Changing Fonts
| In the world of personal computers, the term font is used to refer to the typeface of your text, which is basically the "look" of each character you type. Each computer has a different set of fonts, depending on what software is installed and what printer you're using. Office detects which fonts you have available and enables you to select them in Word.
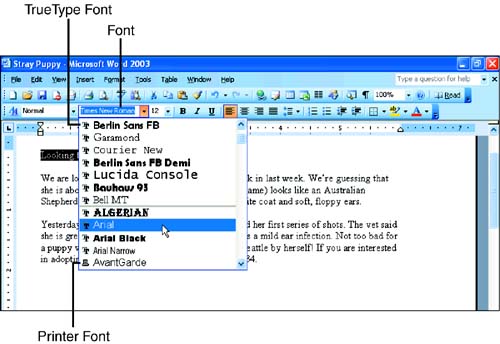
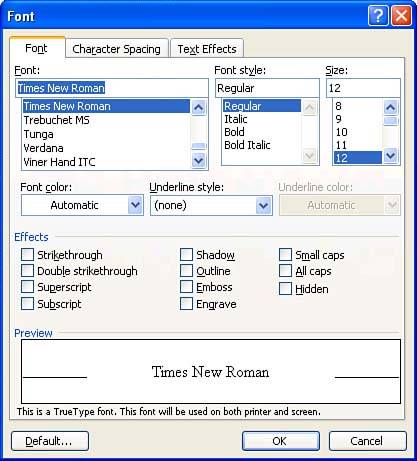
Selecting a Font Using the Font ListThe quickest way to change a font is to use the Font drop-down list in the Formatting toolbar, although you can also change fonts in the Font dialog box, as you'll see in a moment. To apply a font using the Font list, first select the text you want to change. Then click the down arrow to the right of the Font list in the Formatting toolbar. The list of fonts shows you what each font looks like (see Figure 6.1). Scroll down until you find the one you want to use, and click it. Figure 6.1. The Font list shows you what the fonts look like. Click the one you want to use. Word applies the font to the selected text. To see the change more clearly, click once to deselect the text. In Figure 6.2, the title was changed to the Arial font. Figure 6.2. Word applies the font you chose to selected text. Word places the fonts you use frequently above the double line in the Font list (refer back to Figure 6.1) so that you can get at them easily. Below the double line is an alphabetical list of all your fonts. The symbols to the left of the fonts in the Font list indicate the font type. The TT icon represents a TrueType font. These fonts come with Windows or other Windows applications, and they are the best ones to use because they look the same onscreen as they do when printed. TrueType fonts are also scalable, meaning that they can be flexibly resized. The printer icon represents a printer font. These fonts come with your printer. They print just fine, but their onscreen appearance may not match the way they print. Selecting a Font Using the Font Dialog BoxIf you'd like to change other font formatting at the same time as you're changing the font, you may find it more convenient to use the Font dialog box. The dialog box gives you a " one-stop shopping" experience.
To apply a font using the Font dialog box, follow these steps:
|

EAN: 2147483647
Pages: 315