Inserting PowerPoint Presentations and Slides
| You can, of course, use a no-frills approach to getting text and slides from a PowerPoint presentation into your Word documents. Simply use the standard Copy and Paste commands. If you go this route, your pasted data maintains no link to the source data in the PowerPoint presentation. If you want to get a little fancier, try one of the other options described here. If you want to export a PowerPoint presentation to a Word document, you can paste your slides and notes into the Word document as embedded or linked objects. If you embed the slides, they are not linked with the original presentation. When you double-click one of the slides, the PowerPoint interface appears in the Word window. In contrast, if you link the slides, double-clicking one of them in the Word document opens the source slide in PowerPoint. If you edit the slide in PowerPoint, you can tell Word to update it. Follow these steps to send your PowerPoint presentation to a Word document:
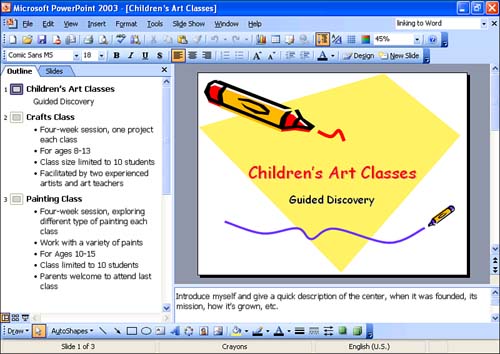
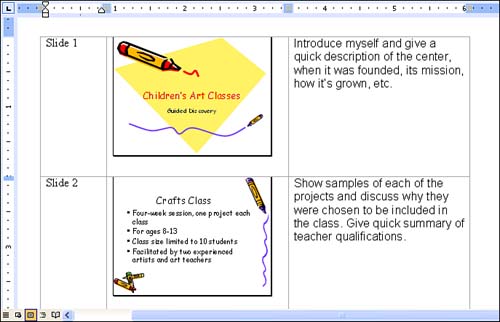
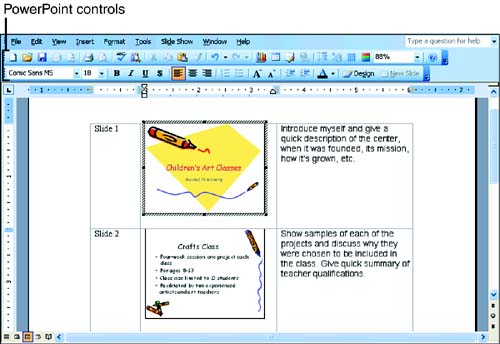
In a moment, the presentation appears in a Word document (see Figure 20.10). Note that Word has placed it in a table, so you can modify its appearance with all the techniques you learned in Hour 15. The Paste Link option was chosen in step 4 to create the document shown in Figure 20.10. Figure 20.10. The PowerPoint presentation appears in a Word table. If you chose Paste in step 4, each slide in the Word document is an embedded object. When you double-click a slide, the PowerPoint controls appear in the Word window, as shown in Figure 20.11. Figure 20.11. You can use PowerPoint controls to edit the embedded slides in your Word document. If you chose Paste Link in step 4, each slide in the Word document is an object that's linked to the original slide in PowerPoint. To edit the slide in PowerPoint, double-click it in the Word document. Unlike linked Excel data, linked PowerPoint slides don't update instantly when you modify them in PowerPoint. To update the slide object in Word, select it and press F9. To ensure that the most current version of the slides always prints, follow these steps:
In addition to exporting an entire PowerPoint presentation to a Word document, you can also insert individual slides, either as linked or embedded objects. Follow these steps to insert an individual slide in your Word document:
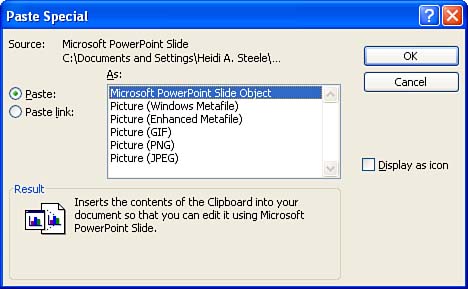
The Paste and Paste Link option buttons in the Paste Special dialog box function the same for PowerPoint slides as they do for Excel workbooks. Choosing Paste embeds the slide in the Word document, so you can double-click it to bring up the PowerPoint controls in the Word window and edit it there. The slides are not linked to the PowerPoint presentation they came from, so editing them in the Word window does not update them in PowerPoint, and vice versa. Choosing Paste Link pastes the slide into the Word document while maintaining a link to the source slide in the PowerPoint presentation, so if you modify it there, it will be updated in Word when you select it and press F9. (You can't edit the linked slide in Word.) Figure 20.13 shows a slide that was pasted from PowerPoint with the Paste Link option. Notice that it has selection handles around it, just as Excel data does when you use Paste Link (refer to Figure 20.3). Figure 20.13. Choose Paste Link in the Paste Special dialog box to link the pasted slide with the original slide in PowerPoint. If you move or rename the source presentation for a linked Word document or for individual slides that you pasted with the Paste Link option, you need to tell Word what the new location and/or filename is. To do this, follow these steps:
|


EAN: 2147483647
Pages: 315