Adding a Watermark to Your Document
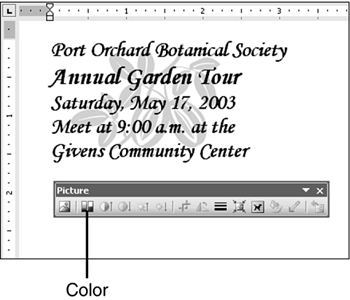
| If you want an image to appear behind your text, you might want to format it as a watermark. When you do this, Word washes out the colors in the image to make the text on top of it legible. Word provides two options for creating a watermark: You can use tools on the Picture toolbar to turn an image that's already in your document into a watermark, or you can use the Printed Watermark dialog box. One advantage of the first option is that it lets you put the watermark on some pages of a multiple-page document, but not on others. (In contrast, the second option automatically places the watermark on all pages of a multiple-page document.) An advantage of the second option is that it allows you to create a text watermark. Formatting an Image Already In Your Document As a WatermarkIf you just use the Behind Text text-wrapping option to send an image behind the text of your document but don't alter the colors of the image, the text on top of it may be hard to read. Figure 17.14 shows an announcement that's overlaid on top of a leaf image. The image was originally black and white, but formatting it as a watermark turned the black to a light gray. Figure 17.14. The text over the watermark is easy to read. Follow these steps to create a watermark:
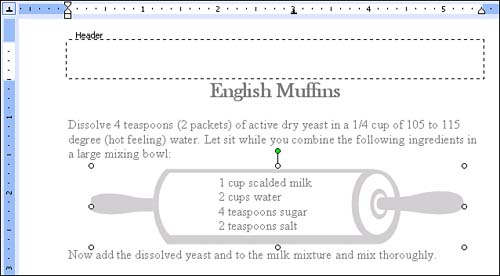
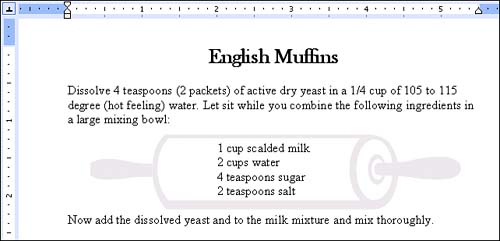
If you want a watermark to appear on every page of a multiple-page document (or on some pages, but not others), follow the previous steps, but insert the image in the header or footer. (Choose View, Header and Footer and click in the header or footer area before inserting the image.) The image can be much bigger than the default header or footer area. In fact, you can drag it out of the header or footer area so that it appears over the document text. In Figure 17.15, the selected clip art is formatted with the Behind Text and Washout options. The image is still inserted in the header, even though it has been dragged down underneath the header area. Figure 17.15. Put the watermark in the header or footer if you want it to print on more than one page. Figure 17.16 shows the same document in Print Layout view so that you can see how the watermark will look when the document is printed. Figure 17.16. The watermark in this figure was placed in the header. If you want the watermark to appear on some but not all pages of your document, divide your document into sections and only insert the watermark in the header or footer of the sections in which you want it to appear. For more information about creating section breaks and varying your headers and footers, refer to Hour 8, "Formatting Pages." Adding a New WatermarkIf you want a text watermark, or if you haven't yet inserted the image that you want to format as a watermark, you can use the Printed Watermark dialog box. This method automatically adds the watermark to every page, and it allows you to insert text watermarks as well as an image. To use this approach, follow these steps:
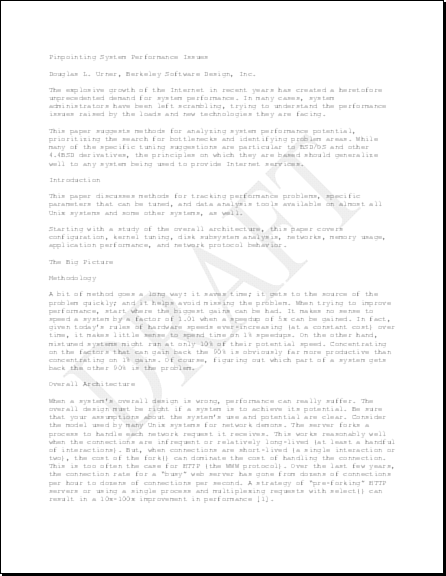
Figure 17.18 shows a document in Print Preview that includes the word DRAFT as a text watermark. Figure 17.18. Word handles the formatting of text or image watermarks for you. |

EAN: 2147483647
Pages: 315