| At times you may want to print form letters , labels, or envelopes for some of the people in your data source, but not others. If you want to send a form letter to clients who live in Seattle, for example, you can tell Word to merge only those addresses that contain Seattle in the City field. You indicate which group of records you want to merge by defining a filter . Follow these steps to merge only some of the records in your data source: -
If you're creating a new data source for your mail merge, stop when you have finished entering new addresses in the New Address List dialog box (see "Entering Records and Saving Your Data Source" earlier in this hour ), and skip to step 3. -
If you're using an existing data source for your mail merge, when you reach the step where the Mail Merge Recipients dialog box appears, click the Edit button. A dialog box that looks exactly like the New Address List dialog box except for its title bar appears. The dialog box title bar displays the path and filename of your data source. -
Click the Filter and Sort button to display the Filter and Sort dialog box, and click the Filter Records tab if it isn't already in front. -
Display the first Field list, and click the field that you want to use to filter the records. -
If necessary, display the list of choices under Comparison . If you want to look for records that contain one particular value in a field ( 94367 in the ZIP Code field or Port Orchard in the City field, for example), you can leave this option set to Equal To.  | Many of the choices in the Comparison list are useful only for number or date fields. For example, if you have a Salary field and you want to send a letter to only those employees who earn more than a particular amount, you would first select the Salary field in step 4. Then select Greater Than in the Comparison list, and type the cut-off salary in the Compare To box. |
-
In the Compare To box, enter the value you are looking for. In Figure 14.31, Word will merge only records that contain Port Orchard in the City field. Click the OK button to return to the previous dialog box. Figure 14.31. Define your filter in the Filter Records tab. 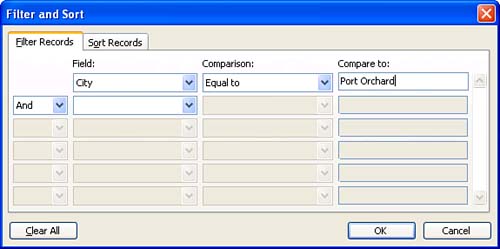 Your records will now be filtered with the rules that you defined. Continue with the mail merge process to run the merge.  | If you like, you can use additional rows in the Filter tab of the Filter and Sort dialog box to set up a more complex filter. You have to connect multiple rules by selecting And or Or from the list at the left edge of the dialog box. (The And operator will include only those records for which both rules connected by the And operator are true. The Or operator will include any record for which at least one of the two rules connected by the Or operator is true.) |
Opening a Main Document Whose Data Source Has Filter and/or Sort Options Set Remember that filter and sort options remain in effect until you clear them. (This is true whether you set the options in the Mail Merge Recipients dialog box or in the Filter and Sort dialog box.) It is especially important to remember this fact if you've set filter options, because until you clear the options (by clicking the Clear All button in the Filter tab of the Filter and Sort dialog box), you won't be able to merge all the records. When you open a main document that uses the data source, Word displays a rather cryptic message like the one shown in Figure 14.32 to remind you that filter and/or sort options have been set. Click Yes to open the data source with the filter and/or sort options still in effect. Click No to open the data source with all of the filter and/or sort information cleared. Figure 14.32. Word informs you that the data source you're opening has filter and/or sort options set. 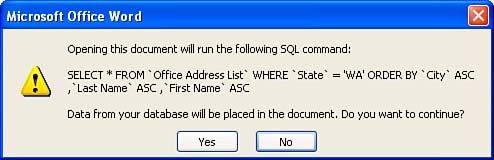  |