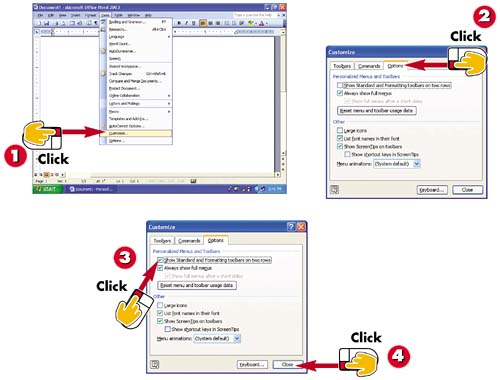
In the Customize dialog box, click the Options tab if it is not already in front.
Click the Show Standard and Formatting toolbars on two rows check box to mark it.
Click the Close button.
INTRODUCTION
If you want all the buttons in the Standard and Formatting toolbars to be visible, you can move the Formatting toolbar onto its own row. (The remaining tasks in this book assume that the Formatting toolbar is positioned on its own row, directly beneath the Standard toolbar.) You can also drag any toolbar out onto the Word window so that it floats over the window, or you can dock it on the left, right, or bottom edge of the window.
TIP
Docking a Floating Toolbar
If you release the mouse button when you're dragging a toolbar over the text area of the Word window, the toolbar will float over the window. To dock a floating toolbar on the edge of the window where it just was, simply double-click its title bar.
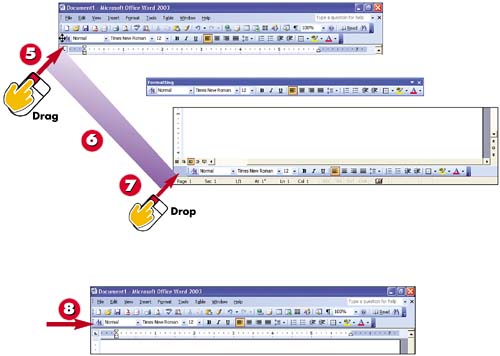
The Formatting toolbar appears underneath the Standard toolbar. To move it, point to the vertical line at the left end of the toolbar. The mouse pointer becomes a four-headed arrow.
Drag the toolbar into the text area of the window, and release your mouse button. The toolbar is now floating over the window.
Point to the title bar of the floating toolbar, and drag down. When the toolbar flattens out along the bottom edge of the window, release the mouse button to dock the toolbar.
Drag the Formatting toolbar back up to just beneath the Standard toolbar.
TIP
Resizing a Floating Toolbar
When a toolbar is floating, you can resize it to any rectangular shape you like by dragging one of its borders.
TIP
Separating the Standard and Formatting Toolbars
Another way to place the Standard and Formatting toolbars on separate rows is to click the Toolbar Options button at the right edge of either toolbar (see the previous task), and then click Show Buttons on Two Rows . To make the toolbars share a row again, click a toolbar's Toolbar Options button and choose Show Buttons on One Row .