Scheduling Tasks
Scheduling TasksWhen you manage systems, you'll often want to perform tasks such as updates or maintenance during nonbusiness hours. This way, you don't affect productivity and workflow. But who wants to come in at 3 a.m. on a Monday morning? Fortunately, using the Task Scheduler service, you can schedule one-time or recurring tasks to run automatically at any hour of the day or night. You automate tasks by running command-shell scripts, WSH scripts, or applications that execute the necessary commands for you. For example, if you wanted to back up the system drive every weekday at midnight, you could create a script that runs backups for you and records progress and success/failure in a log file. Utilities for Scheduling TasksIn Windows Server 2003, you can schedule tasks on local and remote systems using the Scheduled Task Wizard, the command-line AT utility, or the command-line SCHTASK utility. Each utility has its advantages and disadvantages. Scheduled Task Wizard provides a point-and-click interface to task assignment. This makes it easy to quickly configure tasks without having to worry about syntax issues. The disadvantage is that you don't have a central location that you can use to check for scheduled tasks throughout the enterprise and you have to access the wizard separately on each individual system that you want to configure. The command-line AT scheduler, on the other hand, doesn't have a friendly point-and-click interface. This means you'll have to learn the necessary command syntax and type in commands. The advantage to AT is that you can designate a single server as a task scheduler and you can view and set tasks throughout the enterprise on this single server. SCHTASKS is a command-line utility that is just as versatile as the Scheduled Task Wizard. You can use the utility to configure tasks to run on a specific schedule, set run permissions, and configure startup, log on, and idle processor commands. Like AT, you can also schedule tasks to run anywhere on the network. More important, SCHTASKS can be used to view status information for any scheduled tasks that are configured on a system, including those created using AT, SCHTASKS itself, and the Scheduled Task Wizard. The sections that follow discuss how to use the Scheduled Task Wizard. A complete discussion of AT and SCHTASKS is beyond the scope of this book. However, if you want to use SCHTASKS to examine scheduled tasks configured on any system on the network, simply type the following command at a command prompt: schtasks /query /s SystemName where SystemName is the name of the system that you want to examine, such as: schtasks /query /s corpserver01 Preparing to Schedule TasksThe Windows Server 2003 service that controls task scheduling is the Task Scheduler service. Task Scheduler logs on as the LocalSystem account by default. This account usually doesn't have adequate permissions to perform administrative tasks. Because of this, when you use the AT scheduler, you should configure Task Scheduler to use a specific user account that has adequate user privileges and access rights to run the tasks you want to schedule. You should also make sure that the Task Scheduler service is configured to start automatically on all the systems on which you want to schedule tasks. Set the Task Scheduler startup and logon account as specified in the sections entitled "Configuring Service Startup" and "Configuring Service Logon" in Chapter 3 , "Monitoring Processes, Services, and Events." A script should configure whatever user settings are necessary. This ensures that everything the script does is under its control and that domain user settings, such as drive mappings, are available as necessary. Scheduling Tasks with the Scheduled Task WizardYou can use the Scheduled Task Wizard to schedule tasks on the local or remote system to which you're currently connected. You access the Scheduled Task Wizard and currently scheduled tasks through the Scheduled Tasks folder. Accessing the Scheduled Tasks FolderYou can access the Scheduled Tasks folder on a local system with either of the following techniques:
You can access the Scheduled Tasks folder on a remote system by completing the following steps:
Viewing and Managing Existing TasksEntries in the Scheduled Tasks folder show currently scheduled tasks. You can work with entries in the Scheduled Tasks folder using any of the following techniques:
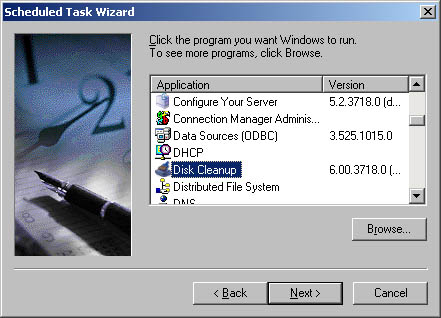
Creating Tasks with the Scheduled Task WizardTo schedule a task with the Scheduled Task Wizard, follow these steps:
|
EAN: N/A
Pages: 141