Registering Your Visitors
Registering Your Visitors
One effective strategy for finding out who is visiting your Web site is to create a registration form. Giving users the option to log in to your site with a username and password has advantages for both site owners and visitors. Visitors who register can subscribe to publications , or access premium content you create just for them. With the user information you receive from registration forms, you can tailor your site to address your visitors needs, and make it more effective.
Creating a Password Field
A password field is a text box in which a user enters a password. When you create such a text box by right-clicking it, and choosing Form Field Properties, you click Yes next to the Password field option. This allows the password that is entered to appear in the form of asterisks , rather than text characters , so unauthorized users cannot determine the password while it is being typed. Together with a text field that captures a user s login ID, a password field can be used to validate that the user has access to a protected area within your Web site (see Figure 15-10).
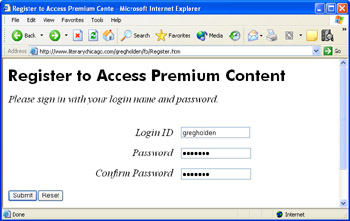
Figure 15-10: Password fields help register users to enter a restricted area of a Web site.
Enable Registration Quickly with the User Registration Template
Password fields can be combined with User IDs and other information to create a registration form. Such a form provides an entry point for users who want to access restricted or premium content online. FrontPage comes with a User Registration Template that makes it easy to create such a form.
In order for the registration form to work, you need to prepare the target Web to use the Registration Form Handler, which creates accounts for new users. To prepare the Web, open it in FrontPage, and choose Tools, Server, Permissions. (You can t do this on a file-based Web.) When the Permissions Administration form appears, click Change Permissions. When the Change Subweb Permissions form appears, click Use Unique Permissions For This Web, then click Submit. Turn off anonymous access for the subweb on its Site Administration form. Then you can create the user registration form as follows :
-
Choose File, New.
-
Click More Page Templates in the New Page section of the Task Pane.
-
Click the General tab.
-
Click User Registration, and click OK.
-
Replace the placeholder text in the registration form (see Figure 15-11) with your own text.
-
Click Save and save the file in the root directory of your FrontPage-based Web.
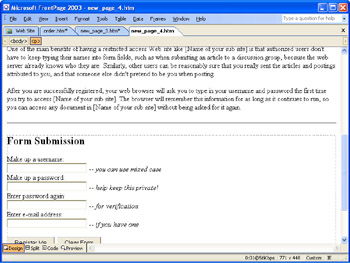
Figure 15-11: The User Registration template makes it easy to create a registration form.
The registration form must be saved to the root Web, not the Web site itself. For example, if the protected web site is http://Root/Subweb , the form must be saved in Root.
| Note | When FrontPage creates the user registration form, read the comments at the top of the form carefully . The first comment explains that some servers do not permit users to register themselves ” specifically , servers running Microsoft Windows 2000 or NT do not permit this. Ask your network administrator or Web host if the server that hosts your site allows user self-registration. |
Customize the Registration Results
Once you create a registration page, you need to configure FrontPage s Registration Form Handler so it will work on your Web. Follow these steps:
-
Right-click anywhere in the registration form.
-
Choose Form Properties from the shortcut menu.
-
Make sure Send To Other is selected.
-
Make sure Registration Form Handler is displayed, and click Options.
-
Click the Registration Tab, and type the name of your Web in the Web Name box (see Figure 15-12).
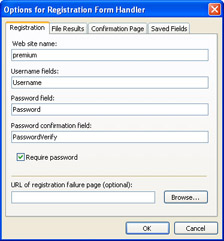
Figure 15-12: Point the Registration Form Handler to your user registration Web. -
If you want the user to verify a password by entering it twice, type a name for the confirmation field in the Password Confirmation Field box.
-
Enter the URL of a custom page to be displayed in case registration fails, if you want to create your own page ( otherwise FrontPage supplies a default page). Click OK.
-
Click the File Results tab, and type the URL of the file that you want to receive the registration data that the user submits.
-
Choose a desired format for the registration information from the File Format drop-down list.
-
Click Saved Fields, and check one of the Additional Information To Save check boxes, if you want to collect additional registration information from your visitors. Click OK.
| Caution | The name you type in the Web Name box must match the name of your Web exactly, including any hyphens or underlines, or the registration form handler will not process your registration form data. The safest way to get the name exactly right is to click the Open Web button and locate the Web on your computer or network to double-check the correct name. |
EAN: 2147483647
Pages: 179