| If you've done your homework (checked compatibility and size and dug up the case-opening instructions for your PC), installing a new power supply is one of the easier repairs around. You don't need to fiddle with driver CDs or Windows Update to get the new one working. But, you do need to be fairly handy with a screwdriver or nut driver. Typical power supplies are held in place by several screws that attach the power supply to the rear panel of the computer. The power supply also is supported by a shelf inside the case, and screws can secure the power supply to that shelf. To remove a power supply, follow these steps: -
Shut down the computer. If the power supply has an on-off switch, turn it off as well. -
Disconnect the AC power cord from the computer. -
Open the case to expose the power supply, which might be as simple as removing the cover on a desktop unit, or as involved as removing both side panels, front bezel, and case lid on a tower PC. Consult the documentation that came with your computer to determine how to expose the power supply for removal. -
Disconnect the power supply from the motherboard. -
Disconnect the power supply from all drives . -
Disconnect the power supply from the case and CPU fans. -
Remove the power supply screws from the rear of the computer case (see Figure 5.11). Figure 5.11. Mounting screws on typical ATX (left) and SFX-L (right) power supplies. 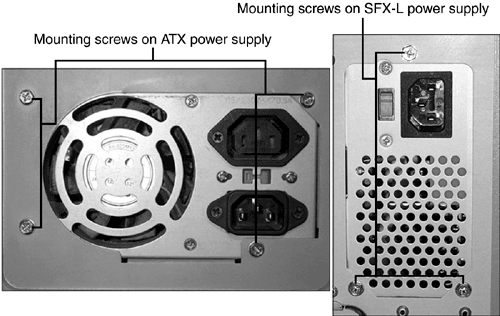 -
Remove any screws holding the power supply in place inside the case. (Your PC might not use these additional screws.) -
Disconnect the power supply switch from the case front (if present). -
Lift or slide the power supply from the case. Before installing the replacement power supply, compare it to the original, making sure the form factor, motherboard power connectors, and switch position match the original. To install the replacement power supply, follow these steps: -
Lower the power supply into the case. -
Connect the power supply switch to the case front (if present; this applies to Slimline/LPX power supplies). -
Attach the power supply to the shelf with screws if required. -
Attach the power supply to the rear of the computer case; line up the holes in the unit carefully with the holes in the outside of the case. -
Connect the power supply to the case, CPU fans, drives, and motherboard. -
Attach the AC power cord to the new power supply. -
Turn on the computer. On systems with both a front and rear power switch, turn on the rear one first. -
Boot the system normally to verify correct operation, and then run the normal shutdown procedure for the operating systems. If necessary, turn off the system with the front power switch only. -
Close the case and secure it. |