Using Layers and Masks in Animation
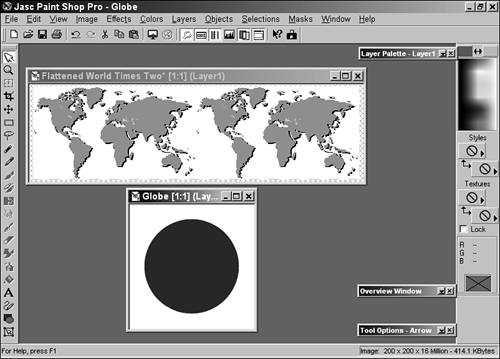
Using Layers and Masks in AnimationUsing Paint Shop Pro and Animation Shop together enables you to create amazingly complex animations. You can create an image in Paint Shop Pro, using layers, masks, and any of the effects you'd like. Then you can import the resulting file into Animation Shop as a multiframed animation. The following section shows you how to build a spinning globe animation. Putting Your Own Spin on the WorldYou'll need to find an image of the world that has been flattened. Many clip art sites and CD-ROMs have maps of the world and globes, so you should be able to find one similar to the one I'm using. If you're handy with the Paint Brush tools, you might even create your own. Figure 45.1 shows the image I'm using. Figure 45.1. The (pre-Columbus) world. This map shows the world flattened out. Actually, the map shows two copies of the world so that you can wrap the entire image around a sphere and not miss any parts or have any unruly seams. The world image I'm using is 524x150. To leave some space around the edges of the new image that I'll be creating, I'll open a new 200x200 image. What I'll be doing is cutting and pasting 150x150 portions of the flattened globe into different layers of the new image. Here are the general steps:
I'll walk through creating the first few layers:
That's how each layer is created. To create the second layer, follow these steps:
Create each new layer the same way until you have 15 World layers. You'll need all 15 to get the entire globe into the animation. Creating the AnimationTo save the image so that it can be opened in Animation Shop, I turned on all the layers except the Background layer. (I turned off most of them as I created each layer to avoid confusion.) Animation Shop adds each visible layer as a frame when it opens a PSP file. With the file saved, it's time to open it in Animation Shop. Before doing so, though, you must change the preferences in Animation Shop. In Animation Shop, choose File, Preferences, General Program Preferences and click the Layered Files tab (see Figure 45.4). Figure 45.4. Setting the Layered Files preferences in Animation Shop. Select the Keep Layers as Separate Frames option and click OK. This feature causes Animation Shop to open a multilayered file and keep each layer as a separate frame. It's a very powerful feature. With the preferences set up properly, it's time to open the image. Choose File, Open and browse to the file you saved in Paint Shop Pro. In my case, it's the Globe file (the final image I saved in Paint Shop Pro). To view the animation, click the View Animation button. If the image checks out, you can save it as a Web-ready animated GIF. Spreading Your WingsIf you'd like to practice some of the techniques I've described in this chapter, you can open the bttrfly.psp file that comes with Paint Shop Pro. Open it in Paint Shop Pro and examine each layer; you can open the file in Animation Shop as well to see how the final animation turned out. I suggest you create a few animations using images created in Paint Shop Pro. Start with a few layers and see how the process works; then attack a more ambitious project. Remember to have some fun and try different things as you work with both of these amazing programs. |
EAN: 2147483647
Pages: 350