Using Third-Party Filters
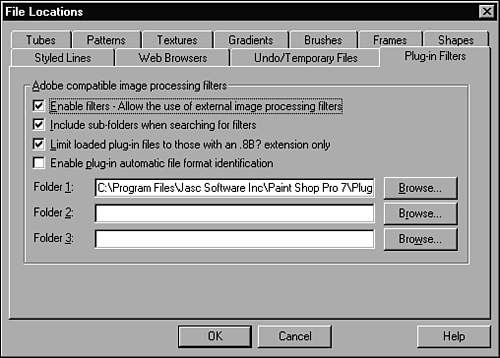
| Along with the filters that ship with Paint Shop Pro, numerous third-party filters (often referred to as plug-ins) are available. Installing Plug-insInstalling a plug-in package that can be used with Paint Shop Pro is a multistep process:
The options you can set in the Plug-in Filters tab are as follows :
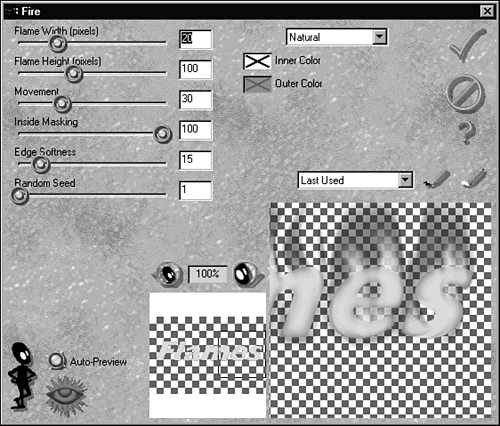
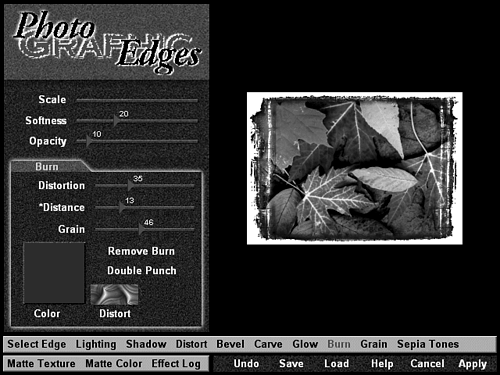
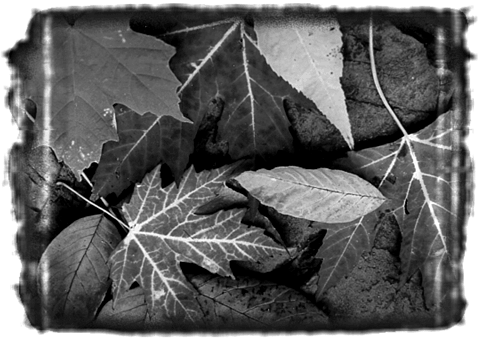
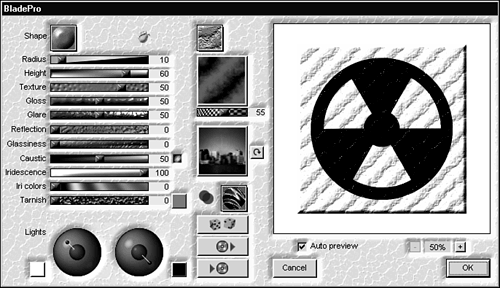
With your plug-ins installed and with Paint Shop Pro aware of where they are, you should be able to find them under Effects, Plug-in Filters. If you've installed Export filters, such as Ulead's SmartSaver, they will also be available under File, Export, Plug-in Export. Note that if you install filters while Paint Shop Pro is running, you might have to restart the program before the filters are available. Alien Skin's Eye CandyEye Candy has long been one of my favorite plug-ins. It has some cool filters, such as Inner Bevel, Chrome, Fire, and Smoke. Figure 40.8 shows the Eye Candy dialog box for the Fire filter. Figure 40.8. Alien Skin's Eye Candy dialog box Fire filter. The Eye Candy dialog boxes are pretty much the same for all filters. The only changes are the particular options you can set. One nice touch with the Eye Candy filters is the real-time preview window, which you can see in the lower-right corner of Figure 40.8. Figure 40.9 shows the result of applying both the Fire and Smoke filters. Figure 40.9. Alien Skin's Fire and applied to some text in Paint Shop Pro. I've seen many tips on applying a fire effect to text, but none comes close to the Eye Candy filter. You can get a demo of the Eye Candy filters at Alien Skin's Web site (http://www.alienskin.com). Auto F/X's Photo/Graphic EdgesAuto F/X is the creator of several amazing filter packages. One of my favorites is Photo/Graphic Edges. Starting with the latest version, Photo/Graphic Edges operates as a standalone as well as a plug-in. That is, you can run it separately as well as from within Paint Shop Pro. The Photo/Graphic Edges filter enables you to add complex edges to your photographs. You can also add certain effects, such as Sepia Tones, Grain, and Burns. Figure 40.10 shows the Photo/Graphic Edges dialog box. Figure 40.10. Auto F/X's Photo/Graphic Edges dialog box. Figure 40.11 is the result of adding both an edge and a burn effect to a photograph of some fall leaves . Figure 40.11. Auto F/X's Photo/Graphic Edges filter applied to a photograph of some fall leaves. Along with the various effects that can be applied to an image with the Photo/Graphic Edges filter, you can select from a large gallery of edges that come with the plug-in. Visit Auto F/X's Web site at http://www.autofx.com for more information and to download a demo of this cool plug-in. Flaming Pear's BladeProThere is a lot of fuss over this "new kid on the block" on the Paint Shop Pro Internet newsgroup ( comp.graphics.apps.paint-shop-pro ), and rightly so. This really cool plug-in enables you to add textures, lighting, and bevels to your images. All you need to do is select an object and call up the filter (Effects, Plug-in Filters, Flaming Pear, BladePro). Figure 40.12 shows a template I created for my Web site, GrafX Design (http://www.grafx-design.com). Figure 40.12. Radioactive symbol template created for the GrafX Design Web site. After selecting it with the Magic Wand tool, I used BladePro (see Figure 40.13) to add a texture called Lizard to the symbol. Figure 40.13. Flaming Pear's BladePro dialog box. The result of applying the texture can be seen in Figure 40.14. Figure 40.14. The Lizard texture from Flaming Pear's BladePro plug-in, applied to the radioactive symbol. In addition to the extra textures and environments supplied with BladePro, many more are available from the Flaming Pear Web site (http://www.flamingpear.com/) and from other sites springing up all over the Web. Typing BladePro into your favorite Internet search engine will undoubtedly turn up hundreds of sites where you can find more textures and environments for BladePro. Of course, you can play around with the settings of the various options to create your own effects. These can be saved and passed on to friends or placed on your own Web site to be shared with the rest of the world. To save a setting, click the bottom button at the middle of the interface. Clicking this button will bring up a dialog box where you can name and save your settings file. Other Plug-insYou can start finding cool plug-ins by checking out the demos of the ones I've mentioned here and the others listed at the beginning of this chapter. You're sure to find a product that meets your needs, whether it's to enhance your photographs or to help in the creation of Web graphics. |
EAN: 2147483647
Pages: 350
