|  Choosing Background and Text Colors  -
 | With the page to which you want to apply a background color displayed onscreen, open the Format menu and choose Background . | -
 | The Page Properties dialog box opens, with the Formatting tab displayed. Click the down arrow next to the Background field. | -
 | Click the square containing the color you want to use (or click More Colors to choose from a palette that offers a wider selection). | INTRODUCTION You can choose any color for a page's background, or you can use a picture for a background (see the next task). While choosing a background color, it's smart to consider choosing text colors at the same time to ensure that the text colors are a good contrast to the background. (Text in a color that's too close to the background color is difficult to see.) |
TIP Do It Differently If You're Using a Theme If you've assigned a theme to this page, you should change background and text colors from the Themes dialog box (see Part 2) instead of doing this task. |
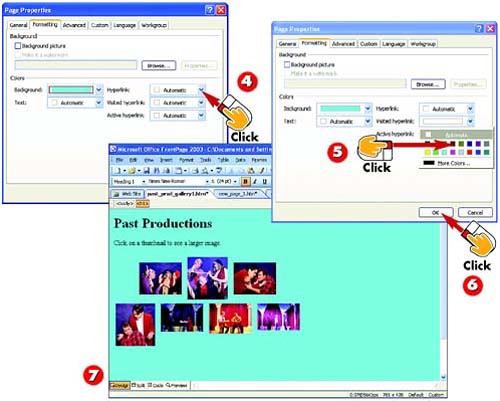 -
 | Determine whether the colored squares in the Text field and in the three Hyperlink fields contrast well with the background color (and with each other). | -
 | Use the list boxes to change text colors as necessary. | -
 | Click OK . | -
 | The background color (and any other colors you selected) is applied. | HINT Users May Block Your Custom Color Choices Users can configure their browsers to reject the "custom" text and background colors you choose here and show the same colors for all pages instead. Users who do this will not see the text colors you choose, but will see the text itself just fine. |
TIP Use Font Color to Override Default Colors After choosing the default color for each kind of text, you can still assign any color you want to selected text by clicking the Font Color button on the Formatting toolbar. |
Using a Picture Background 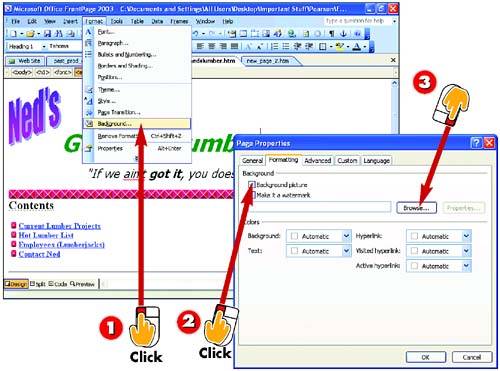 -
| | With the page to which you want to apply a background picture displayed onscreen, open the Format menu and choose Background . | -
| | The Page Properties dialog box opens with the Formatting tab displayed. Click to put a check in the Background Picture checkbox. | -
| | To locate the picture file you want to use as the background, click the Browse button. | INTRODUCTION Instead of using a solid-color background, as you learned to do in the preceding task, you can use a picture as a background. If the picture is too small to fill the whole window in which the page appears, it is automatically tiled ”repeated over and over ”to fill the window. Tiling enables you to build a great-looking pattern out of the repeated image. |
HINT Picture Backgrounds Trump Color Backgrounds An image background automatically supersedes a background color. If you create an image background, any selection you might have made for background color is irrelevant. |
 -
| | The Select Background Picture dialog box opens. Navigate to the folder containing the image you want to use as a background. | -
| | Click the desired image to select it. Click the Open button. | -
| | The path to the selected image appears in the field. Click OK . | -
| | The background image is applied. | HINT Watch Out for Big Files An image background, like any picture file, slows the downloading of your page, so avoid using very large background files. A large background image slows down the page's download much more than a small picture tiled many times. |
HINT Multiple Small Images "Tile" to Make One Background You can get background image files that are specially designed so that, when tiled, they form a seamless texture, such as marble or wood. The Clip Art Gallery has several such images in its Web Backgrounds category. |
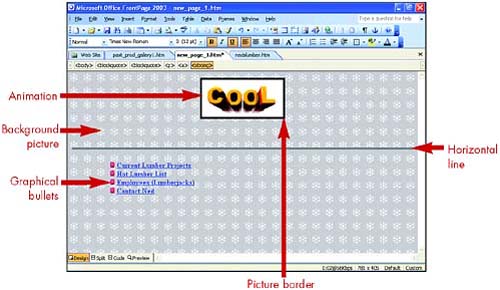
Putting a Border Around a Picture 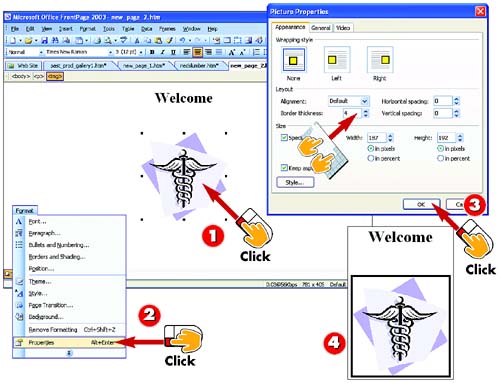 -
| | Click the picture to which you want to add a border to select it. | -
| | Open the Format menu and choose Properties . The Picture Properties dialog box opens. | -
| | In the Border thickness field, type a number or click the up or down arrow to set the border thickness (a higher number makes a thicker border), and click OK . | -
| | The border is applied. | INTRODUCTION Adding a nice border can help your pictures look a little classier. After you've applied a border, you can add additional effects to it, as you'll see in the next task. |
TIP You Can Find Even More Border Choices You can choose from an expanded selection of border options by selecting the picture, opening the Format menu, and choosing Borders and Shading . |
Adding a Bevel 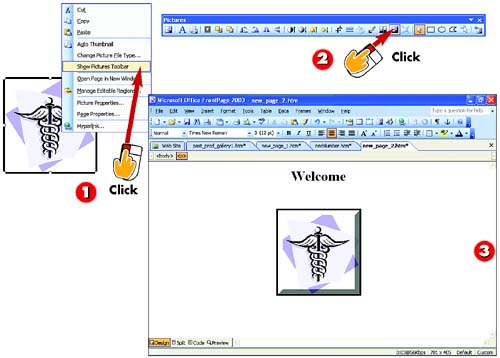 -
| | Right-click the selected picture and choose Show Pictures Toolbar in the shortcut menu that appears. | -
| | Click the Bevel button on the Pictures toolbar. | -
| | The bevel is applied. | INTRODUCTION You can add a 3D effect to a picture's border by adding a bevel , a gray shadow along the bottom and right side. A bevel creates the illusion that the picture is floating above the page. It's a nice touch, if you don't overuse it. |
HINT Bevels Don't Require Borders You can add a bevel to a picture that has its own built-in border, or to any square or rectangular picture. The bevel really has nothing to do with the border, but a bevel without some sort of apparent border on the other two sides looks a little odd. |
Organizing Pages with Horizontal Lines 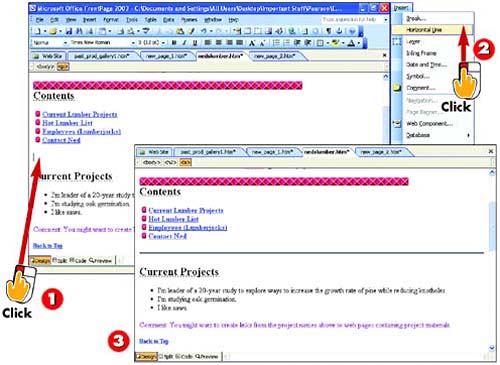 -
| | Click in your page at the spot where you want to insert the line. | -
| | Open the Insert menu and choose Horizontal Line . | -
| | The line is inserted in the spot you selected. | INTRODUCTION Horizontal lines help divide a page visually. Used between a heading and the paragraph that follows it, a line can add a little extra style to page. Lines also help divide sections of a longer page. Best of all, they're incredibly easy to insert, and they add graphical flair without slowing the download of the page the way pictures can. |
HINT Fancier Lines Aren't Horizontal Lines ”They're Pictures Online, you'll see all sorts of fancy multicolor lines dividing up pages. These aren't real horizontal lines; they're pictures used like lines, and you insert them like any other picture. You can find a great selection of these in Clip Gallery's Web Dividers category. Note that, unlike real horizontal lines, picture lines can't automatically scale themselves to a percentage of the width of the page. So when using picture lines, make sure that the line is of a width that still looks good no matter what resolution the visitor views the page in. |
Changing the Look of a Line 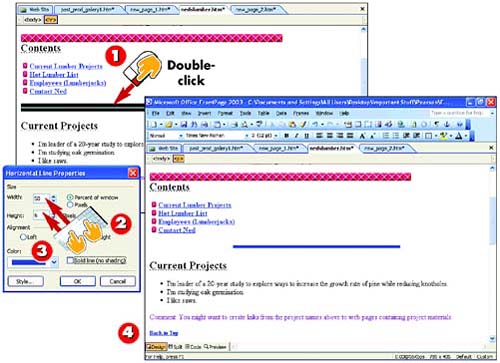 -
| | Double-click a line you've inserted to open the Horizontal Line Properties dialog box. | -
| | To make the line shorter, type a value less than 100 in the Width field. Type a number in the Height field to change the thickness; a higher number makes a thicker line. | -
| | Choose an Alignment and Color and then click OK . | -
| | The changes you specified are applied to the line. | INTRODUCTION Adding a basic horizontal line is a snap. But with just a little extra effort, you can change that line's appearance, making it thicker or thinner, making it shorter, and choosing its alignment and color. |
TIP You Can Turn the 3D Effect On or Off By default, the line has a shadow under it to give it a 3D effect. To remove the shadow, click the Solid line check box to deselect it. |
Playing a Background Sound 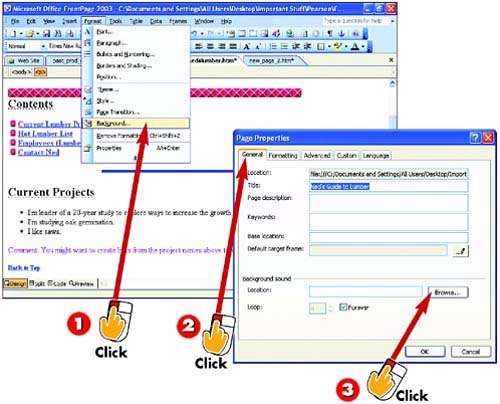 -
| | With the page to which you want to apply a sound effect displayed onscreen, open the Format menu and choose Background . | -
| | The Page Properties dialog box opens. Click the General tab. | -
| | Click the Browse button. | INTRODUCTION For a nice touch, you can make a sound effect or music clip play the moment a visitor arrives at a page. Only users of Internet Explorer 3 or later will hear the clip, so don't make the clip an essential part of understanding your page. Consider it a nice "throw-in" for the IE crowd . |
TIP You Can Use Any Sound File Type Sound clips in WAV format (.wav) work best, but you can use clips stored in other formats. To use a non-WAV file, between steps 3 and 4, open the Files of type list in the Select File dialog box and choose the file type you will use. |
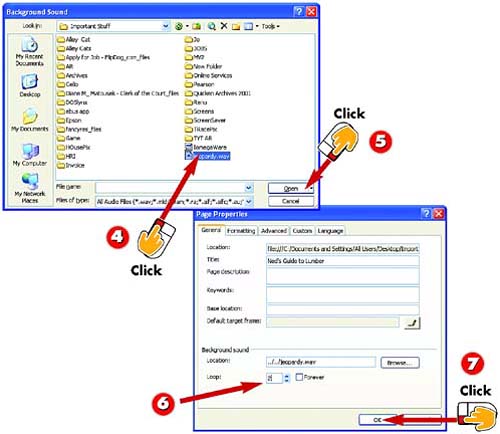 -
| | Navigate to the sound clip file you want to use, and click it to select it. | -
| | Click the Open button. | -
| | Mark the Forever check box to make the clip play for as long as the visitor views the page. Or type the number of times to play the sound in the Loop field. | -
| | Click OK . | HINT Preview to Hear Your Sounds Sounds don't play in Design view; to hear the background sound, preview the page. |
TIP Record Your Own Sound Clips By connecting a microphone or other audio source to your PC's sound card, you can record your own sound clips using Windows's built-in recorder. To access the recorder, click the Start button, choose Programs , select Accessories , click Entertainment , and choose Sound Recorder . |
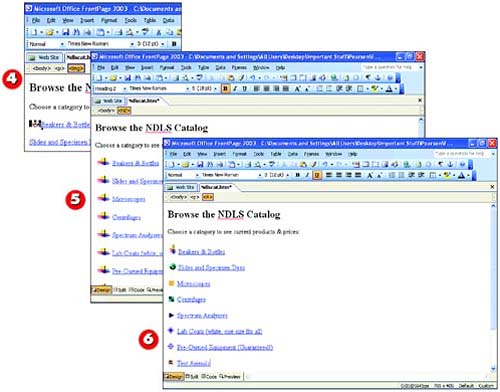
Adding Animation from the Clip Gallery 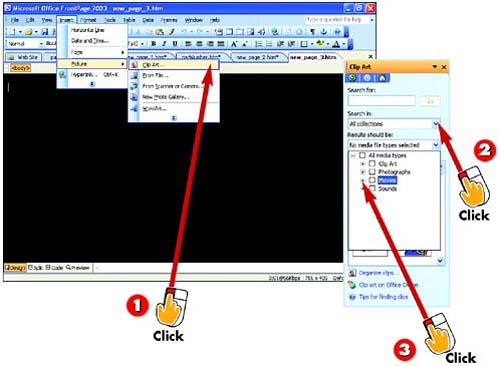 -
| | Click in your page where you want to insert the animation. Open the Insert menu, choose Picture , and then choose Clip Art . | -
| | The Clip Art task pane opens. Click the down arrow next to the Results should be field and click each check box in the list to uncheck it. | -
| | Click the + sign next to the Movies entry in the Results Should Be list to open the list of movie file types. | INTRODUCTION A special kind of GIF image file, called an animated GIF , plays a brief, simple animation when you view it in a Web page. You'll find animated GIFs in clip-art libraries online and on disk, and you can create them with programs such as Macromedia Flash. You'll find a bunch in FrontPage's clip-art library. |
HINT Preview to See Your Animations Move Note that your animation won't play in Design view; to see the animation play in your page, preview the page. |
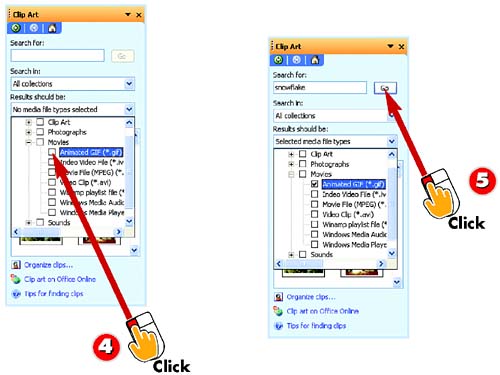 -
| | Check the check box next to Animated GIF to mark it. | -
| | Now use the Search for field and Go button to search for and select your clip to insert it, as described in the very first task of Part 6. | TIP Previewing an Animation Before Using It To see the animation play before you insert it, point to it in the task pane list to display an arrow along its right side, click the arrow, and then choose Preview/Properties from the menu that appears. |
HINT Just Like Any Other GIF You change the size, shape, position, and other aspects of an animated GIF exactly as you would a regular GIF (refer to Part 6). |
Using Graphical Bullets 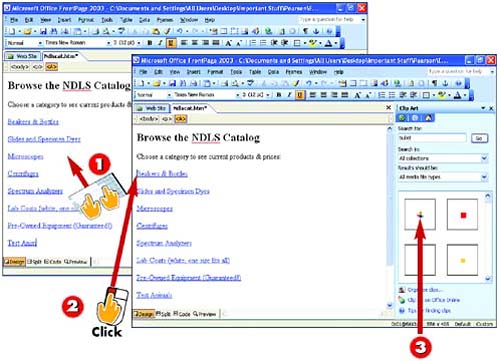 -
| | Type the list items as ordinary paragraphs, pressing Enter after each. ( Do not click the Bullets button!) | -
| | Click to the left of the first item. | -
| | Insert the picture file you'll use as a bullet, any way you want (from a file, from the Clip Gallery, by scanning, and so on; see Part 6 for help). | INTRODUCTION In many bulleted lists you'll see online, the bullets are not symbol characters , but little pictures ”stars, suns, smiley faces, and so on. These "graphical bullets" are pretty easy to apply, and FrontPage's Clip Art Gallery includes a hefty collection of choices (check out the Web Bullets category). |
HINT Themes Can Add Picture Bullets for You You can also add graphical bullets by choosing a theme (see Part 2). If you choose a theme, graphical bullets will be applied automatically to any list you format with the Bullets button. |
 -
| | Format the bullet picture as desired (size, shape, and so on). | -
| | To use the same bullet for other list items, copy the bullet (select it and click the Copy button) and paste it in front of each item in the list (click the Paste button). | -
| | To use a different bullet picture on each item, repeat steps 2 “4 for each item. | TIP Indenting Your Bulleted List To indent the finished list (after adding the bullets), click to the left of the bullet on the first item, drag downward to select the whole list ” including all bullets ”and then click the Increase Indent button. |
TIP Adding Space Between Bullets and List Text To increase the space between the bullet and the text, right-click the picture, choose Image Properties, Appearance tab. Increase the number shown in Horizontal Spacing , and then click OK . |
HINT Bullets Can Be Animated If you use small animated GIFs for bullets, you'll have animated bullets. |
Inserting a Video Clip 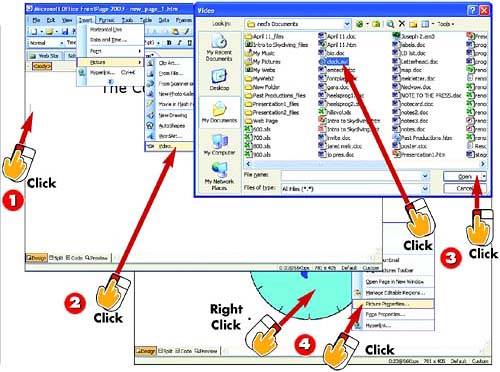 -
| | Click in your page at the general spot where you want the video clip to appear. | -
| | Open the Insert menu, choose Picture , and choose Video . | -
| | Navigate to and select the AVI file you want to insert and then click the Open button. | -
| | A picture representing the video is inserted. Right-click the picture, and choose Picture Properties from the shortcut menu. | INTRODUCTION With a video capture card installed in your PC and a video source (such as a camcorder or VCR), you can create video files in Windows Video (AVI) format. FrontPage makes inserting those clips in your pages easy and presents them attractively as frozen still pictures in the page that play automatically or at the visitor's request. |
HINT Inline Video's Not for Everybody FrontPage's method of showing the clip "inline" like a picture is viewable only through Internet Explorer 3 or later, and could degrade the performance of the page. |
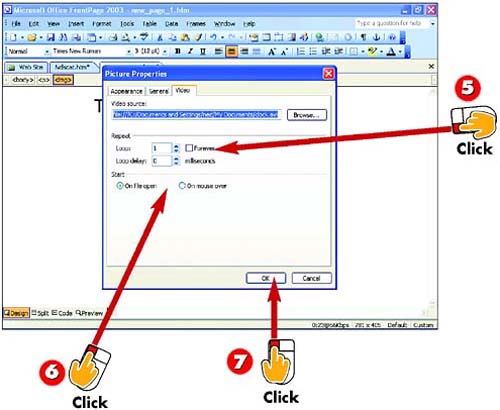 -
| | To play the video continuously, check the Forever check box. To play it a set number of times, type the number of times to play in Loop . | -
| | To play the video as soon as the page appears, click On file open . To play the video when the visitor's mouse pointer passes over the picture, click On mouse over . | -
| | Click OK . | TIP Adding a Pause Between Loops When the clip will be played repeatedly ( looped ), you can add a brief pause between each loop by entering a number in the Loop delay field. The delay is measured in milliseconds (1/1000ths of a second), so a loop delay of 500 adds a half-second pause. |
HINT To Watch Your Video Play, Preview Video doesn't play in Design view; to see the video play in your page, preview the page. |
|