Running Webmin
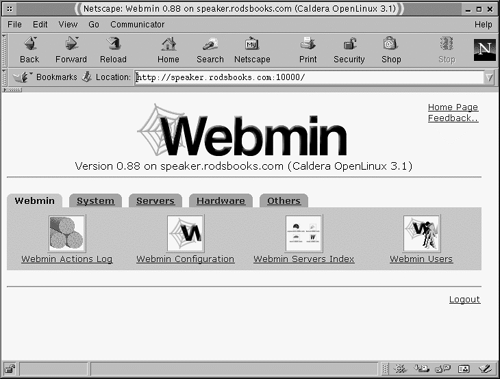
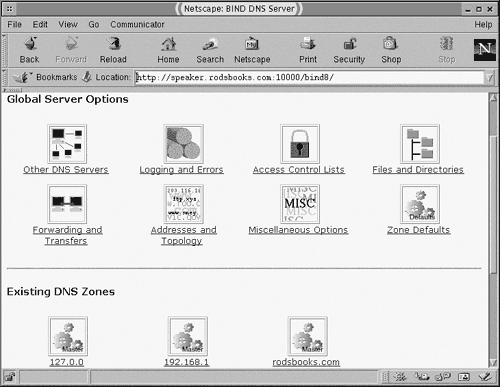
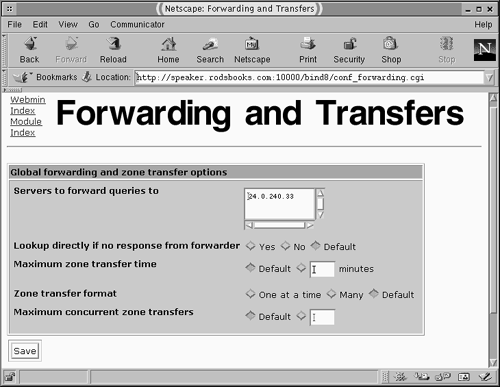
| Webmin (http://www.webmin.com/webmin/) is conceptually similar to Linuxconf in that it's a configuration system that's designed to operate on a variety of Linux distributions. Webmin explicitly supports a somewhat broader range of distributions, though, as well as non-Linux UNIX-like systems such as Solaris, FreeBSD, and MacOS X. (A complete list is available at http://www.webmin.com/webmin/support.html). Thus, configuring and using Webmin is similar to configuring and using Linuxconf. Because Webmin is designed primarily as a network configuration tool, though, initial configuration to accept remote logins is somewhat less involved than it is with Linuxconf. Configuring WebminOf the major distributions discussed in this book, only Mandrake ships with Webmin (it's planned for inclusion with the upcoming Debian 3.0, though). For other distributions, you can obtain the package from the Webmin Web site, which hosts the program in RPM and tarball formats. Installing the RPM is simplest if you're using an RPM-based distribution, because the RPM includes a script that detects your distribution type and configures the server appropriately; you do not need to do anything else to get it running. If you install the tarball, you must run a script and answer questions about your system to get the program running. The procedure for doing so is as follows :
NOTE
Webmin itself is configured through files that normally reside in /etc/ webmin (you can change this directory if you install the tarball). You probably won't need to change any of these files, but if you do, the ones that are most likely to need attention are config and miniserv.conf . Both of these files contain configuration information such as the port number to which Webmin listens by default, the system name , and the type of the host OS. In addition, the miniserv.users file contains the administrative username and password. (If you installed from RPM, the system uses root as the administrative username and copies the root password from /etc/passwd or /etc/shadow ; if you installed from the tarball, you had to enter this information manually.) Subdirectories of /etc/webmin contain information relevant to specific servers and subsystems that Webmin handles. The standard configuration for Webmin uses a SysV script to start the server. This script in turn uses the /etc/webmin/start script to actually call the Webmin Perl scripts. Using WebminIn broad strokes, using Webmin is similar to using Linuxconf; you enter the URL for the Webmin server (including the 10000 port number) in a Web browser, which then displays a prompt for a username and password. Figure 16.5 shows the resulting Webmin configuration screen for one system. Like Linuxconf, Webmin organizes its configuration tools into separate categories, but they don't nest as deeply in Webmin as in Linuxconf. Chances are most of what you'll do will be in the System and Servers tabs. The Webmin tab is used to configure Webmin itself, Hardware to adjust hardware (such as partitions), and Others to set a few miscellaneous items. Figure 16.5. Webmin's main screen lets you select the general category and, when that's chosen , the specific subsystem you want to configure. When you click the icon for an individual server or subsystem, you may be greeted by a final configuration screen or by a list of components of that specific server or subsystem. For instance, the DNS server configuration provides suboptions for logging, files, and so on, as well as for each zone served by the DNS server, as shown in Figure 16.6. Such nesting may continue for several levels. Eventually, you'll reach a screen in which you can alter specific settings by using text entry boxes, check boxes, lists, and so on, as shown in Figure 16.7. When you do so, click the Save button to save your changes. Many server configuration modules include a button called Apply Changes to force the server to pick up a changed configuration. Others include a Stop or Start button, depending upon whether the server is currently running; you can click the Stop button, followed by the Start button, to activate your changes. Figure 16.6. Many servers and subsystems include their own set of links to let you manage a server in reasonably sized configuration screens. Figure 16.7. You enter information in Webmin screens much as you do in Linuxconf screens. The main list of modules in Webmin may include servers that aren't running, or even installed, on your system. If you click such a server, you'll receive a message stating that Webmin couldn't find the configuration file, and suggesting that the module configuration may be wrong or the server may not be installed. If you've installed a server from an unusual source, you can click the Module Configuration link in this message to go to the configuration page for that Webmin module. If you know where the configuration files actually reside, you can change that information to have Webmin administer your server. As a general rule, Webmin modules are more complete than are their Linuxconf counterparts, although there's nothing about Webmin per se that dictates this. On any given distribution, you might find Webmin to be better for some things but Linuxconf better for others. If you're investigating both tools, your best bet is to try both, at least on a test system. When you're finished using Webmin, you can click the Logout link on the main page (see Figure 16.5). This action terminates your connection to Webmin, so you don't need to close down your Web browser, as is advisable when you're finished using Linuxconf. |
EAN: 2147483647
Pages: 203


