Appendix E: ODBC and IIS
| |
| Note | This appendix covers the steps required to set up an ODBC Data Source Name , and how to create virtual directories using Internet Information Server 5 |
ODBC Data Source Names
As mentioned in Chapter 18, Open DataBase Connectivity (ODBC) was the precursor to OLEDB and ADO, and still plays a large part in development issues mainly because it is so easy to set up. A Data Source Name (DSN) is simply a pointer to a particular source of data, and allows us to reference this data source just by a name, rather than by the physical location. This allows the location of the data to change without any changes to the code, because the code points to the DSN.
There are three types of DSN:
-
User DSN , which is only visible to a single user. Other users on the machine cannot use this DSN.
-
System DSN , which is visible to all users who use the machine, including the operating system.
-
File DSN , which is a DSN stored in a file, and is visible to all users.
For Active Server Pages you only need to concern yourself with a System DSN which must exist on the web server
To create a System DSN using Windows XP Professional you use the ODBC Data Sources applet in the Administrative Tools section of the Control Panel . Opening this provides access to the Data Sources icon. Click this icon to open the ODBC Data Source Administrator :
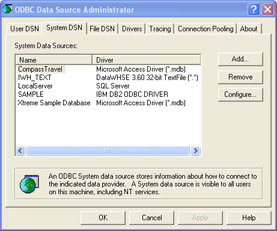
Clicking on the System DSN tab shows a list of existing data sources. To create a new System DSN click the Add button, where you will see a list of data store drivers that you can connect to:
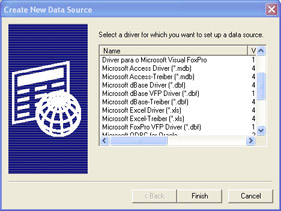
A driver is used by ODBC to connect us to the actual source of the data. There is a driver for each type of data that ODBC can handle.
You'll need to find an Access DSN, so make sure the correct driver is selected, then press the Finish button to take you to the Access DSN setup dialog.
There are often several Access drivers, for different locales, be sure to select the one most appropriate for your data.
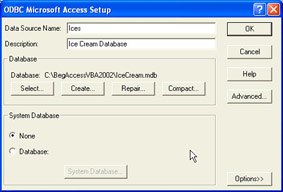
This is where you get asked to enter the name and description of your data source. This can be anything, but it's best to make them fairly descriptive. In our case, we've called the data source Ices, and also given a brief description to help us differentiate it from any other, similar, DSNs we might have.
You should then use the Select button to pick the Access database you wish to use as the source of the data - this will show the standard file dialogs, allowing you to browse the file system and find the correct mdb file.
Once you've found your database, the dialog box will look something like this:
Now you can press the OK button to add this DSN to the list you saw earlier:
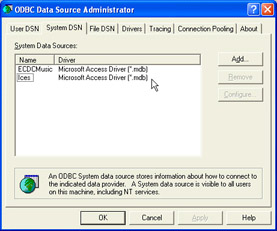
Creation of the System DSN is now complete, so you can now close this dialog by pressing the OK button.
| |
EAN: 2147483647
Pages: 256