| Once your file is open, you can set it up as you want to start your design. Most of the page setup options are found under the Layout menu. Let's take a look at several of the selections here and how they can help make designing your document easier: Margins and Columns: Choose Layout, Margins and Columns to display the Margins and Columns dialog (see Figure 25.3). This is the same information you can set in the New Document dialog. The Preview check box enables you to see your page before you commit to your choice and click OK. Figure 25.3. Use the Margins and Columns dialog to create even column guides on your page. 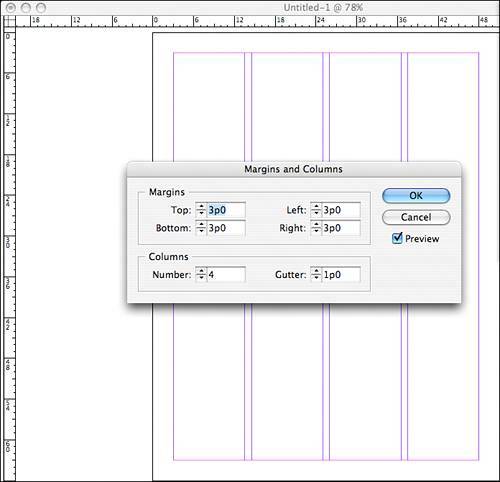
Ruler Guides: Ruler guides are dragged from the rulers at the top and left side of the InDesign workspace to help with object placement. You can change various guide settings by selecting Layout, Ruler Guides. View Threshold indicates the magnification at which ruler guides will no longer be visible. If this is set too high, individual guides will be indistinguishable when you are zoomed out of the document. Choose the color you want those guides to be. Create Guides: Choose Layout, Create Guides and set horizontal and vertical guides here (see Figure 25.4). Vertical guides are similar to column guides; adding horizontal guides helps you create modular designs. You can fit the guides to the entire page or just to the area within the margins, based on how you want to divide the page. If you'd like to get rid of guides you've already placed on the page, check the Remove Existing Guides box. Again, enable the Preview check box to see the guides before you accept them. Figure 25.4. The Create Guides dialog not only enables you to set up column guides, but it also creates regularly spaced horizontal guides on your page for the ultimate control over modular designs. 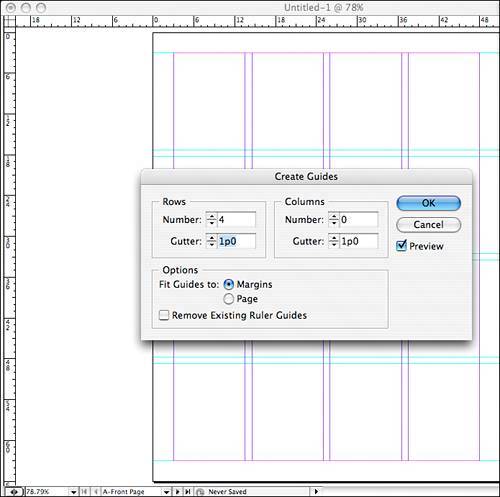
Any time you see a Preview check box in a dialog, click to enable it. When the Preview box is checked, you see whatever action you're performing on the page. If you like it, you can click OK. If you don't, you can click Cancel or change your settings. You may have to move the dialog out of the way to get a good view, but the Preview check box can keep you from committing to something you don't really want to do.
Layout Adjustment: Choose Layout, Layout Adjustment to access InDesign's automatic adjustment feature, which can be helpful if you are designing a piece that might change size or shape or that will need to be revamped while still using a lot of the same elements. When elements such as page size, margins, or columns are changed, layout adjustment makes your document conform to the original settings and object placement as much as possible. Click the Enable Layout Adjustment check box. You then have choices that will help you control the degree of layout adjustment. The measurement in the Snap Zone field refers to the point at which items will adjust. For example, if your Snap Zone measurement is set to 0p2, everything within two points of the guide that changes will snap to the guide's new location. Check boxes give you options to Allow Graphics and Groups to Resize, which will keep these items with the guides as they change; Allow Ruler Guides to Move, which will move ruler guides along with the other guides; or Ignore Ruler Guide Adjustments, which adjusts based on layout guides like margins and columns, not ruler guides; and to Ignore Object and Layer Locks, which will adjust locked items or items on locked layers.
Other options to help set page grids can be turned on under the View menu: View Baseline Grid: The baseline grid corresponds to how text is spaced on the page. The default baseline grid is set to 1 pica; alter this depending on your preference. Choosing this option only puts a visual representation of the baseline grid on the page. See Chapter 27, "Working with Type in InDesign," for more information on the baseline grid. View Document Grid: The document grid places horizontal and vertical guides on your page. There are two weights of gridlines; if you were measuring in picas on your document, for example, you could set a gridline every 6 picas (to signify an inch) with 6 subdivisions (to signify picas).
The settings for both of these features, including gridline color, are found in the Grids pane of the Preferences window. |