USING THE DRAWING TOOLS
| Though the Shape and Line tools often give many drawing objects a head start, most vector artwork is the product of heavy Pencil and Pen tool use. If the Pencil tool is freedom, the Pen is precision. Both tools can create open or closed vector paths, and each has functions for modifying existing paths. Pencil ToolAs its name implies, drawing with the Pencil tool is as familiar as drawing with a pencil. With this tool selected, simply click and drag; wherever the cursor travels, so does the path. Illustrator automatically creates an anchor point every time the path changes direction. This makes drawing easy, but it also tends to make overly complicated paths, with too many direction changes. See the "Modifying Paths" section for the tools and techniques of cleaning up and massaging paths. Let's try a quick drawing with the Pencil tool:
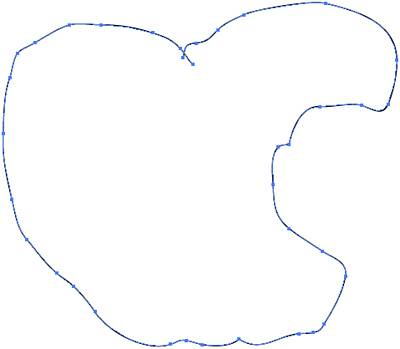
The Pencil tool can not only draw paths but modify existing ones as well. Try this exercise to take a bite out of the apple:
Choosing Undo from the Edit menu or with the keyboard shortcut Ctrl+Z (Windows users) or With an electronic stylus and tablet, Pencil tool drawing is far easier than with a mouse or trackball. Mastering the Pencil tool with such an input device is easy because it becomes just like drawing with a real pencil on paperyou even have the optional luxury of varying stroke weight according to the angle of the stylus or the pressure exerted on the tablet. Pen Tool
Wacom (http://www.wacom.com) is the leading manufacturer of styluses and tablets, though Aiptek (http://www.aiptek.com) and other competitors exist. With the Pencil tool, the focus is on the shape; draw the path segments, and Illustrator automatically creates the anchor points to define them. This behavior facilitates freedom and rapid sketching of an idea. The Pen, the precision drawing tool, is the Pencil's opposite: Draw the anchor points and Illustrator automatically connects them with path segments. Each click with the Pen tool creates an anchor point (or end point). Each click subsequent to the first connects the points with path segments. Try this exercise:
In the rectangle drawing there are four corner points, anchor points defining and attached to independently angled (often straight) path segments. More often than corner points, drawings require smooth points with curvature. It's important to note that, though the path segments display the curvature, anchor points control the curvature and direction of path segments leading into and out from them.
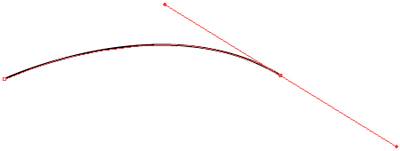
Hold the Shift key while clicking to make a new anchor point to limit its location to an increment of 45° relative to the previous anchor point. Smooth points are created by clicking to create the anchor point (or end point) and dragging to introduce curvature. They are easily identified by the presence of direction lines or curve handles emanating from them (see Figure 16.13). Figure 16.13. After clicking and dragging, direction lines appear.
Try this exercise:
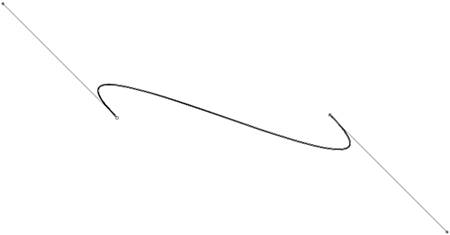
Each anchor point has its own curvature settings, making both ends of a path segment malleable. Try creating an S-curve:
Smooth points have inheritance, that is, the curvature assigned to one point automatically applies to the next (but not the one following). So, clicking and dragging to create a curved path segment on one smooth point automatically carries over to the next anchor point, following the path segment through and converting this second point automatically to a smooth point. This is what occurred in the exercises you've done so far. To illustrate the point, try this:
Curvature inheritance is a convenient way of making complex pathsmaking the two to four arcs of an ellipse, for example, requires little more than half the effort. When inheritance is not desired, however, there is an easy way to eliminate it. After creating one curve, but before clicking to establish the next anchor point, click once on the last smooth point. This action converts the anchor point from a smooth to a corner point, creating independent curvature and angling to the path segments on either side of that point. Now the next anchor point may be defined exclusive of the previous; click and release to create a corner point and straight path segment, or click and drag to create a smooth point with independent curvature. Let's try creating independent points:
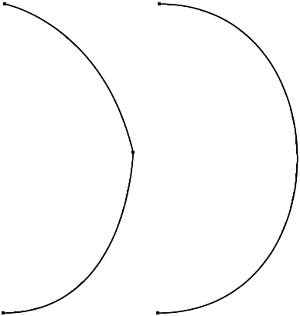
The more points in a curve, the more complicated it becomes when working with changes and when printing. Many beginners draw complex paths as a series of corner points or very shallow smooth points, clicking and creating a new anchor point at each minor course or curvature change. Exploit the curvature of smooth points to reduce the overall number of points, the complexity of the path, and the likelihood of unsightly bumps that can be caused by anchor points at awkward places in a curve (see Figure 16.16). Figure 16.16. In the main curve an extraneous anchor point is causing an unwanted bump (left). By eliminating this point and adjusting the direction handles of the smooth points on either side of it, the curve renders smoothly (right).
|


EAN: 2147483647
Pages: 426