Strong-Named Assemblies and the Global Assembly Cache
Two main requirements for a control must be satisfied before that control can be used within other applications. The first requirement is that the assembly must be a strong-named assembly. A strong-named assembly is an assembly that has been associated with certain attributes that describe the assembly and has also been associated with a public key and digital signature. By you associating an assembly with a public key and digital signature, the assembly is guaranteed to be unique because no other assembly can generate the same key for an assembly. Although we won't get into the details and various implementation specifics of strong-named assemblies, you will be shown how to create a strong-named assembly.
The process of creating a strong-named assembly involves the use of a special tool that is shipped with Visual Studio .NET. This tool, named SN.exe, can be found in the common tools folder in the main Visual Studio .NET program folder. This tool will only need to be run once. Therefore, look for the SN.exe file in the Visual Studio .NET common tools folder. Open a console window at the location of that file. Next, generate a strong name key by entering the following command:
Sn.exe k shapecontrol.snk
This will create a file containing a unique key that you will assign to your assembly. Locate the shapecontrol.snk file you just created and copy it to the ShapeControl project directory. Assigning a strong name key to an assembly requires changing an attribute contained within the AssemblyInfo.cpp file that was created by the project wizard when you created your project. Open the AssemblyInfo.cpp file within the ShapeControl project and locate the attribute named AssemblyKeyFileAttribute. Change the parameter for that attribute, which is currently empty, by specifying the name of the strong name key you created earlier. Now, each time your assembly is built, it will be associated with that strong name key and consequently become a strong-named assembly.
The second requirement necessary to use a control contained within an assembly is that it must be installed into the Global Assembly Cache (GAC). The GAC is a central location for assemblies that are meant to be shared by several .NET applications. Because controls are designed to be shared components, they are required to be installed into the GAC.
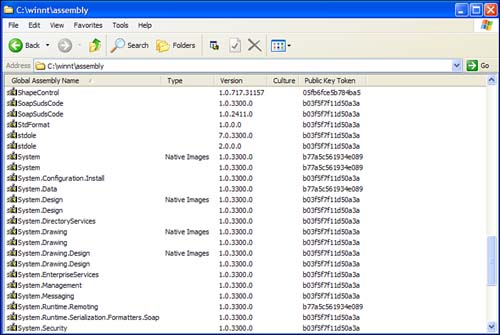
You can view the contents of the GAC by navigating to the assembly directory contained within your Windows folder. You'll notice as you navigate to that directory that the columns within Windows Explorer change to show information about the various assemblies installed on the system, as shown in Figure 23.4. This is due to a shell extension named shfusion.dll, which is known as the Assembly Cache Viewer. You can, in fact, install your assembly into the GAC by simply dragging and dropping your DLL into the assembly directory, but you would have to do that each time your assembly is built.
Figure 23.4. The Assembly Cache Viewer shell extension allows you to view the contents of the Global Assembly Cache.
Visual Studio .NET contains a utility that allows you to install and remove assemblies from the GAC. This utility is named Gacutil.exe and is contained within the common tools folder of Visual Studio .NET. In order to install your assembly into the GAC each time it is built, you will now create a custom build step that calls Gacutil.exe to perform the assembly installation.
Right-click the ShapeControl project in Solution Explorer and select Properties. Make sure All Configurations is selected in the Configurations drop-down box. Select Build Events, Post-Build Event from the Configuration Properties list on the left side of the dialog. Click in the Command Line property and then click the button labeled with an ellipsis to open the Command Line Builder dialog. The first command you need to perform is to remove the old assembly that is in the GAC from the previous build. If you don't do this step, you will end up with multiple versions of the assembly in the GAC. To uninstall the control assembly, enter the following command:
gacutil.exe /u ShapeControl
Create a new line to start the next command. The process of installing an assembly is similar to uninstalling. However, rather than specifying the name of the assembly, as you did in the previous step, you must specify the path to the DLL. Enter the following command to install your assembly DLL into the GAC:
gacutil.exe /i "$(TargetDir)\ShapeControl.dll"
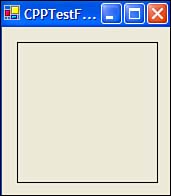
Your assembly is now ready to be built, and as you do this, your assembly will be assigned a strong key and installed into the GAC. Because these steps have been performed, you can now run the test-harness application successfully. Your results should appear similar to what's shown in Figure 23.5.
Figure 23.5. Running the test harness after assigning the custom control a strong key and installing it into the GAC.
| Top |
EAN: 2147483647
Pages: 237