Working with Scanners and Cameras
|
|
Windows XP supports many different scanners and digital cameras, most of which you can simply plug into Windows XP and begin using. Gone are the days of difficult scanner configurations and digital cameras that will not work under Windows. As with many peripheral devices, you should ensure that the product is compatible with Windows XP before you buy it. As always, when you install any hardware device, be sure to read the manufacturer’s instructions. If you are having problems installing a scanner or a camera, Windows XP gives you a wizard that can help, as demonstrated in the following steps.
| Note | You should not have to use this wizard unless you are having problems with installation. Generally, you can just plug the scanner and camera into the correct port and begin using it. |
Installing a Camera or a Scanner
-
Click Start | Control Panel | Scanners and Cameras.
-
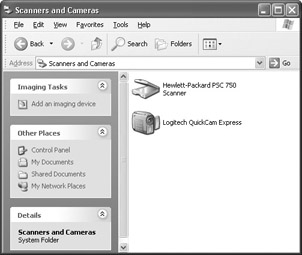
The Scanners and Cameras dialog box appears, shown here. Any currently installed scanners or cameras appear in this dialog box. To install a troublesome scanner or camera, click the Add an Imaging Device link under Imaging Tasks.
-
The Camera and Scanner Installation Wizard appears. Click Next on the Welcome screen.
-
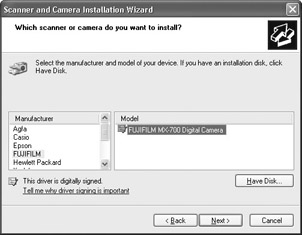
In the selection screen, shown here, select the model and make of the scanner or camera that you want to install. Use the Have Disk button if you have an installation disk or CD-ROM. Click Next.
-
In the detection screen, you can choose automatic detection or you can assign the port on which the device is connected. As a general rule, automatic detection is the best selection option. Make a selection and click Next.
-
Provide a name for the device and click Next.
-
Click Finish.
| Note | Some cameras use a memory stick that will show up as an additional hard drive. To copy pictures to the computer, simply open the drive and copy the files. |
Importing Pictures
Once the digital camera is installed and connected, you can easily move pictures from the digital camera by simply opening the camera icon in the Scanners and Cameras dialog box, or you can simply right-click the camera and click Get Pictures. By default, pictures are stored in the My Pictures folder. However, users in your environment may wish to save pictures in an alternative location. You can easily configure this option by selecting a different folder in which to save the pictures. The following steps show you how.
Linking the Camera to a Folder
-
Right-click the camera, and then click Properties.
-
On the Events tab, in the Select an Event control, click the event for which you want to initiate an action.
-
In the Actions window, click the Save All Pictures to This Folder option. All the pictures you select will be saved to the folder you specify when the event occurs. To search for a specific folder or drive, click Browse.
-
When you are done, just click OK.
Scanning Items
Once the scanner is installed, you can easily scan items by simply right-clicking the scanner’s icon in the Scanners and Cameras dialog box and clicking Scan. See the scanner’s documentation for additional configuration options and instructions as needed. One noteworthy item concerns the scanning of pictures. Rather than just treating pictures like any kind of scan job, Windows XP gives you the Get Picture Using Scanner Wizard option when you right-click the scanner icon. This easy-to-use wizard can help you scan pictures at any resolution you might need. See the following steps for details.
Scanning Pictures
-
In the Scanners and Cameras dialog box, right-click the scanner icon and click Get Picture Using Scanner Wizard.
-
The Scanner and Camera Wizard appears. Click Next on the Welcome screen.
-
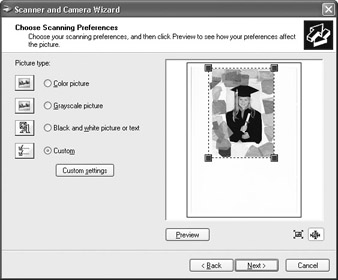
In the Choose Scanning Preferences window, shown here, choose the kind of picture that you want to scan, such as color, grayscale, and so on. If you click the Custom Settings button, you can choose the resolution, color, brightness, and more. Make your selections and click Next.
-
In the next window, choose a name for the picture, the file format, and the place where the picture will be saved. Click Next.
-
The picture is now scanned. A window appears asking whether you want to publish the picture, order copies, or do nothing else. Make a selection and click Next to complete the wizard.
|
|
EAN: N/A
Pages: 164