Performing Common Management Tasks
|
In this section, we look at some common management tasks. This includes setting Enterprise Policies and special object permissions, as well as managing arrays. It is important that your firewall has its security policies implemented properly, as the ISA Server has this defined in the Enterprise policy and Enterprise policy settings.
Configuring Object Permissions
ISA Server uses Windows 2000 discretionary access control lists (DACLs) to control access to objects and object properties. With Windows 2000, access is granted on a granular basis and can be granted to individual users or to groups (Microsoft's recommended approach).
The ISA Server objects for which you configure permissions are:
-
Enterprise policy settings
-
Enterprise policies
-
Arrays
-
Alerts
-
Sessions
-
The gatekeeper
Default Permissions
Depending on the type of object, certain permissions are assigned by default. You can view or change the object permissions by right-clicking on the object, selecting Properties, and selecting the Security tab, as shown in Figure 24.30.
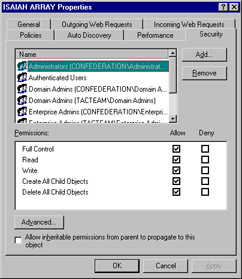
Figure 24.30: Set Permissions on Objects Via the Security Tab on the Object's Properties Sheet
The example in Figure 24.30 shows the permissions settings for the Array object. By default, the Administrator, Domain Admin, Enterprise Admin, and System accounts have full control, and the Authenticated Users group has read access. You can change the permissions or add other groups or individual user accounts in the same way you configure any NTFS permissions in Windows 2000.
Special Object Permissions
You will find that some ISA objects have special permissions, accessed by clicking the Advanced button and then selecting View/Edit for permissions. For example, the Sessions object has the Read Sessions Information and the Stop Sessions permissions. By default, authenticated users have the Read Sessions Information permission, whereas Administrators, Domain Admins, and Enterprise Admins have full control, which encompasses both of these special permissions. Likewise, the Alerts object has special Read Alerts Information and Reset Alerts permissions. Again, authenticated users have the first, and Administrators, Domain Admins, and Enterprise Admins have full control, encompassing both (see Figure 24.31).
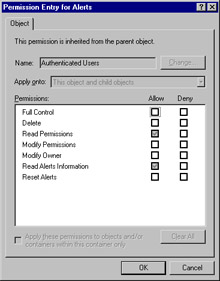
Figure 24.31: Some ISA Objects Have Special Advanced Permissions Such as the Read Alerts Information and Reset Alerts Permissions for the Alerts Object
Permissions may be directly assigned to an object or they may be inherited from a parent object. Inheritance can be controlled by the administrator. At the bottom of an object's Security tab is a check box that, when checked, allows inheritable permissions to propagate to the object. You can prevent inheritance of special permissions by checking the Apply these permissions to objects and/or containers within this container only check box when you elect to view/edit advanced permissions.
Similarly, you'll find that the Gatekeeper objects have several special permissions, including Read call routing info, Modify call routing, Read terminals, Create static user, Unregister terminal, Read active calls, and Terminate call. By default, these permissions are granted to the Everyone group, which has full control.
Setting Permissions on ISA Objects
To set the standard and special permissions on an ISA object, follow these steps:
-
Right-click the object for which you want to set permissions.
-
Select Properties from the right context menu.
-
On the Properties sheet, select the Security tab.
-
Here you can change standard permissions and add or remove users and groups.
-
To set special permissions, click the Advanced button.
-
Select the user or group for which you want to modify special permissions, and click the View/Edit button or add a new user or group by clicking the Add button.
-
Allow or deny the desired permissions.
| Note | All ISA Server services run in the context of the user account named Local System. This account must have the appropriate permissions and user rights to run the services. |
Managing Array Membership
Installing the first ISA server that is made a member of an array creates the array. There are several requirements for doing this: You must be a member of the local Administrators, Enterprise Admins, and Schema Admins groups, because you must first initialize the enterprise, which modifies the Active Directory schema.
Creating a New Array
Once an array has been created, you can create new arrays. Right-clicking the Servers and Arrays object in the left console pane and selecting New | Array invokes the New Array Wizard. You will be asked to supply information such as the site and domain name in which the new array will be located, as well as a name for the new array and the mode (caching, firewall, or integrated) in which the array will run.
| Note | When you add an array to or remove an array from the enterprise, the information is written to the Active Directory and replicated to all domain controllers in the domain. |
Adding and Removing Computers
You can remove a server from an array by right-clicking its name in the right detail pane when you highlight the Computers folder. Select Delete, and you will be prompted by the dialog box shown in Figure 24.32.
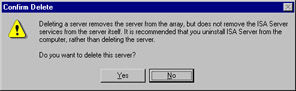
Figure 24.32: Delete an ISA Server from an Array Via the ISA Management Console
| Note | If a server was previously deleted from an array, you cannot use Add/Remove Programs in the Control Panel to uninstall ISA Server. Instead, you must use the rmisa.exe program on the ISA CD-ROM. Note that if you uninstall the only remaining computer in an array, the entire array will be removed. |
To join a server to an existing array, you must install (or reinstall) ISA Server. If the enterprise has been initialized, you can select which array the server will join (see Figure 24.33). When you install ISA as a member of an existing array, you must install it in the same mode as the other array members (caching, firewall, or integrated).
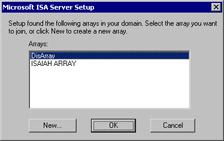
Figure 24.33: When You Install ISA Server, If the Enterprise Has Been Initialized, You Have the Option of Joining an Existing Array
To move a server from one array to another, you must uninstall and reinstall ISA Server.
Promoting a Stand-Alone ISA Server
A stand-alone ISA server cannot be joined to an existing array; however, after you have initialized the enterprise, you can promote a stand-alone server to create a new array of which the promoted server will be a member. To promote a stand-alone server and create a new array, right-click the server name in the left console pane, and select Promote from the context menu. You will see the message shown in Figure 24.34.
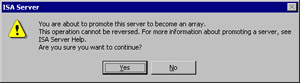
Figure 24.34: Promoting a Stan-Alone Server to Become an Array—An Operation That Cannot Be Reversed
| Warning | Once you promote the stand-alone server to become an array member, the action cannot be reversed. You can remove the server from the array, but doing so will not return it to stand-alone server status. ISA Server will have to be reinstalled. |
If you choose to promote the server, you will be asked to set global policy and choose how enterprise and array policies will be applied to the array. When you promote a stand-alone server to create an array, the configuration information for the array is stored in Active Directory.
Remember: Although a stand-alone ISA server is not required to be a member of a Windows 2000 domain, an array member must be a domain member. Thus, in order to promote a stand-alone server to an array, the server must belong to a Windows domain.
| Note | After you promote a stand-alone server to array status, you need to reconfigure the ISA Server object permissions. |
|
EAN: 2147483647
Pages: 240