The Concept of Editing: Insert and Overlay
| Understanding how to edit in Premiere is essential. If you can't build your timeline, the rest of this book is useless. There are several ways to add the desired portion of your source footage to your timeline. The basic process involves the following steps:
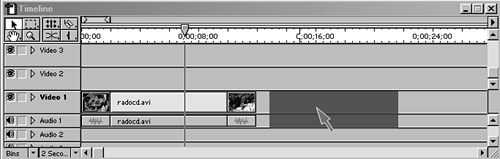
After you set your in and out points, you can use one of two methods to add the footage to your timeline. With the first method, you can drag your marked clip directly into the timeline area. Click and hold on the Source window, and then drag the mouse over to the Timeline window. You see a gray area appear when the cursor is over an available track, as shown in Figure 3.3. The duration of the marked clip determines the width of the clip being added to the timeline. You cannot drag a clip into the timeline if a clip already exists in that portion of the timeline. Therefore, you cannot accidentally overwrite any clips you have edited into your timeline. Figure 3.3. A gray placeholder appears when you drag source material directly into the timeline.
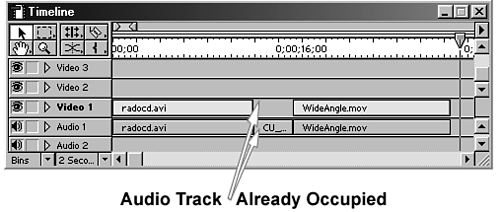
note If you are dragging a source clip that contains both audio and video, you can't add it to your timeline if one of those tracks is occupied. The video portion will not be added even if that track is empty if there is an audio clip in that location (see Figure 3.4). Figure 3.4. A source clip with audio and video cannot be added if even one of the tracks is occupied in the timeline.
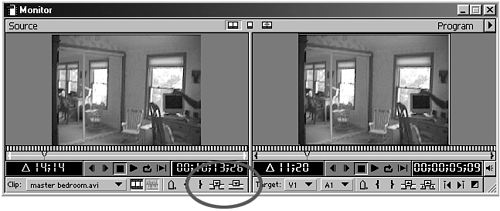
The other alternative to dragging a clip is to use one of the two editing buttons, as shown in Figure 3.5. The two types of editing features are insert editing and overlay editing. Understanding the difference between the two is important. If you choose the wrong one, you could wind up messing up your entire sequence. Figure 3.5. The insert and overlay editing buttons.
Overlay EditingThe most often used form of editing is overlay editing. It works by simply covering up whatever is in the timeline at the position where you want to place that clip, based on whichever tracks you have selected. Note that this changes the clips' in and out points in the vicinity of the overlay edit. In some cases, it might delete clips altogether. If the timeline is empty or you are adding clips to the end of a sequence, overlay just adds that footage without disrupting any other clips in the timeline, as shown in Figure 3.6. Figure 3.6. Overlay editing covers whatever is in the timeline without shifting anything else in the selected tracks.
note Overlay editing does not change the overall duration of your sequence, but it can change the duration of any clips in the timeline if they get covered up by (any portion of) the clip being added. Insert EditingInsert editing is used for a different purpose. One of the great benefits of editing on a computer is its capability to edit nonlinearly. This means that you can edit your movie in any order and add shots wherever and whenever. If you've ever edited on a linear system, you know that your edit master is only as good as your last edit. You cannot go back and add another shot at the beginning of your program and expect all the other shots to just slide on down. That is impossible to do when you're working on linear tape. With a computer, it's a different story. You can add a shot at any point in time to any portion of your edited sequence. You add this new clip to the sequence while pushing all your other clips farther down the timeline by the exact duration of the clip that is being added, as shown in Figure 3.7. To envision how insert editing works, imaging taking your film strip (edited sequence), cutting it at a particular frame, separating those pieces, and adding a new clip between those old edit points. Figure 3.7. Insert editing shifts everything on the selected tracks farther down in the timeline.
note Insert editing does alter the overall duration of your sequence in the timeline. It does not affect the duration of any other clips in the timeline, just their location. warning Insert editing is a common cause of knocking your timeline out of sync. When adding a clip, be sure to select all the necessary tracks. If you have synced audio and video clips in your timeline, and you insert just a video clip, you knock all the synced clips out of sync for the remaining duration of your sequence. |