Fading in and Fading Out

A very common effect used in all types of programs is to have one shot slowly fade in, remain superimposed over the original shot, and then slowly fade back out. By adding a couple of keyframes, you can quickly achieve this effect:

  1. Add a clip to Track 1.

  2. Add a second clip to Track 2. This shot can be the same length as or shorter than the one in Track 1.

  3. Expand Track 2 to view the Transparency line.

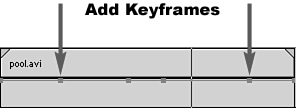
  4. Add a keyframe approximately a quarter of the way into the duration of the clip on Track 2.

  5. Add another keyframe approximately three quarters of the way into the duration of the clip on Track 2, as shown in Figure 6.11.

    Figure 6.11. Add keyframes between the first and last keyframes.

    graphics/06fig11.gif

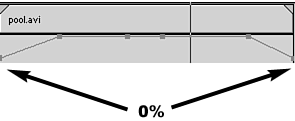
  6. Drag the first keyframe down to the lowest level.

  7. Drag the last keyframe down to the lowest level, as shown in Figure 6.12.

    Figure 6.12. Dragging down the first and last keyframes creates a smooth fade-in and fade-out effect.

    graphics/06fig12.gif

tip

To delete a keyframe (other than on the first or last frame of a clip), click and drag the keyframe off the clip (PCs).


note

Depending on your system, you will most likely have to render that effect to see it during playback.


Premiere 6. 5 Fundamentals
Premiere 6.5 Fundamentals
ISBN: B000H2MVO4
EAN: N/A
Year: 2006
Pages: 219

flylib.com © 2008-2017.
If you may any questions please contact us: flylib@qtcs.net