Dissecting ASP.NET Web Forms
| In an ASP.NET page, collecting user input is much simpler than the techniques discussed in the preceding section. To collect user input, the ASP.NET web page must contain a Web Form. A Web Form is a Web control that has the following syntax: <form runat="server"> ... </form> When you create a new ASP.NET web page in Visual Web Developer, a Web Form is automatically added. To demonstrate that this is the case, let's create a new ASP.NET page, one that we'll build on throughout the remainder of this hour. Name this new ASP.NET web page BMICalculator.aspx. As always, be sure to have Visual Basic selected as the Language choice and check the Place Code in Separate File check box. After the new file is created, go to the Source view if you are not already there and inspect the HTML markup automatically injected into this new ASP.NET page. As Figure 9.5 shows, the HTML portion already contains a Web Form (the <form runat="server"> on line 10). Figure 9.5. A Web form is automatically included in new ASP.NET web pages created by Visual Web Developer.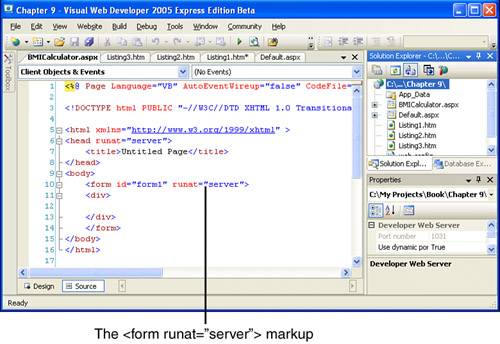 Now, view the page through the Design view. You should see an empty designer because we've yet to add any Web controls to our ASP.NET page. By default, the designer is a WYSIWYG editor, meaning that it displays only those Web controls and static HTML markup that you would see when viewing the ASP.NET page through a browser. Because Web Forms do not have any visual impact on a web page, the designer does not show the Web Form. Adding Web Controls to Collect User InputIn an HTML web page, user input is collected using a number of <input> elements, which can provide a variety of input media, such as text boxes, check boxes, radio buttons, and so on. Additionally, a <form> must be placed around these <input> elements and have its method and action properties specified. With an ASP.NET page, collecting user input is much simpler. As we've seen already, we need to have a Web Form, which Visual Web Developer has already kindly added for us. In addition to this Web Form, we need to have a number of input Web controls into which the user will enter his input. For example, if we want to provide the user with a text box to enter his input, we would use a TextBox Web control. If we want to have the user enter his input via a radio button, we would use a RadioButton Web control. These various Web controls must be placed within the Web Form. Earlier in this hour we looked at creating an HTML web page to collect user input for a BMI calculator. The BMI calculator needs to collect two bits of information from the user: height and weight. These two pieces of information can be provided via two text boxes. Therefore, let's add two TextBox Web controls to our BMICalculator.aspx ASP.NET page. Before you add the first TextBox Web control, though, first type in the title to precede the TextBox Web control: Your height (in inches):. To enter this text into the designer, simply place the cursor in the designer and start typing. If needed, you can create a space by pressing the Enter key. After you've typed in the label, next drag and drop a TextBox Web control from the Toolbox onto the designer, placing it immediately after the text you just added. Figure 9.6 shows the Visual Web Developer after adding this first TextBox Web control. Figure 9.6. The first TextBox Web control has been added.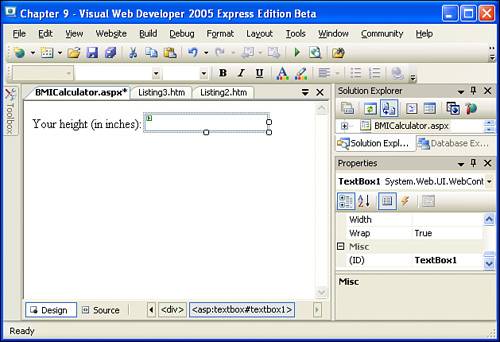 Now let's add the second TextBox Web control. Start by moving your mouse cursor after the TextBox Web control we just added and left-click. This will show the cursor in the designer. You can then type in the title for the TextBox Web control that we are about to enter. Specifically, enter the text Weight (in pounds):. As before, after entering this text, drag and drop a TextBox Web control from the Toolbox onto the designer, placing it immediately after the newly entered text. Take a moment to ensure that your screen looks similar to Figure 9.7. Figure 9.7. The second TextBox Web control has been added. At this point we have added two TextBox Web controls to the ASP.NET page. We are still missing one Web control, though. Recall from our earlier discussion that the browser needs to know when the user has completed entering his input. This was accomplished in the HTML web page in Listing 9.2 by adding a submit button. We need to add a submit button to our ASP.NET web page as well. To accomplish this, drag and drop the Button Web control from the Toolbox to the designer, placing it beneath the two TextBox Web controls. Figure 9.8 shows the designer after the Button Web control has been added. Figure 9.8. The final Web controlthe Button Web controlhas been added.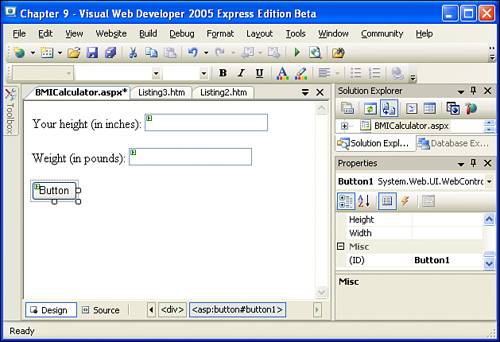 We have now added all of the Web controls that are needed to collect the user's input. The next step is to set the properties of these various Web controls. The Button Web control, for example, is currently displaying the text "Button", which we can change to a more descriptive message by changing the Button Web control's Text property. Also, the ID properties of the three Web controls are still set to their default values, which are not very descriptive, either. Let's take a moment to change the properties of these Web controls. First, click on the Button Web control, which will load the Button's properties in the Properties pane. Take a moment to change the ID property to btnSubmit and the Text property to Calculate BMI. After you change the Text property, the text appearing on the Button in the designer should change as well. Next, click the first TextBox Web control, the one appearing after the text "Your height (in inches):". Change the ID property to height. Finally, click on the second TextBox Web control and change its ID property to weight. Testing the BMICalculator.aspx ASP.NET PageNow that we have added the needed Web controls, let's visit BMICalculator.aspx tHRough a browser. Go to the Debug menu and choose Start Without Debugging. This will launch a web browser and direct it to BMICalculator.aspx. The output you see should be identical to that shown in the designer in Figure 9.8. After you have visited the ASP.NET web page through your browser of choice, take a moment to view the HTML source code that was sent to your browser. Listing 9.4 shows the source code received when visiting BMICalculator.aspx through a browser. Listing 9.4. The Browser Receives <form> and <input> Elements
The first thing to notice from Listing 9.4 is that the Web Form and Web controls produce roughly the same HTML markup that we crafted by hand in Listing 9.3. This is a powerful concept because it pleases both us, the ASP.NET developers, and the web browser requesting the ASP.NET page. It allows us not to have to worry about HTML specifics. Rather, we can just drag and drop the Web controls needed onto our ASP.NET page. When the page is visited, the ASP.NET engine will convert the Web controls into the appropriate HTML markup, which is what the browser expects.
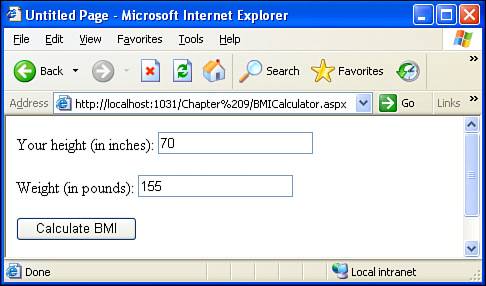
You should take note of three more important things in Listing 9.4 before we move on. First, notice that the Button Web control is rendered as a submit button (line 20). That means when this button is clicked, the <form> element contained within will be submitted. Next, note that the Web Form in our ASP.NET web page is rendered as a postback <form> element (line 8). (Recall that a postback form is one that has its method set to POST and its action set to its own URL.) This means that when the user clicks the Button Web control, the <form> will submit, causing the page to be reloaded. Finally, take note of the <input> elements on lines 10 and 24. They are hidden <input> elements (note that the type attributes are set to hidden), meaning that they are not displayed in the browser. These hidden <input> elements are produced when the Web Form is rendered and provide information used by the ASP.NET engine when handling a postback. A thorough discussion of what, exactly, these hidden <input> elements accomplish is beyond the scope of this book. Web Forms Remember the Values the Users EnterWhile you have BMICalculator.aspx loaded into your browser, take a moment to fill some values into the two text boxes and then click the Calculate BMI button. What happens? Upon first glance, it may appear that nothing happened. The same web page is shown, and the text boxes contain the values you entered. However, something has happened. Specifically, when you clicked the submit button, the <form> was submitted. Because this <form> is a postback form, the same web page was reloaded, which is why you still see the same web page in your browser. In fact, the HTML markup sent to your web browser has changed, but ever so slightly. If you view the HTML received by your browser after entering some data into the text boxes and submitting the form, you'll see that the TextBox Web controls' rendered <input> elements now contain a value attribute with the value equal to the value you entered into the text box. To better understand what has just happened, take a look at Figure 9.9. This figure shows BMICalculator.aspx after the values 70 and 155 have been entered into the height and weight text boxes and the submit button has been clicked. Figure 9.9. The text boxes have had values entered into them, and the form has been submitted. The HTML sent to the browser in Figure 9.9 is shown in Listing 9.5. Note that the HTML markup in Listings 9.4 and 9.5 is nearly identical, the only exception being that the <input> elements on lines 15 and 18 of Listing 9.5 differ from lines 15 and 18 of Listing 9.4. Specifically, the <input> elements in Listing 9.5 have a value attribute set to the value entered into each respective text box (see Figure 9.9). The HTML markup rendered by the TextBox Web controls is different in Listing 9.5 than it was in Listing 9.4. Listing 9.5. The HTML Received by the Browser After the Form Has Been Submitted
To understand why the TextBox Web controls rendered different HTML markup after the form was submitted (Listing 9.5) than before (Listing 9.4), let's step through this process in detail. First, realize that the TextBox Web control has a Text property. If this property is set to some value, the HTML markup rendered by the TextBox Web control is different than if this property is not set at all. That is, if this property is not set, the HTML rendered by the TextBox Web control is simply <input name="ValueOfIDProperty" type="text" docEmphasis">ValueOfIDProperty" /> For example, on line 15 in Listing 9.4 you can see that the first TextBox Web control, whose ID property is set to height, produces the following HTML markup: <input name="height" type="text" /> If, however, the Text property is set to some value, the value attribute is included in the rendering of the TextBox Web control like so:
So, when the BMICalculator.aspx page was first visited, the Text property of the TextBox Web controls was not set, as evidenced by the HTML markup produced (see lines 15 and 18 in Listing 9.4). When the user enters some values into these two text boxes, such as 70 in the height text box and 155 in the weight text box, and then submits the form, the Text properties of the TextBox Web controls are set to the values the user entered. Then, when the TextBox Web controls are rendered, they include the value attribute set to the value the user entered (see lines 15 and 18 in Listing 9.5). Writing the Source Code Portion for BMICalculator.aspxNote that when we enter values into the text boxes and submit the form, the web page is reloaded (because we're using a postback form) and the values entered into the text boxes are persisted across the postback. Although this is fine and good, we still need to provide code to actually perform the Body Mass Index calculation. The BMI calculation is quite simple and is shown in Figure 9.10. Figure 9.10. The BMI is a ratio of weight to height. The code required for this calculation is fairly straightforward and is shown in Listing 9.6. Listing 9.6. The Code for the BMI Calculation
On line 2 an Integer variable named h is declared and assigned the value of the height TextBox Web control's Text property. On line 3 an Integer variable named w is declared and assigned the value of the weight TextBox Web control's Text property. Next, on line 6 a Double variable named BMI is created. On line 7 it is assigned the person's weight divided by the person's height squared; that quantity is then multiplied by 703.
Clearly, this code must appear in our ASP.NET web page's source code portion, but where? One option would be to place the code in Listing 9.6 in the Page_Load event handler. Recall that the Page_Load event handler is executed every time the page is visited. This is not what we want, though. If we were to place the code in the Page_Load event handler, the code would execute every time the page is loaded, even when a user first visits the web page, before she had a chance to enter in her height and weight.
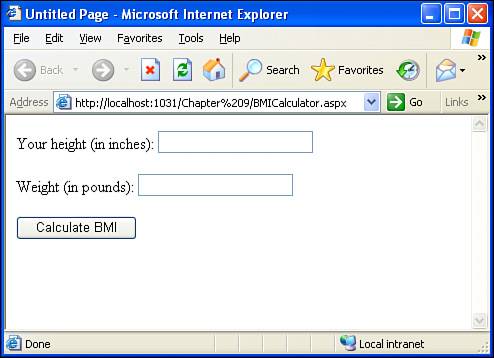
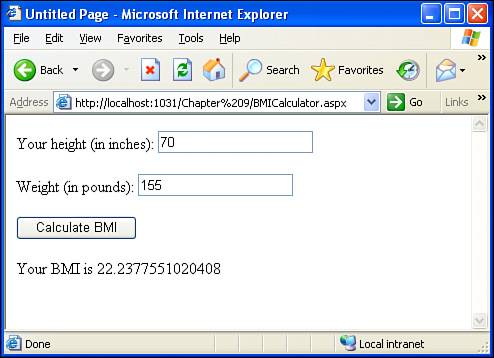
The Page_Load event handler is not a suitable place for the code in Listing 9.6 because we want this code to run whenever the user submits the form, not whenever the page is loaded. Fortunately, the Button Web control contains a Click event, which fires whenever the Web Form is submitted. When we add this event handler to our ASP.NET page's source code section and place the code in Listing 9.6 in this event handler, the code will execute whenever the Web Form is submitted. To add a Click event handler for the button, simply double-click the Button Web control in the Design view. This will take you to the page's source code portion with the appropriate event handler created. Now simply add the code from Listing 9.6 inside the Click event handler. After you have added this code, view the ASP.NET page through a browser. When you first visit the page, you should see two empty text boxes and a button labeled Calculate BMI; Figure 9.11 shows the browser when the page is first visited. Figure 9.11. The final BMICalculator.aspx ASP.NET web page when first visited. Now enter some appropriate values into the two text boxes and then click the Calculate BMI button. If you enter my height and weight70 and 155you should see the output shown in Figure 9.12. Figure 9.12. The user's BMI is displayed.
|

EAN: 2147483647
Pages: 233