| If you are moving from version 10.2 or 10.3 to 10.4, your transition should be fairly smooth. Although 10.4 contains lots of new features, the basic architecture of the OS has remained relatively stable, so you shouldn't have problems with applications not working (at least not with those that worked under 10.3). If you are upgrading from version 10.1 of Mac OS X to version 10.4, the upgrade involves a lot more than the change in number from 10.1 to 10.4 would indicate. There are major architecture changes from that early version of the OS, and moving to 10.4 requires some thought. It might take some time and effort to get into version 10.4's world, but the benefits are well worth the work. The move from 10.1 to 10.2 made extensive changes to some fundamental aspects of the OS and consequently, many applications that worked fine under 10.1 do not work under 10.2 or later without being updated. The good news is that it has been a couple of years since 10.2 was released, so most of these applications have been updated by now. However, be aware that if you are currently running 10.1, you should check for updates to the applications you use if you haven't updated them recently. NOTE All these 10.x references can be confusing. You can move from any version of Mac OS X directly to version 10.4. If you move from 10.2 or an earlier version to 10.4, you just have to be a bit more careful because that is a much bigger change than going from 10.3 to 10.4.
What You Need to Know Before You Install Version 10.4 Before you jump into the installation process, take a few moments to read through the following sections to ensure that you can make the transition smoothly. Assessing Your Hardware The hardware requirements from previous versions of Mac OS X haven't changed all that much, so if you are currently running a previous version of Mac OS X, your hardware is more than likely Mac OS X version 10.4 compatible. CAUTION One significant change in hardware requirements is that installing version 10.4 requires that your Mac have a DVD drive. Unless your Mac is quite old or you elected not to have a DVD drive installed in it, you probably do have a DVD drive, so this shouldn't be a problem for you.
Assessing Your Third-Party Applications Most major Mac applications that required an update for version 10.2 have already been updated. If you find that you use an application that has not been updated for 10.2 or 10.3, you might experience problems when you run itif it runs at all. Check the software developers' websites and download and install any updates of your applications that were released for Mac OS X version 10.2 or later. Because significant changes were made for 10.2 and 10.3 (and carry over to 10.4), you might have to pay upgrade fees for some of these. If applications you need are unavailable in version 10.4compatible versions, check the software's website for the known issues when running the application under version 10.4. If you can live with those issues, proceed with the upgrade. If not, you might have to wait until those applications have been updated to install 10.4, or switch to an alternative application that has been made version 10.4aware. Fortunately, fewer applications require major updates to run under 10.4 versus 10.2 or 10.3 than were necessary for the change from 10.1 to 10.2. CAUTION If you are moving from version 10.1 to 10.4, this is an important issue for you because many OS X applications that ran under 10.1 were unable to run under 10.2 until they were updated. Make sure you have checked all your important applications for 10.4 compatibility before installing version 10.4.
Updating Your Mac's Firmware and Apple Applications Your Mac must have access to some basic software for it to start up. For example, it needs to know where to look for system software that it can use to start up. This software used to be permanently stored in hardware called read-only memory (ROM). This permanent ROM could not be updated, so what came with the Mac was as good as it could get. With modern Macs, the base software is stored in firmware, which is sort of a combination between software encoded in hardware and normal software. The advantage of this is that Apple can update the firmware on modern Macs to correct problems or improve performance. CAUTION If your Mac's firmware needs to be updated for 10.4, the installation process will warn you and you will have to quit the installation and upgrade your firmware before you can continue.
Before installing Mac OS X version 10.4, you should ensure that your Mac's firmware is up-to-date. This is a simple task that might prevent problems later. The good news is that with a single task, you can also update all of your Apple software, which is definitely a good idea before you install version 10.4. TIP To keep your Mac in top condition, you should check for firmware updates occasionally, whether you are upgrading the OS or not.
To update the firmware and Apple applications on your Mac, follow these steps: 1. | Choose Apple menu, Software Update. The Software Update application will check for firmware updates and updates to any of your Apple applications. (Your Mac must be able to connect to the Internet for Software Update to work.)
| 2. | If updates are found, follow the onscreen instructions to download and install them.
| 3. | If no updates are found, click OK and quit Software Update.
|
Choosing an Installation Method When you install version 10.4, there are three primary options, each with its own pros and cons: Upgrade Mac OS X Using this option, you let the Mac OS X installer overwrite or revise your current Mac OS X installation as it sees fit. The benefit of this approach is that it is the easiest and most straightforward method. The downside is that the installation might not be as clean because the entire OS is not replaced. Consequently, there is a greater chance of the OS having problems or not working as well as it might with a clean install. The reported problems you might experience are related to specific situations, and there is no way to list all the possible conditions that might cause you problems. So, using this option is a bit of a crapshoot. However, if you don't usually perform a lot of system modifications and haven't installed third-party utilities, this option can save you some time because you shouldn't have to reconfigure your system as much as you might with the other options. NOTE If you install Mac OS X on a volume on which no version of Mac OS X has been installed, this option becomes Install Mac OS X.
Archive and Install Using this option, the installer creates a brand-new installation of Mac OS X and saves a copy of the current system (in a folder called "Previous Systems"). This enables you to perform a clean installation of OS X version 10.4, while keeping system files from the previous version in case you need to add them back into the system later. You can also continue use applications that were installed under the previous version. The benefit to this method is that the OS itself is likely to be installed better and cause you fewer problems. The downside is that you must do some manual labor to finish the configuration. NOTE If you use the Archive and Install options, the applications you currently have installed on your Mac remain in place and will usually work just like they did before. However, if the application installed files within the Max OS X system, you will need to install the application again.
When you choose this method, you have the option to preserve users and network settings. When you choose this option, the current users, their Home folders, and your Mac's network settings are carried into the new system. This prevents you from having to work through the setup assistant application later, and it maintains all the files that currently reside in all user Home folders on your machine. Erase and Install When you select this option, the volume on which you install the OS is erased and reformatted and a clean install is performed. Because the volume is reformatted, you lose any data currently stored there. The benefit to this method is that you get a fresh start and can rebuild your system from the ground up. The downside is that it requires the most work in that you have to reinstall all your applications, reconfigure your entire system, restore your documents, and so on.
In most cases, I recommend that you choose the Archive and Install method along with the option to preserve users and network settings. This gets you both a clean OS and maintains most of your current configuration, documents, and so on. In my book (and this is my book after all), this option results in the cleanest version of the OS and requires only a minimal amount of reconfiguration. If you need to rebuild a volume, the Erase and Install option nets you the cleanest system. However, this option requires the most work because you basically have to start over from scratch and rebuild the volume, including all user accounts, documents, applications, system settings, and so on. Frankly, I don't recommend the Upgrade Mac OS X option. Theoretically, this option should be the easiest because it attempts to maintain all of your current system configuration, including third-party software, users, documents, preferences, and so on. However, it is sometimes the case that the resulting OS is not as cleanly installed as it is under the other options and the likelihood of problems or reduced performance is increased, sometimes significantly. In some cases, it might be more work to solve problems introduced by upgrading the OS than would have been experienced with the Archive and Install option. However, if you haven't installed any third-party software that impacts the OS, this option might be the quickest path to Mac OS X version 10.4. Creating a Backup of Your Data and Applications Although the risk of losing all your data during an upgrade is small (unless the data is on the volume on which you choose to use the Erase and Install option, in which case losing all the data is a certainty), the results of that happening could be unrecoverable if you don't have everything backed up properly. For example, imagine losing your iPhoto library. Without a backup, your photos would be gone forever. Performing the upgrade without a backup system is about like playing Russian roulettethe odds are with you, but if you lose, you lose big.  To learn more about backup options, p. 1010. To learn more about backup options, p. 1010.
Before installing a new version of the OS, I urge you to make sure all your data is backed up. And, make sure you have CDs or installers for your applications in case they are damaged during the OS X 10.4 installation. You should also be sure you have paper copies of any configuration information, such as the settings for your Internet connection, .Mac, and email accounts. If you lose the configuration data, having it on hard copy will enable you recover with the least amount of fuss. Finally, be sure you also have copies of any updaters for your third-party applications so you can bring them to the latest version after you reinstall them (don't worry about Apple applications because you can update them via the Software Update application). TIP If you have obtained software via downloads, put the installers on CD or on volumes other than the one on which you are installing Mac OS X. Some installers are removed when new versions are released, and you might not be able to download an updater without paying for it again.
Installing Mac OS X Version 10.4 with the Archive and Install Option As you read earlier, this method provides a good balance between having a clean installation and minimizing the reconfiguration work you have to do. Under this method, the installer archives your current system while it installs a clean version of Mac OS X version 10.4 on your machine. Then, you reinstall any system files you need from your current system in the 10.4 version. This method is a bit more work than the upgrade option, but you are also more likely to end up with better results. If you choose the Preserve Users and Network Settings option, all your user information (such as the contents of the Home folders) and most of your system configuration is carried over to the new OS. There are two major parts to this upgrade process: 1. | Perform the installation of Mac OS X version 10.4 on your current Mac OS X volume.
| 2. | Move needed files from the previous version of Mac OS X to version 10.4.
|
Installing Mac OS X Using the Archive and Install Option The first part is rather simple, as you can see in the following steps: 1. | Start up from the first Mac OS X version 10.4 installation DVD by inserting it into your Mac, launching the Install Mac OS X application, and clicking the Restart button at the prompt. After you authenticate yourself as an administrator, the Mac will restart from the installation DVD and immediately enter the installation process. Alternatively, you can insert the DVD, restart your Mac, and hold the C key down while it is restarting. Your Mac will restart from the DVD and will move into the installer.
NOTE When your Mac is starting up under version 10.4, you won't see the Happy Mac icon as in version 10.1 and earlier. That icon has been replaced by the Apple logo. Apparently, Apple felt that the Happy Mac had outlived his usefulness and didn't look version 10.2/3/4compatible. Oh well, rest in peace, Happy Mac! When the installer starts, you will see the Install Mac OS X Select Language window.
| 2. | Select the language you want to use as the primary Mac OS X language, and then click the right-facing arrow, which is the Continue button. You will move into the Mac OS X Installer and see the welcome message.
It's a good idea to run the Disk Utility application to check the disk on which you are installing version 10.4 before you install the new OS.
| 3. | Choose Utilities, Disk Utility. The application will open.
| 4. | Select the disk on which you are going to install Mac OS X and click the Repair Disk button. Disk Utility will analyze the disk and repair any problems it finds and can repair. As it works, the progress will be reported to you in the center pane within the application's window. When the application finishes, the results will be reported to you in the same spot.
If the disk checks out okay or if Disk Utility is able to repair any problems it finds, you can proceed with the rest of the installation process. If Disk Utility finds a problem that it can't fix, you must correct the disk's problem before continuing the installation. This isn't likely to be the case, but it is possible.
For help solving problems that Disk Utility cant repair, see Chapter 36, "Solving Mac Problems," p. 1045.
| 5. | Choose Disk Utility, Quit Disk Utility. You will move back into the Welcome screen of the Mac OS X installer application.
| 6. | Click Continue to exit the Welcome screen.
| 7. | Read the information in the next several windows; click Continue to move ahead in the process.
| 8. | When you reach the Software License Agreement window, click Continue; then click Agree when prompted.
The installer will check the volumes installed in your system. When it finishes, you will see the Select a Destination window. In this window, you will see all the volumes on your machine.
| 9. | Choose the volume on which the current version of Mac OS X is installed. The volume you select will have a circle and green arrow on it to indicate that it is the currently selected volume. In the lower pane, you will see a message indicating how much free space is required for the installation and stating that you have elected to upgrade Mac OS X on this disk.
 | If you can't select the partition (volume) on which you want to install Mac OS X, see "The Installer Won't Recognize a Partition" in the "Troubleshooting" section at the end of this appendix. |
| 10. | Click Options. You will see the Install Options sheet.
| 11. | Click the "Archive and Install" radio button.
| 12. | Check the "Preserve Users and Network Settings" check box. This causes the installer to move all the existing user accounts, network configurations, and so on to the new version 10.4 installation. You should choose this option unless you have a very good reason not to do so, such as you want to start with a new set of user accounts. When you use this option, you will skip the Setup Assistant application because the installer will carry all that information over for you. (The rest of these steps assume that you have used this option. If not, you can review the "Installing Mac OS X Version 10.4 with the Erase and Install Option" section later in this appendix to help you work through the Setup Assistant.)
| 13. | Click OK to close the sheet. In the Select a Destination window, you will see a message stating that you are installing a new version of 10.4 while saving the previous version and moving all user accounts to the new version.
| 14. | Click Continue. You will see the Easy Install screen.
TIP If installing things you won't ever use doesn't bother you, skip to step 19 to use the Easy Install option. This installs every possible file on your machine. It is an easy install, but you will probably end up storing many files you will never use (thus, wasting valuable disk space). | 15. | Click Customize to move to the Custom Install window. Use the tools in this window to deselect any files you don't want to install. You can remove the printer drivers for any printers you don't have, and you can remove most languages that you or those who will be using your Mac don't understand.
| 16. | Click the expansion triangle next to the Printer Drivers check box to see a list of the printer brands Mac OS X supports. If you are never going to want to use any of the brands of printers shown, uncheck their boxes to prevent the installation of those drivers.
| 17. | Click the expansion triangle next to the Language Translations check box to see a list of the languages Mac OS X supports. If you are never going to want to use any of the languages shown, uncheck their boxes. Or you can uncheck the Language Translations box to unselect all of them at once. You can save 30MB of disk space for each language you choose not to install.
NOTE The language you choose in step 2 is always installed. The other languages Mac OS X supports are listed in the Language Translations section. | 18. | In most cases, you should check the X11 check box. This installs the X11 environment that enables you to run applications designed for the X11 environment. If you have no interest in running anything but Mac OS X applications, leave the X11 check box unchecked.
| 19. | Click Install if you selected custom options or Easy Install if you elected not to customize the installation. You will see a progress window that displays information about the various steps the installer goes through to install Mac OS X. This information includes an estimate of how long the process will take, but, of course, this is only an estimate. The installation process can take anywhere from a few minutes up to an hour or so. There is no need for you to hang around and monitor the process because when it is complete, your Mac will restart in Mac OS X version 10.4.
In the login window, you will see the user accounts that existed in the previous version. (If you have only a single user account or if automatic login is enabled, you will move directly to the OS X desktop instead.)
|
| If the installer was unable to install Mac OS X, see "The Installer Couldn't Finish" in the "Troubleshooting" section at the end of this appendix. If one or more of your monitors doesn't work, see "One of My Monitors Doesn't Display, or Some Features Don't Work" in the "Troubleshooting" section at the end of this appendix. If you are experiencing issues with your Mac OS X installation, see "The 10.4 System I Installed Is Not Working" in the "Troubleshooting" section at the end of this appendix. |
NOTE If your accounts have pictures associated with them, you might see placeholders instead of the images. Version 10.4 does not include the same set of images that previous versions did, so you might have to choose new images for some user accounts.
When you log in to version 10.4, you will find that most of your configuration from the previous version has been maintained, such as your login items, desktop photos, and Dock configuration. Some might not be (on some installs with early versions of the installer, I had to reconfigure some options). Usually, if you do have to reconfigure some aspects of the system, doing so takes only a few minutes. Moving Files from the Previous System to the New System The only downside of installing a clean version of the OS is that you have to move files you still need from the previous version to the new version. Mostly, these are the files related to specific third-party applications you have installed. Before you bother looking for files to move, try to work with the system as it is. You might find that everything works just fine and you don't need to do the second part. After you are confident that you don't need the previous versions of the OS, you can trash the folder called Previous System located on your Mac OS X startup volume. If you do find some things that aren't working as you expect, proceed with the second part of the process. If you do find that some third-party applications aren't working properly, reinstalling them from the original CDs or installers (that you, of course, saved on a CD or a different volume) is easiest and best. If you can't do this for some reason, or there are preference or configuration files that you need to retrieve from the old system, you have to find and move those files into the new system manually. Finding and moving all the files you need from the old system to the new one can be a bit tricky, but with some patience and a bit of luck, you can work through it. (If you think installing a new OS is a bit tedious, try installing it dozens of times while writing a book!) Follow these steps: 1. | Open the volume on which you installed version 10.4. In addition to the folder called System, you will see a folder called Previous Systems (see Figure A.1). This contains the previous versions of OS X that existed when you did the install.
Figure A.1. The Previous Systems folder contains, amazingly enough, previous versions of Mac OS X. 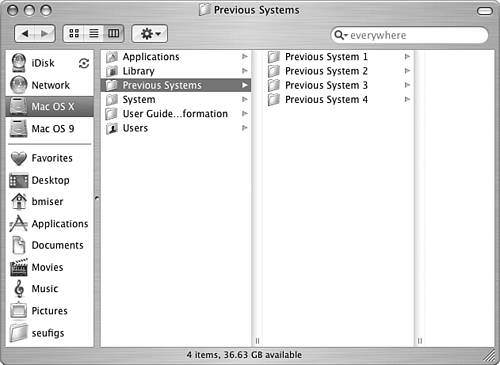
| 2. | Open the Previous Systems folder, and then open the most recent previous system folder contained within that folder. For example, if this is your first clean install, open the folder called Previous System 1. You will see the set of folders that were contained in that version of the OS (see Figure A.2).
Figure A.2. These folders contain files you might need to move to your clean installation of Mac OS X. 
| 3. | Drag the files you think you might need from the folder in the Previous System folder to the corresponding folder in the 10.4 System folder.
|
Whether you need any of these files and folders depends on your specific setup. In my testing, I found that my system worked fine without any of the old files, but in the event you need to move some files over, consider the following folders: Applications This folder contains the previous versions of Apple applications that were part of the default installation. Library This folder contains the library files that provide functionality for various areas of the OS, such as Audio, Fonts, Java, and QuickTime. It is very unlikely that you will need to retrieve any of these files. The only exceptions might be files that were installed by third-party software. System This folder contains only one folder, which is the system Library folder. In this folder are core application services and frameworks, such as Classic, Displays, and OpenSSL. Again, it is very unlikely that you will need to retrieve any of these files. The only exceptions might be files that were installed by third-party software. Users If you chose to move all user accounts to the clean installation, this folder is empty because you maintained the users in the new system. If you didn't preserve users, you can use the contents of this folder to re-create user folders.
Various third-party applications can store individual files within these folders as well, so if something doesn't seem to be working properly and you can't reinstall the application from an original installer, explore these folders to see whether you can find files for those applications. Then, move those files to the corresponding folders in 10.4 system folders. After you have used 10.4 for some time and are confident it is working properly, you can dispose of the Previous System folders to recover disk space. | If an application does not work properly after you have installed Mac OS X, see "An Application Doesn't Work Under OS 10.4" in the "Troubleshooting" section at the end of this appendix. If an application has lost your preferences after you install 10.4, see "An Application Lost My Preferences Under OS 10.4" in the "Troubleshooting" section at the end of this appendix. |
Finishing Your Mac OS X Installation After you have completed the installation, use Software Update to update it. To learn how to update the installation, p. 1100.
Installing Mac OS X Version 10.4 with the Erase and Install Option The Erase and Install option provides the cleanest installation of OS 10.4 and gives you the chance to rebuild the volume on which you install 10.4; this is a good thing because you have the chance to get rid of data and applications that you don't use anymore and that are just wasting space. The downsides to this method are that it requires you to back up all the data you do want to carry to the new 10.4 installation and is definitely the most work. Following are the phases in this installation process: 1. | Back up any data, including user Home folders and application installers and updaters, that you want to include in the 10.4 installation onto CD, DVD, or a different volume on a hard drive than the one on which you are installing Mac OS X version 10.4. Ensure that you have installers, updaters, and registration numbers for all your applications stored someplace besides the volume on which you are going to install Mac OS X.
| 2. | If you want to partition a disk on which you are going to install Mac OS X, start up from the Mac OS X Installation disc and partition the drive.
| 3. | Run the Mac OS X installer to install the OS, and then work through the Setup Assistant.
| 4. | Create additional user accounts.
| 5. | Copy data from the backups you made in step 1 into the new installation.
|
Backing Up Data to Take into the New System When you use the erase installation option, all the data on the volume on which you install Mac OS X is deleted, erased, removed, kaput, terminated, and so on. So, before you install, you need to save any data you want to use with version 10.4 from your current Mac OS X installation some place other than the volume on which you are installing Mac OS X version 10.4. There are a number of ways to back up this data, including the following: CAUTION If you are going to partition the drive on which you install Mac OS X, you need to save your data on a different drive (or CD or DVD) than the one on which you are going to install Mac OS X. When you partition a drive, you will destroy all the data on that drive.
To learn more about backup systems, p. 1010.
When backing up the data you want to "take with you," you should consider the following: User Home folders The Home folders for each user account contain that user's documents, preferences, and other data. For example, the Music folder contains the iTunes Music Library, the Pictures folder contains the iPhoto Photo Library, and so on. The Library folder within the Home folder contains user preferences, email account information, Safari bookmarks, and so on. If you want to save any of this data, you need to back up the Home folders you want to save. You can be selective about this data; for example, you can choose to back up only parts of the Home folders, such as the Music and Pictures folders. In most cases, I recommend that you save the entire Home folder for each user account, unless you are not going to re-create that user account in the new system. Application installers and updaters If you have installed or updated any of your applications from an installer that you downloaded, make sure you back up the application and its updaters. If you installed the application from CD or DVD, be sure you can locate the discs and that you save a copy of any updates you downloaded and installed for that application. You can also back up the applications themselves rather than the installers and reinstall the applications by dragging them from the backup into the Applications folder under the new system. However, this can sometimes result in the application not working properly because a system component wasn't installed correctly. I recommend that you reinstall applications from the original installer and then apply any updates that are available. CAUTION In addition to the software installers and updaters, be sure you have any registration or serial numbers for any applications you are going to install in the new system. Losing this information can cost time and possibly money if you have to reregister an application.
System Data If an application you use makes changes to the OS at a system level, you need to retrieve the files that application has saved in the current System folder so you can restore them. Typically, you need to do this only if you don't choose to reinstall the application from scratch.
After, and only after, you are sure you have backed up all the data you want to install in the new system, you can proceed with the rest of the steps of the installation process. Partitioning a Drive Before Installing Mac OS X You can partition a hard drive to make logical volumes on it; each volume acts like an independent hard drive. The time to do this is before you install Mac OS X because you must erase the entire disk, not just the volume on which you are going to install Mac OS X, to partition it. If you are going to use an existing volume to install Mac OS X, skip to the next section called, "Starting the Mac OS X Version 10.4 Installation." 1. | Insert the Mac OS X Installation disc in your Mac, restart it, and press and hold down the C key while it starts up. When the Mac starts up, the installer application will open.
| 2. | Select Utilities, Disk Utility. The Disk Utility application will open.
| 3. | Use the Disk Utility to partition the drive.
To learn how to use the Disk Utility to prepare and partition a disk to prepare a volume for Mac OS X, p. 894.
| 4. | When you have partitioned the drive, quit the Disk Utility. You will return to the Mac OS X Installer.
|
Starting the Mac OS X Version 10.4 Installation To install Mac OS X using the Erase and Install option, follow these steps: 1. | Start up from the Mac OS X version 10.4 installation disc by inserting it into your Mac, launching the Install Mac OS X application, and clicking the Restart button at the prompt. The Mac restarts from the installation disc and immediately enters the installation process.
If you have partitioned the drive, you can skip this step because you will already be in the Installer.
NOTE When your Mac is starting up under version 10.4, you won't see the Happy Mac icon as in version 10.1 and earlier. That icon has been replaced by the Apple logo. Apparently, Apple felt that the Happy Mac had outlived his usefulness and didn't look version 10.2/3/4compatible. Oh well, rest in peace, Happy Mac! As things begin to progress, you will see the Install Mac OS X Select Language window.
| 2. | Select the language you want to use as the primary Mac OS X language, and then click the right-facing arrow, which is the Continue button. You will move into the Mac OS X Installer and see the welcome message.
It's a good idea to run the Disk Utility application to check the disk on which you are installing version 10.4 before you install the new OS. If you just partitioned the hard drive, you don't need to do this and can skip to step 6.
| 3. | Choose Utilities, Disk Utility. The application will open.
| 4. | Select the disk on which you are going to install Mac OS X and click the Repair Disk button. Disk Utility will analyze the disk and repair any problems it finds and can repair. As it works, the progress will be reported to you in the center pane within the application's window. When the application finishes, the results will be reported to you in the same spot.
If the disk checks out okay or if Disk Utility is able to repair any problems it finds, you can proceed with the rest of the installation process. If Disk Utility finds a problem that it can't fix, you must correct the disk's problem before continuing the installation. This isn't likely to be the case, but it is possible.
For help solving problems that Disk Utility cant repair, see Chapter 36, "Solving Mac Problems," p. 1045.
| 5. | Choose Disk Utility, Quit Disk Utility. You will move back into the Welcome screen of the Mac OS X installer application.
| 6. | Read the information in the next several windows; click Continue to move ahead in the process.
| 7. | When you reach the Software License Agreement window, click Continue; then click Agree when prompted. (Of course, you will read the agreement to make sure you actually agree with it. It's a mystery to me what happens if you don't agree.)
The installer checks the volumes installed in your system. When it finishes, you will see the Select a Destination window. In this window, you will see all the volumes on your machine.
| 8. | Choose the volume you want to erase and install Mac OS X on. The volume you select will have a circle and green arrow on it to indicate that it is the currently selected volume. In the lower pane, you will see a message indicating how much free space is required for the installation and stating that you have elected to update Mac OS X on this disk.
| If you can't select the partition (volume) on which you want to install Mac OS X, see "The Installer Won't Recognize a Partition" in the "Troubleshooting" section at the end of this appendix. |
NOTE If you have partitioned the drive, you will see that the drive is empty and that you have elected to install Mac OS X on the volume (rather than upgrade because there is nothing on the volume to upgrade). | 9. | Click Options. You will see the Install Options sheet.
| 10. | Click the Erase and Install radio button.
NOTE If you partitioned the drive, you can also select the Install Mac OS X option because there is no version of the OS on the disk. You can select the Erase and Install option, but there is nothing to erase on the disk. When the disk is empty, these options do the same thing. | 11. | Select the format you want to use on the selected volume on the "Format disk as" pop-up menu. Generally, you should select the Mac OS Extended (Journaled) option, which is the default.
| 12. | Click OK to close the sheet. In the Select a Destination window, you will see a message stating that you have selected to erase the volume and format according to the selection you made in the previous step.
| 13. | Click Continue. You will see the Easy Install screen.
TIP If installing things you won't ever use doesn't bother you, skip to step 18 to use the Easy Install option. This installs every possible file on your machine. It is an easy install, but you will probably end up storing many files you will never use (thus, wasting valuable disk space). | 14. | Click Customize to move to the Custom Install window. Use the tools in this window to deselect any files you don't want to install. You can remove the printer drivers for any printers you don't have, and you can remove most languages that you or those who will be using your Mac don't understand.
| 15. | Click the expansion triangle next to the Printer Drivers check box to see a list of the printer brands Mac OS X supports. If you are never going to want to use any of the brands of printers shown, uncheck their boxes to prevent the installation of those drivers.
| 16. | Click the expansion triangle next to the Language Translations check box to see a list of the languages Mac OS X supports. If you are never going to want to use any of the languages shown, uncheck their boxes. Or you can uncheck the Language Translations box to unselect all of them at once. You can save 30MB of disk space for each language you choose not to install.
NOTE The language you choose in step 2 is always installed. The other languages Mac OS X supports are listed in the Language Translations section. | 17. | In most cases, you should check the X11 check box. This installs the X11 environment that enables you to run applications designed for the X11 environment. If you have no interest in running anything but Mac OS X applications, leave the X11 check box unchecked.
CAUTION Before proceeding, make sure that you have backed up any data you want to save. All the data on the selected volume will be removed when you perform step 16. (If you partitioned the drive, it is already too late….) | 18. | Click Install if you selected custom options or Easy Install if you elected not to customize the installation. You will see a progress window that displays information about the various steps the installer goes through to install Mac OS X. This information includes an estimate of how long the process will take, but, of course, this is only an estimate. The installation process can take anywhere from a few minutes up to an hour or so. There is no need for you to hang around and monitor the process because when it is complete, your Mac will restart in Mac OS X version 10.4.
When this process is complete, you move into the Mac OS X 10.4 Setup Assistant (you'll know this has happened when you hear music and see the Welcome screen).
| 19. | Follow the onscreen directions to work through the Setup Assistant. These steps include setting your personalized settings, entering or creating an Apple ID, registering your copy of Mac OS X, creating an administrator user account, choosing or configuring an Internet connection, setting up email accounts, selecting a time zone, and setting the time and date.
The Setup Assistant is well designed and does a good job of guiding you through the steps of configuring the basic aspects of Mac OS X, such as creating the first user account, configuring Internet access, and so on. You can use the information presented in other parts of this book to understand what the Assistant is asking you about and to reconfigure any settings you make via the Setup Assistant at a later time.
|
To learn about configuring Internet access under Mac OS X, p. 337.
TIP In most cases, just do the very basic amount of configuration in the Setup Assistant to get through it. Then do manual configurations of the system, guided by the information in this book, so you better understand what you have configured.
After the Setup Assistant has finished its work, you move to the Login window. Welcome to Mac OS X version 10.4! | If the installer was unable to install Mac OS X, see "The Installer Couldn't Finish" in the "Troubleshooting" section at the end of this appendix. If one or more of your monitors doesn't work, see "One of My Monitors Doesn't Display, or Some Features Don't Work" in the "Troubleshooting" section at the end of this appendix. If your Mac can't connect to the Internet, see "My Mac Won't Connect" in the "Troubleshooting" section at the end of this appendix. |
CAUTION You should create additional user accounts and restore all the data you want before you do anything else, such as launching applications. This ensures that you don't create any new files in the Home folders and other locations that you will end up replacing when you restore data to the new system.
Creating Additional User Accounts After you have completed the Setup Assistant, log in and create user accounts for each user of your Mac; you will at least need one user account for each user whose data you are going to restore. To learn how to create and configure user accounts, p. 26, and "Configuring a User Account," p. 26.
Restoring Data to the New System Restoring data from your backups can be somewhat time-consuming, but most of the process is not terribly complicated. Restoring User Home Folders There are two basic categories of data in users' Home folders that you might want to restore to the new system: data folders and files within the Library folder. To learn about the contents of Home folders, p. 21.
The default data folders in each user's Home folders include Desktop, Documents, Movies, Music, Pictures, and Public. (There might be additional folders if the user has created them.) These folders are very important because all the user's data is stored in them, such as their iTunes music and iPhoto Photo Library. To restore these folders, follow these steps: 1. | Log in as the user whose folders you are going to restore.
| 2. | Drag the folder you are restoring from the backup into the user's Home folder on the Mac OS X version 10.4 volume. If the folder already exists (such as the Pictures folder), you are warned that you are replacing an existing folder.
| 3. | Click Replace to replace the current folder with the version you want to restore.
Depending on how large the folder is (for example, the Music folder can be quite large if the user has added a lot of music to the iTunes Library), the copy process can take some time. Fortunately, you can copy multiple folders at the same time and continue to do other tasks while the copy proceeds.
| 4. | Repeat steps 2 and 3 for each folder you want to restore to the user's Home folder.
|
CAUTION You can treat the Library folder just like the other default folders and replace it in its entirety. However, I don't recommend this because new versions of Mac OS X can store different files in the Library folder. It is better to be selective about what you replace in this folder so you replace only those files that are related to specific applications.
Restoring files from the user's Library folder is trickier and requires a bit more thought. Your goal should be to recover any of the user's personalized data, such as an address book, email accounts, bookmarks, application preferences, and so on. NOTE If you want the user to start over and create all new preferences, you can skip this part of the process.
The general steps to use are the following: 1. | Open a Finder window showing the contents of the user's Library folder on the Mac OS X version 10.4 volume.
| 2. | Open a second Finder window showing the contents of the user's Library folder on the backup volume, such as a DVD, CD, or hard drive.
| 3. | Drag the files you want to restore from the backup volume into the same folder in the Library folder on the Mac OS X version 10.4 volume. If the file currently exists, you are prompted to replace it; elect to replace the file.
Use Table A.1 to get an idea of the files you should replace.
Table A.1. Examples of Files Within a User's Library Folder That Might Need to Be RestoredFolder with a User's Library Folder | Filename orFolder Name | What It Restores |
|---|
Application Support | AddressBook | The user's Address Book information. | Application Support | iCal | The user's calendar. | Application Support | Other application folders | If there are other application folders, this restores them for each application the user will use. | Calendars | | Any calendar files the user wants to maintain. | FontCollections | | Any font collections the user wants to maintain. | Fonts | | Any fonts the user wants to maintain. | iMovie | | Any plug-ins or sound effects the user has added and wants to be available. | Internet Plug-ins | | Any Internet plug-ins the user has installed that aren't included in the related application's installer. | Keychains | | Any keychains the user has created. | Mail | All | The information related to the user's use of the Mail application, including account information and mailboxes. | Preferences | | Any preferences for applications you will reinstall. | Safari | Bookmarks.plist | The user's Safari bookmarks. | Sounds | | Any custom sounds the user has added to the system. |
| 4. | Repeat steps 2 and 3 for each Library file you want to move to the new installation.
|
CAUTION Table A.1 is not all-inclusive. There might be other files related to applications you have that are not included in the table. However, you should be able to locate those files by following similar patterns. For example, in the Preferences folder, look for files with the application's name. These are likely candidates for restoration.
Restoring Applications After you have restored the appropriate Home folders, you should reinstall any applications you want to make available. Although you can drag these from a backup, I recommend that you reinstall them from the installation disc or installer file to ensure that any system files are installed properly. After you have installed an application, make sure you also apply any updates that are available for it. Restoring System Files If there are specific system files, such as those associated with an application that you chose not to install with its installer, restore those from the backup to the new system. Finishing Your Mac OS X Installation After you have completed the installation, use Software Update to update it. To learn how to update the installation, p. 1100.
Installing Mac OS X Version 10.4 with the Upgrade Option As you read earlier, you can install version 10.4 directly over a previous version of Mac OS X. The installer manages all aspects of the upgrade for you and attempts to maintain as much of your current configuration as it canhowever, don't expect perfection; some personalization might be lost. When this method works properly, this is an easy and fast way to upgrade. When it doesn't work, you can experience problems such as applications quitting unexpectedly. If you want to have the installer perform the upgrade, perform the following steps: 1. | Start up in the Mac OS X environment you want to upgrade.
| 2. | Insert the Mac OS X version 10.4 installation disc.
| 3. | Open the Install Mac OS X application.
| 4. | Click Restart at the prompt.
| 5. | Confirm that you are an Administrator for the machine. Your Mac restarts and boots from the installation disc, and you move into the Mac OS X installation process. The system goes through several checks. Eventually, you see it begin to prepare the installation process.
NOTE When your Mac is starting up under version 10.4, you won't see the Happy Mac icon as with previous versions of the OS earlier than Mac OS X 10.1. That icon has been replaced by the Apple logo. Apparently, Apple felt that the Happy Mac had outlived his usefulness and didn't look version 10.2/3/4compatible. Oh well, rest in peace, Happy Mac! As things begin to progress, you see the Install Mac OS X Select Language window.
| 6. | Select the language you want to use as the primary Mac OS X language, and then click Continue. You move into the Mac OS X Installer and see the welcome message.
| 7. | Read the information in the next several windows; click Continue to move ahead in the process.
| 8. | When you reach the Software License Agreement window, click Continue; then click Agree when prompted.
The installer checks the disks installed in your system. When it finishes, you see the Select a Destination window. In this window, you see all the volumes on your machine.
| 9. | Choose the volume on which the current version of Mac OS X is installed. The volume you selected will have a circle and green arrow on it to indicate that it is the currently selected volume. In the lower pane, you will see a message indicating how much additional space is required to install the software and stating that you have elected to upgrade Mac OS X on this volume.
| 10. | Click Continue. You will see the Easy Install screen.
| 11. | Click Upgrade. You will see a progress window that displays information about the various steps the installer goes through to install Mac OS X version 10.4. This information includes an estimate of how long the process will take, but, of course, this is only an estimate. When the process is complete, your Mac restarts in Mac OS X version 10.4.
After the installation process is complete, you move to the Login window. Welcome to Mac OS X version 10.4!
|
| If the installer was unable to install Mac OS X, see "The Installer Couldn't Finish" in the "Troubleshooting" section at the end of this appendix. If one or more of your monitors doesn't work, see "One of My Monitors Doesn't Display, or Some Features Don't Work" in the "Troubleshooting" section at the end of this appendix. If you are experiencing issues with your Mac OS X installation, see "The 10.4 System I Installed Is Not Working" in the "Troubleshooting" section at the end of this appendix. |
Finishing Your Mac OS X Installation After you have completed the installation, use Software Update to update it. See the section "Updating Your Mac OS X Installation." |