| As its name implies, Preview's primary function is to let you preview (perhaps the application would be more accurately called View) documents. In the context of Preview, documents include many kinds of files, such as image files, PDFs, and many more. Although you can't make many changes in the documents you preview, Preview is useful for viewing a wide variety of documents. NOTE Preview is Mac OS X's default PDF viewing application.
Viewing Images in Preview Many of the image file types you commonly use under Mac OS X are configured to open in Preview by default. NOTE Preview might not be the default application for viewing image, PDF, or other files. If not, you can open any image file by first opening Preview and then using the Open command, or by setting Preview to be the application associated with a specific image file.
 To learn how to associate files with an application, p. 201. To learn how to associate files with an application, p. 201.
To open and view images in Preview, use the following steps: 1. | Open an image file. Preview will open and you will see the image in the Preview window (see Figure 22.1). If the image doesn't fill the Preview window, you'll see gray borders around it.
Figure 22.1. Perhaps Preview would be better named View because you use it to view images and other documents. 
TIP If an application other than Preview opens when you open an image file, open the file's contextual menu and select Open With, Preview. | 2. | Use the tools in the toolbar to control how the images appear, such as the Zoom In button to make the image larger.
|
TIP To zoom in on part of an image, select the part on which you want to zoom and select View, Zoom to Selection (or press  -*). To remove the selection box, click the image outside of the box. -*). To remove the selection box, click the image outside of the box.
Many of Preview's commands are straightforward, such as the Zoom To Fit command that sizes the current image so it fills the Preview window. If you have used any graphics application, you won't have any trouble with these basic viewing commands. Preview also features a Drawer that is useful when you are working with more than one image at a time. To try this, select several image files and open them at the same time. When you do this, Preview's Drawer will open and you will see thumbnails of each image you opened (see Figure 22.2). Select an image's thumbnail to view it in the Preview window. Figure 22.2. Preview's Drawer makes viewing multiple images easy. 
NOTE If you open images one-at-a-time, a Preview window will open for each image file.
You can open and close the Drawer by nclicking the Drawer button on the toolbar; by selecting View, Drawer; or by pressing -T. TIP You can customize Preview's toolbar just like you can in many other Mac OS X applications, including the Finder.
Using Preview to Crop an Image Cropping is one of the most basic and useful image editing options. Fortunately, you can use Preview to easily crop images, as you can see in the following steps: 1. | Open the image you want to crop.
| 2. | Drag in the image to select the portion of the image you want to keep (see Figure 22.3). As you select part of the image, the part that is not selected will be darkened.
Figure 22.3. Select the portion of the image you want to keep before you use the Crop command. 
| 3. | To adjust the selected part of the image, drag the selection box around or resize it by either dragging a corner or dragging the resize handle located in the center of each side of the selection box.
TIP To keep the selection box proportional to the original image, hold down the Shift key while you drag. | 4. | When you have the part of the image you want to keep selected, select Tools, Crop or press -K. All the image outside of the selection box will be removed.
|
TIP You can move to back to the most recently saved version of an image by selecting File, Revert.
Using Preview to Read PDFs Portable Document Format (PDF) files are a common way to distribute electronic documents. You are likely to encounter many PDFs on the Web, as file attachments to emails, and so on. Preview is Mac OS X's default PDF viewer. You can create your own PDF documents. To learn how, p. 210.
To view PDFs with Preview, do the following: 1. | Open a PDF document in Preview.
| 2. | Open Preview's Drawer. You'll see a thumbnail of each page in the document (see Figure 22.4).
Figure 22.4. You can click a page's thumbnail in the Preview Drawer to jump to that page. 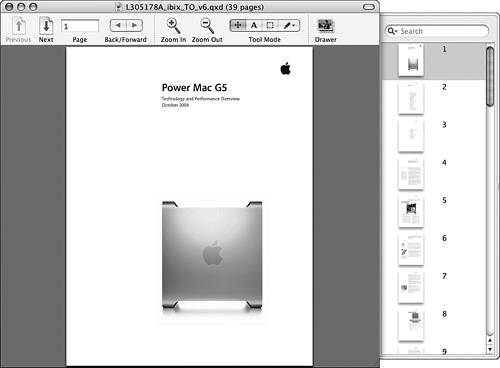
NOTE Some of the features depend on how a PDF was created. For example, if the PDF was created with a linked table of contents, you will see buttons that enable you to choose to view thumbnails or topics. Both views work similarly in that you click what you want to see. | 3. | Click a thumbnail to move to a specific page, or type the page number in the Page box on the toolbar.
| 4. | Move to pages one at a time by clicking the Next or Previous button in the toolbar or by pressing the Down or Up arrow keys.
| 5. | Adjust the display of a PDF document by using the commands shown when you select View, PDF Display. The options include Singles Pages, which shows the document page-by-age; Facing Pages, which shows two pages at a time; and so on.
| 6. | You can annotate a PDF, such as to make comments or highlight parts of it, by selecting Tools, Annotate Tool. Then you choose the tool you want to use by selecting Tools, Text Annotation (this enables you to add text annotations to the document) or Tools, Oval Annotation (this enables you to draw ovals to highlight parts of a PDF). You can use both types of tools on the same page, and you can include multiple annotations on the same page (see Figure 22.5).
Figure 22.5. You can annotate PDF documents using Preview's Annotation tools. 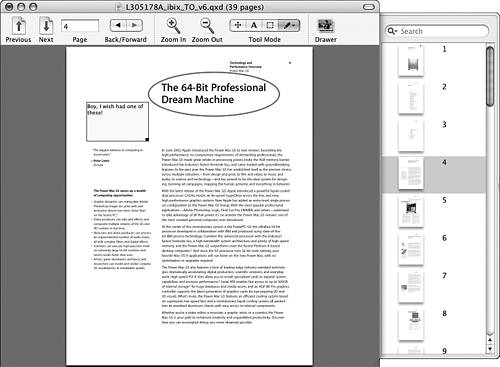
| 7. | To move around inside a document, select Tools, Scroll Tool (or press -1). The cursor will become the hand and you can drag around a page to move it within the Preview window (unless the entire page fills the window, in which case you can't do this).
| 8. | To select text so you can copy and paste it into other documents, select Tools, Text Tool or press -2. Select the text you want to copy and select Edit, Copy. The text will be moved to the Clipboard, from which you can paste it into other documents, such as TextEdit.
| 9. | To select parts of a page using a selection box, select Tools, Select Tool or press -3. Drag on the page to select part of it. You can then copy that part and paste it into other documents. To remove the selection box, press Esc or click outside the selection box.
TIP You can select any of these tools by clicking the appropriate button on the Tool Mode button that is part of the default Preview toolbar. | 10. | To add a bookmark to a PDF, move to the location at which you want to set a bookmark and select Bookmarks, Add Bookmark or press -D. In the resulting sheet, name the bookmark and click Add. You can return to this point in the document at any time by selecting it on the Bookmarks menu.
| 11. | To search a PDF document, type the text for which you want to search in the Search box that appears at the top of the Drawer. As you type, Preview will search the document for your search text. When it finds the first instance, the page on which it appears will be shown and an oval will be drawn around the occurrence. After a second or so, the oval disappears, but the search term remains shaded so you can easily see it. In the Drawer, each occurrence of the search term appears on the list of results (at the top of the list, you will see how many occurrences there are in the document). When you click an occurrence, the page on which it appears is shown in the Preview window and the search term is highlighted on the page.
| 12. | If you made annotations to the document, save it before you close it.
|
Viewing a Slideshow in Preview iPhoto, iDVD, and iMovie can be used to create slideshows. Although not nearly as sophisticated as those applications, you can create a basic slideshow in Preview by performing the following steps: 1. | Use Preview to open the image files you want to view in a slideshow.
| 2. | Select View, Slideshow or press Shift--F. The Preview interface will disappear and the images will be displayed as a slideshow.
| 3. | Move the mouse and a set of controls will appear at the bottom of the screen (see Figure 22.6). From left to right, the buttons are
- Back Moves the slideshow back one image
- Pause/Play Pauses or plays the slideshow
- Next Moves to the next image
- Index Sheet Displays thumbnails of each image so you can click one to move to that image
- Fit to Screen/Actual Size Adjusts the size of the image to fill the screen or be the actual size
- Close Stops the slideshow
Figure 22.6. Preview's slideshows aren't fancy, but they are a quick way to view a batch of images. 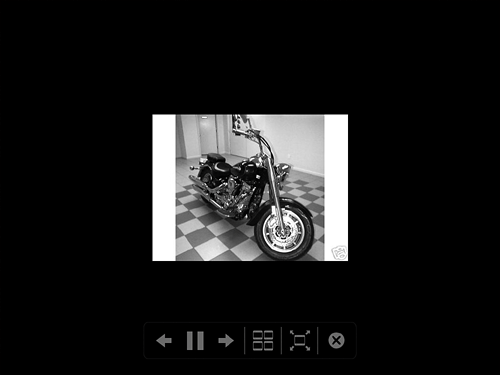
| 4. | Use the appropriate buttons to control the slideshow.
| 5. | When you are done, click the Close button or press Esc. You will moved back to the standard Preview window.
|
TIP You can create a slideshow from the Finder by using Spotlight to search for image files. Click Show All in the Images section to display all the image files. Select the images you want to include in the slideshow and open the contextual menu. Select Slideshow and then use the tools that appear to control the slideshow. This works just like a slideshow you create in Preview.
Using Preview to Convert Files to Different Formats One of the nice things Preview does for you is enables you to convert an image from one format to another. Here's how: 1. | Open the image you want to save in a different format.
| 2. | Select File, Save As. The Save As sheet will appear.
| 3. | Select the file format in which you want to save the file in the Format pop-up menu (see Figure 22.7).
Figure 22.7. One of Preview's most useful functions it its ability to convert image files to different formats. 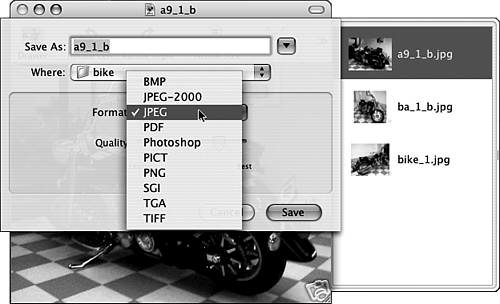
| 4. | If the format you selected has options, use the slider, check boxes, or other controls to configure its settings.
| 5. | Rename the file, choose a save location, and then click Save. A new file in the format you selected will be created.
|
Other Useful Preview Functions You might find three other Preview functions to be useful: Get Info Use this command (select Tools, Get Info or press -I) to get detailed information about an image. When you do this, you'll see the Document Info window, which has three tabs. Use the Summary tab to get high-level information, including its type, file size, resolution, and so on. Use the Details tab to view more detailed specifications, such as color model, color depth, and so forth. Use the Keywords tab to associate keywords with an image; you can use Spotlight or a smart folder to search for the keywords you associate with an image. My Rating To rate an image, select Tools, My Rating, and then choose the number of stars at which you want to rate the image. You can use this rating in other applications or to search for images with specific ratings using Spotlight or smart folders. Image Correction You can change many aspects of an image, such as its brightness, sharpness, and so on, by selecting Tools, Image Correction. Use the controls in the resulting window to configure specific aspects of the image (see Figure 22.8). Figure 22.8. The powerful, but somewhat hidden, Image Correction tool enables you to configure many aspects of an image. 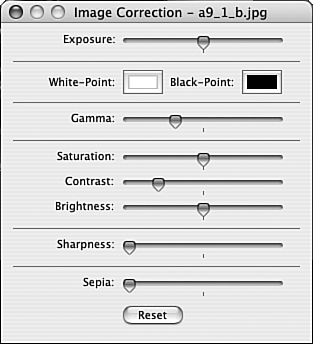
Setting Preview Preferences You can configure several Preview preferences to tweak Preview to suit your needs. These options are summarized in Table 22.1. Table 22.1. Preview PreferencesTab | Preference | What It Does |
|---|
General | Thumbnail size slider | Sets the size of thumbnails shown in the Drawer. | General | Window background color | Sets the color of the area outside an image in the Preview window (the default is gray). | Images | When opening images: Open all images in one window | No matter how you open images (one at a time or many at once), they all appear in the same window and you can use the Drawer to work with them. | Images | When opening images: Open groups of images in the same window | When you open multiple images at the same time, they all appear in the same window and you can use the Drawer to work with them. | Images | When opening images: Open each image in its own window | No matter how many images you open at once, they each appear in a separate Preview window. | Images | Default image size: Actual size | Opens images at their default sizes. | Images | Default image size: Scale large images to fit window | Automatically zooms out in large images so the entire image is displayed in the Preview window. | Images | Default image size: Scale up small images to fit window | Automatically zooms in for small images so the image fills the entire Preview window; you can choose this only when "Scale large images to fit window" is selected | Images | Respect image DPI for Actual Size | This causes the Actual Size command to take the image's resolution into account when resizing it. | PDF | Default document scale | Choose auto-scale to use the default size settings stored in the PDF file; choose Use scale of and enter a value to cause Preview to use the scale value you enter when you open a PDF. | PDF | Remember last page viewed | Causes Preview to display the page you last viewed when you open a document. | PDF | Greeking threshold | Sets the size at which greeking is used to display text; this is done when text becomes too small to be displayed legibly and instead is replaced by symbols that look like Greek. | PDF | Anti-alias text and line art | When checked, Preview will smooth out text and art through antialiasing it. | PDF | Open drawer only for Table of Contents | Causes Preview to open the Drawer only when a PDF has a table of contents element included in it. | Bookmarks | Remove | This pane shows all the bookmarks that have been created using Preview; for each, the label, file, and page are shown. Select a bookmark and click Remove to delete it from the document in which it was created. | Color | Preferred CMM | Use the pop-up menu to choose the Color Management Model that should be used for an image; your choices will depend on how the image was created. Select Automatic to have Preview choose the model it sees as best or is the default for an image. |
|