Methods of Installation
| The installable file is in the form of an application file. This file is around 89,200KB in size. There are three modes of installation: GUI, command, and silent modes. For GUI mode, your system must support a Java-based GUI. If your system does not support a Java-based GUI, the installation program detects this and switches to command mode automatically. Note The following explanation of installation on the Windows platform is detailed because the source code in this book was developed on the Windows platform. The installation procedure for Unix platforms is briefly explained. For details on installing on other platforms, please refer to the documentation at http://e-docs.bea.com/wls/docs70////install/index.html GUI Mode, Windows PlatformTo start the installation in GUI mode, navigate to the directory of the downloaded executable item and double-click the icon weblogic700_win. If your installable file is on a CD-ROM, the installer automatically runs when you insert the CD-ROM into your CD-ROM drive. If for some reason the installer does not run automatically, navigate to the CD drive and double-click the installer icon named weblogic700_win or weblogic700_win32. Running the InstallerIt is advisable to shut down all other programs before you start any installation. You can exit the installation at any point by clicking the Exit button, and you can return to the previous screen by clicking the Previous button. Follow these steps to complete the installation:
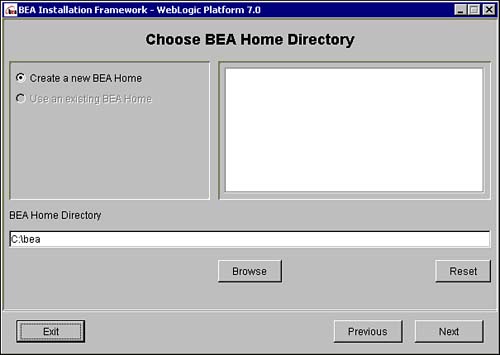
Now when you open the explorer window and navigate to your newly created BEA directory, you see the following folders:
Also, in your Start > Programs menu, you find an entry for BEA WebLogic Platform 7.0. This points to the BEA home directory. To run the installation from a command prompt, open a DOS window in the directory containing the executable file, and type the name of the executable file. For example, if the name of the executable file is weblogic700_win.exe and the file exists in the My Download Files directory, open a DOS prompt in the My Download Files directory, and type the following command (see Figure B.3): weblogic700_win Figure B.3. Running the GUI installation from the command prompt.
How to create your own domain is explained a little later. GUI Mode, Unix PlatformFor installation, the downloadable file is in the form of a .bin file (called weblogic700_linux for the Linux version, unless you change it while downloading). Open a command shell prompt, and after downloading the appropriate installable file, execute the command Chmod a+x weblogic700_linux Then run the installation program by typing ./weblogic700_linux.bin If you have an installation CD-ROM, navigate to the CD-ROM directory, and execute the command ./weblogic700_linux.bin If your installable file is in the form of a .jar, then set the JDK home path and execute this on the command line: java jar installable_name.jar If your installable .jar file exists on a CD-ROM, navigate to the CD-ROM directory, and execute the following command: java jar installable_name.jar mode=gui Note The name of the file is weblogic700_linux for the Linux installer, which is around 98,500KB in size. In Sun Solaris, the filename is weblogic700_solaris.bin (around 95,600KB in size). For HP-UX, the filename is weblogic700_hpux.bin (around 1MB in size). The installations using .jar files do not include JDK. Hence, for these installations, you need to install JDK first and then proceed. Command-Line ModeThe command-line mode of installation is available for the Unix platforms. Perform the same steps as in the preceding sections, with the qualifier mode=command in the java statement. Silent ModeIn this mode, the installation does not prompt you for any input. Instead, these values are picked up from an XML file. Also, in this mode, acceptance of the BEA license agreement is taken for granted. An installation using this mode can be performed once and then replicated with the same configuration on multiple machines. This mode requires the creation of the installation template or XML file before commencing the installation. Before looking at the sample template, take a look at what each of the variables mean so that you can decide the variable values that you wish to enter.
If you wish to run the configuration wizard, a set of values required by the configuration wizard also have to be mapped in this XML file. These values are the domain directory; domain name; server name; user name and password for the domain created; the address, port, and secure server port on which the server should be configured; the cluster name, port, and multicast address (if needed); the administration address and port; the name and address of the managed server; whether the server is to be created as a standalone serve, a clustered managed server, or a managed server; the path to the JAR file used by the configuration wizard to configure the servers; the managed servers data group; and the clustered servers data group. In all these values, it should be kept in mind that the values should not contain spaces in a Unix environment. Note Because the value of RUN_DOMAIN_WIZARD is set to false, the configuration wizard will not be run during the installation of WebLogic. An example of the XML created is shown in Listing B.1. Listing B.1 silent.xml for a Silent-Mode Installation<?xml version="1.0" encoding="UTF-8"?> <domain-template-descriptor> <input-fields> <data-value name="BEAHOME" value="C:\bea" /> <data-value name="USER_INSTALL_DIR" value="C:\bea\weblogic700" /> <data-value name="RUN_DOMAIN_WIZARD" value="false" /> <!--The following values are used by the Configuration Wizard to create and configure a domain.--> <data-value name="domain.directory" value="C:\bea\user_domains\mydomain" /> <data-value name="C_domainName" value="mydomain" /> <!--here the value for serverName should be that of your local host or your computer name. For example, if your computer is named "Local", the server name is "Local"--> <data-value name="C_serverName" value="Local" /> <data-value name="C_username" value="user" /> <data-value name="C_password" value="password" /> <data-value name="C_serverListenAddress" value="" /> <data-value name="C_serverListenPort" value="7001" /> <data-value name="C_serverSSLListenPort" value="7002" /> <data-value name="ClusterName" value="mytrialcluster" /> <data-value name="ClusterPort" value="7777" /> <data-value name="ClusterMCAddr" value="237.0.0.1" /> <data-value name="ADMIN_HOST_NAME_OR_IP" value="adminserver" /> <data-value name="ADMIN_LISTEN_PORT" value="7001" /> <data-value name="MANAGED_SERVER_REGISTERED_NAME_IN_ADMIN" value="ms1" /> <!--The SERVER-RUN-AS value determines the server configuration that the Configuration Wizard creates. There are four options as indicated by the following lines. Comment out the three options you do not want to use.--> <data-value name="SERVER-RUN-AS" value="Single Server (Standalone Server)" /> <!-- <data-value name="SERVER-RUN-AS" value="Admin Server with Managed Server(s)" /> --> <!-- <data-value name="SERVER-RUN-AS" value="Admin Server with Clustered Managed Server(s)" /> --> <!-- <data-value name="SERVER-RUN-AS" value="Managed Server (with owning Admin Server configuration)" /> --> <!--The selectedJar value determines the template that the Configuration Wizard uses to create a domain and configure servers.--> <data-value name="selectedJar" value="C:\beatest\weblogic700\common\templates\domains\wls.jar" /> <data-value name="INSTALL_NT_SERVICE" value="no" /> <!--The managedServers data group determines the configuration of the group of managed servers in the domain. This data group applies only when you select "Admin Server with Managed Server(s)" as the value for SERVER-RUN-AS. To use this data group, uncomment all applicable lines.--><!-- <data-group name="managedServers"> --> <!-- <data-element> --> <!-- <data-value name="managedServerRegName" value="managed1" /> --> <!-- <data-value name="managedServerHostIP" value="1.2.3.4" /> --> <!-- <data-value name="managedServerListenPort" value="1001" /> --> <!-- <data-value name="managedServerSSLListenPort" value="1002" /> --> <!-- </data-element> --> <!-- <data-element> --> <!-- <data-value name="managedServerRegName" value="managed2" /> --> <!-- <data-value name="managedServerHostIP" value="2.3.4.5" /> --> <!-- <data-value name="managedServerListenPort" value="2001" /> --> <!-- <data-value name="managedServerSSLListenPort" value="2002" /> --> <!-- </data-element> --> <!-- <data-element> --> <!-- <data-value name="managedServerRegName" value="managed3" /> --> <!-- <data-value name="managedServerHostIP" value="3.4.5.6" /> --> <!-- <data-value name="managedServerListenPort" value="3001" /> --> <!-- <data-value name="managedServerSSLListenPort" value="3002" /> --> <!-- </data-element> --> <!-- <data-element> --> <!-- <data-value name="managedServerRegName" value="managed4" /> --> <!-- <data-value name="managedServerHostIP" value="4.5.6.7" /> --> <!-- <data-value name="managedServerListenPort" value="4001" /> --> <!-- <data-value name="managedServerSSLListenPort" value="4002" /> --> <!-- </data-element> --> <!-- </data-group> --> <!--The clusterServers data group determines the configuration of the group of managed clustered servers in the domain. This data group applies only when you select "Admin Server with Clustered Managed Server(s)" as the value for SERVER-RUN-AS. To use this data group, uncomment all applicable lines.--> <!-- <data-group name="clusterServers"> --> <!-- <data-element> --> <!-- <data-value name="clusterServerRegName" value="cluster1" /> --> <!-- <data-value name="clusterServerHostIP" value="1.2.3.4" /> --> <!-- <data-value name="clusterServerListenPort" value="101" /> --> <!-- </data-element> --> <!-- <data-element> --> <!-- <data-value name="clusterServerRegName" value="cluster2" /> --> <!-- <data-value name="clusterServerHostIP" value="2.3.4.5" /> --> <!-- <data-value name="clusterServerListenPort" value="202" /> --> <!-- </data-element> --> <!-- <data-element> --> <!-- <data-value name="clusterServerRegName" value="cluster3" /> --> <!-- <data-value name="clusterServerHostIP" value="3.4.5.6" /> --> <!-- <data-value name="clusterServerListenPort" value="303" /> --> <!-- </data-element> --> <!-- <data-element> --> <!-- <data-value name="clusterServerRegName" value="cluster4" /> --> <!-- <data-value name="clusterServerHostIP" value="4.5.6.7" /> --> <!-- <data-value name="clusterServerListenPort" value="404" /> --> <!-- </data-element> --> <!-- </data-group> --> </input-fields> </domain-template-descriptor> When you have finished creating this template, name it silent.xml. You can save it in any location because you have to specify this location in the command that you execute when you install WebLogic in silent mode. To install, follow the steps for the appropriate O/S given in the following sections. Windows PlatformIf you wish to install WebLogic as a Windows service, then you need to log on as an administrator while performing the installation or have administrator privileges assigned to your user ID. Then, at a command prompt, go to the directory containing the installation file and type the following command: weblogic700_installable.exe -mode=silent -silent_xml=path_to_silent.xml Note In this example, and this entire appendix, the name of the installable file is assumed to be weblogic700_installable.exe. Because this installation is a silent one, a log file will be helpful to monitor the installation. To log the installation progress, include the path of a log file after the path of the silent.xml file, as shown here: weblogic700_installable.exe -mode=silent -silent_xml=path_to_silent.xml log= full_path_of_log_file Note If the log file does not exist, the installer creates it. However, the directory specified for the log file must exist. Unix PlatformOpen a command-prompt window after logging onto the target Unix system. Navigate to the directory containing the installable file, and execute the following command: chmod a+x weblogic700_installable.bin ./weblogic700_installable.bin -mode=silent ./weblogic700_installable.bin mode=silent silent_xml=path_to_silent.xml log= /log/wls_install.log Note The log file can be created by including the log option, as described earlier. If you don't need the log file, do not include the log option. The steps for installing from a .jar are similar to the steps mentioned in the command mode method of installation, with the mode option and the log option specified. |

EAN: 2147483647
Pages: 339