Configuring Web-Related Options
3 4
Before you start creating Web pages in Word, you should review Word's Web page–related options. Setting options might sound a little tedious compared to the prospect of creating Web pages, but controlling your working environment up front can save you headaches later. By paying attention to the Web options, you'll also give yourself a chance to think about your Web pages before you get started, and you'll be alerted to the types of details you might have to take into consideration. The options discussed in this section can be found in the Web Options dialog box, which you can access by choosing Tools, Options, clicking the General tab, and then clicking the Web Options button. The first tab in the dialog box is the Browser tab, so we'll start there.
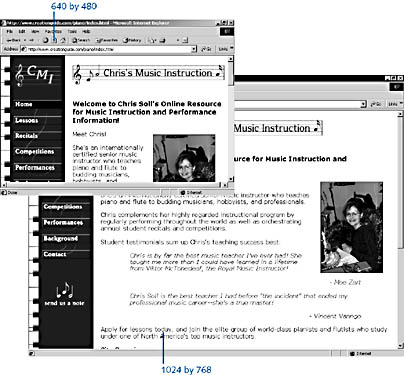
Figure 31-2. As a designer, you usually need to consider how your Web page will appear in a variety of circumstances. This figure shows the Web page example from Figure 31-1 with the monitor set to 640 by 480 and 1024 by 768 pixels instead of 800 by 600.
Specifying Target Browser Options
When you create Web pages, you have to consider how people will be viewing your pages. One detail you need to be aware of is which browsers users will be using. If you're publishing Web pages on an intranet for your company, chances are that most users will be using the same browser and similar computer configurations—in that case, design considerations are easy because you can design for the company standard. On the other hand, if you're planning to post your pages on the Internet for people around the world, you'll have to take a more liberal approach to design because you won't know how users will be viewing your pages. (Will they use Macs, PCs, Microsoft Internet Explorer, Netscape Navigator, or something else?) In those cases, you need to define which browsers and versions of those browsers you're going to cater to as you design your Web pages.
Word helps you to design to a particular browser standard, which means that working within browser and version limitations is easier than it sounds. In Word, you can turn on or off features not supported by selected Web browsers. To configure this setting, follow these steps:
- Choose Tools, Options, click the General tab, and then click the Web Options button. The Web Options dialog box appears, as shown in Figure 31-3.
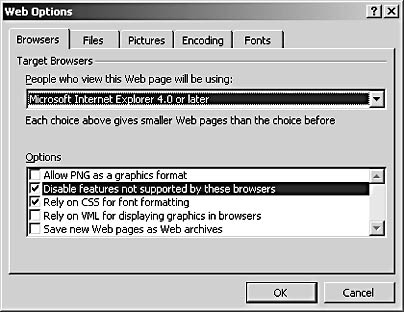
Figure 31-3. The Web Options dialog box provides options you can use to specify how Word handles some Web page creation tasks.
- Click the Browsers tab, if necessary.
- Ensure that the Disable Features Not Supported By These Browsers check box is selected.
Caution
If you clear the Disable Features Not Supported By These Browsers check box, you will be able to use every Web page feature built into Word regardless of whether any browser version can support it. In this case, "more" isn't better because you could very easily design a page that few people can view. - Click the People Who View This Web Page Will Be Using down arrow, and choose a browser type in the drop-down list. The check boxes in the Options list will be adjusted automatically based on the browser you select.
By default, Word is configured to use Internet Explorer 4 and Netscape Navigator 4 as target browsers. This setting is a fair standard, because those two browsers represent the most popular applications—and versions of the applications—in use today.
Reviewing File Options
After you specify a target browser for your intended Web audience, you should next consider how you want Word to handle your Web files. As mentioned, Web pages are made up of multiple files. When you create Web pages, you must keep your files organized—otherwise, you'll end up with pages containing broken links and missing components. Word offers a few ways you can organize your files, as well as a couple of default editor options, on the Files tab in the Web Options dialog box, shown in Figure 31-4.
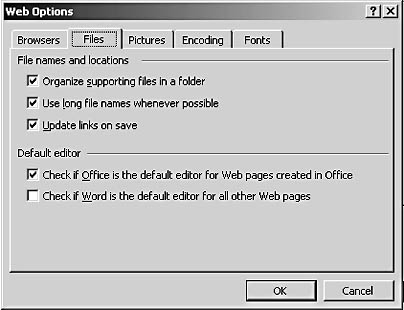
Figure 31-4. The Files tab helps control how Word organizes a Web page's files, and lets you specify whether you want Word to automatically check which program is registered as the default editor.
The Files tab enables you to specify the following preferences regarding files and folders:
- Organize Supporting Files In A Folder. By default, Word saves supporting Web page files (such as graphics) in a separate folder within the folder that contains the HTML document. Generally, this setup works best, because you'll be able to find your HTML document easily as well as group the supporting files together in a logical subfolder. You should clear this check box only if you're working on a Web page that already has an existing hierarchy of folders or if you prefer to have your HTML documents and supporting files stored in the same folder. Regardless of how you store your Web page's files, you should note the page's file organization. Later, when you upload your Web page to a server, you'll need to re-create the organizational structure on the Web server to ensure that your links work properly.
- Use Long File Names Whenever Possible. By default, this check box is selected. Nowadays, the only operating system that doesn't support long file names is Windows 3.x running on MS-DOS. If you know that some people who will be working with your files will be using Windows 3.x on MS-DOS, you'll want to clear this check box; otherwise, leave it selected.
- Update Links On Save. By default, this option is selected, which means that Word checks the Web page's links each time you save a Web page document. If Word finds a broken link, you'll receive an error message that provides an option for fixing the link before saving.
In addition to folder options, the Files tab provides two check boxes related to the default editing applications associated with Web pages. You can specify that you want Word to automatically check whether any Microsoft Office program or Word specifically is registered as the default Web page editor for a Web page. By default, the option to check whether Office is the default editor for Web pages created in Office is selected. This setting means that pages built in Word will be displayed in Word, whereas pages built in Microsoft Excel or Microsoft FrontPage will be opened in those programs. Keep in mind that you can open a Web page in any Web editor application, regardless of which application is set as the default editor. To do so, simply open the application you want to use as a Web page editor, and then open the document from within the application.
Targeting Monitor Specifications
The Pictures tab in the Web Options dialog box, shown in Figure 31-5, has been pared down in Word 2002. On this tab, you simply define a couple of target monitor settings for typical viewers. Basically, when you configure these settings you're instructing Word to optimize a Web page for the selected monitor. For most Web surfers, a typical monitor size is 800 by 600 pixels, with 96 pixels per inch. If you know that your audience uses other settings, you can optimize for those monitor settings. Regardless of your settings here, you should check all your Web pages using various screen settings before you post your pages live. As a Web designer, you want your Web pages to look their best for the largest possible number of people.
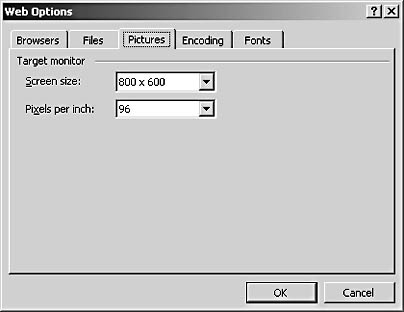
Figure 31-5. You can instruct Word to optimize a Web page for specific screen sizes and pixels-per-inch settings.
Selecting Encoding Options
The Encoding tab in the Web Options dialog box, shown in Figure 31-6, enables you to choose a language code from among those installed on your computer. Encoding refers to the byte or byte sequence that represents each character in your HTML or plain-text files. You can choose a language code for the current page if the page is not already displayed with the correct language encoding (by selecting a language code in the Reload The Current Document As drop-down list). You can also save the current document with a particular language code by clicking the Save This Document As down arrow, selecting a language code in the drop-down list, and then clicking OK. If you know that you always want to save Web pages using the encoding language selected in the Save This Document As list, you can select the Always Save Web Pages In The Default Encoding check box. This setting comes in handy if you reuse pages from other sources and want to store every page using one encoding language.
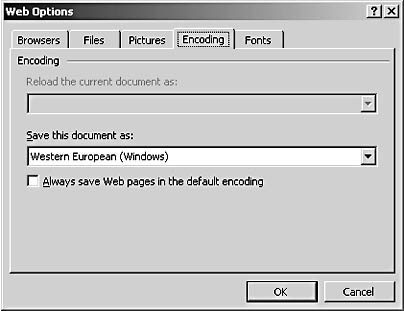
Figure 31-6. You can specify language encoding for documents that are currently displayed, for documents that are about to be saved, or for current and future Web pages you open in Word.
Choosing Default Fonts
The last tab in the Web Options dialog box is the Fonts tab, shown in Figure 31-7. On the Fonts tab, you can configure the following default settings:
- Character Set enables you to choose the character set that's used to encode the file. A character set is basically a mapping between the selected language's characters and a combination of numbers, letters, and symbols. For example, in ASCII (one of the most widely used character sets), the code 65 maps to the letter A. Most likely, the default setting is the character set you'll want to use for your Web pages.

Figure 31-7. The Fonts tab enables you to set default font styles that will come into play when a Web page doesn't specifically assign a font style or size to text.
- Proportional Font specifies the font used for normal text if the Web page doesn't assign a font style. You can set a default font size in pixels in the Size box.
- Fixed-Width Font specifies the font used for fixed-width elements if a Web page doesn't assign a font style. You can set a default font size in pixels in the Size box.
Universal Web Page Fonts
When you use fonts in your Web pages, keep in mind that only the following select fonts are universally recognized as cross-platform fonts (which means they'll be displayed properly on both Macs and PCs):
- Arial
- Arial Narrow
- Comic Sans
- Courier New
- Georgia Times
- New Roman (or Times)
- Trebuchet
- Verdana
If your Web pages will be viewed by a large, diverse audience (as would be the case on the Internet), you should consider sticking with these fonts when you design Web pages.
EAN: 2147483647
Pages: 337