Customizing WordArt Objects
3 4
After you insert a WordArt object, you'll most likely want to customize the object to suit your purposes. You can customize WordArt objects in a number of ways. For example, you can adjust a WordArt object's content and style, change the object's shape, combine WordArt objects, control text alignment, and so forth. To assist you in making changes to your WordArt objects, Word provides the WordArt toolbar, shown in Figure 17-4.

Figure 17-4. The WordArt toolbar contains most of the tools you need to fully customize WordArt objects.
The next few sections describe the various ways you can alter WordArt characteristics to morph standard WordArt objects into custom graphical text elements. As you'll discover, customizing WordArt is a breeze.
Adjusting WordArt Style and Text
After you create a standard WordArt object, you might decide that you want to change your basic font selection, apply a different WordArt base style, or edit the text. To do this, you'll have to return to the WordArt Gallery or the Edit WordArt Text dialog box. Backtracking is easy:
- To apply a different WordArt base style to an existing WordArt object, click the WordArt object you want to modify, click the WordArt Gallery button on the WordArt toolbar, and double-click a style in the WordArt Gallery.
- To edit text in an existing WordArt object, double-click the WordArt object, or click the WordArt object (which selects the WordArt object and opens the WordArt toolbar by default) and click the Edit Text button on the WordArt toolbar. In the Edit WordArt Text dialog box, make any desired changes, including adjusting text and formatting, and click OK.
When you apply a different style using the WordArt Gallery or edit WordArt text in the Edit WordArt Text dialog box and click OK, the changes are instantly reflected in your WordArt object.
Positioning WordArt Objects in Documents
After you create a WordArt object, you'll probably want to specify how and where the object will be displayed in your document. By default, a WordArt object is inserted as an inline object. This means that the object is inserted at the insertion point and embedded within a regular line of text, as shown in Figure 17-5. You can drag inline WordArt objects from line to line and from paragraph to paragraph. You can also resize inline WordArt objects just as you resize other objects (by dragging the object's sizing handles or configuring the object's Size properties, as described in the section "Changing the Shape of WordArt,"). But if you want to wrap text around a WordArt object, rotate the object, angle the object's text, position the object behind or in front of document text, or drag the object around a page that doesn't contain text, you'll need to change the WordArt object's text wrapping setting.
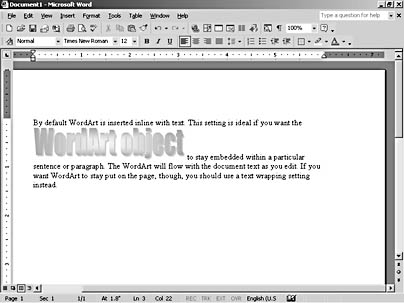
Figure 17-5. By default, WordArt objects are formatted as inline objects.
To change a WordArt object's text wrapping setting, follow these steps:
- Click the WordArt object, and click the Text Wrapping button on the WordArt toolbar.
- On the Text Wrapping drop-down menu, choose a text wrapping setting.
The Text Wrapping drop-down menu, shown in Figure 17-6, provides the following standard text wrapping styles: In Line With Text (the default setting), Square, Tight, Behind Text, In Front Of Text, Top And Bottom, Through, and Edit Wrap Points.
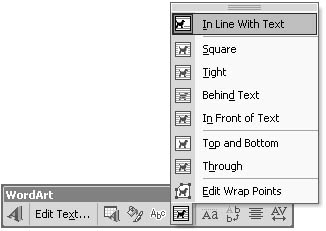
Figure 17-6. You can control how WordArt is displayed relative to document text by configuring the text wrapping setting.
After you specify how you'd like a WordArt object to be positioned within text, you can move the object by dragging it around your page in Web Layout or Print Layout view. In addition, you can specify exact object placement settings by configuring the Layout tab in the Format WordArt dialog box.
Tip - Move WordArt Objects Incrementally
You can move WordArt objects in small increments using the arrow keys. To nudge a WordArt object, click the object to select it, and then press the Up Arrow, Down Arrow, Left Arrow, and Right Arrow keys to move it in the desired direction.
To access advanced layout properties for a selected WordArt object, you need to display the Advanced Layout dialog box. To do so, follow these steps:
- Click the WordArt object, and click the Format WordArt button on the WordArt toolbar (or right-click the WordArt object, and choose Format WordArt on the shortcut menu) to open the Format WordArt dialog box.
- In the Format WordArt dialog box, click the Layout tab. The Layout tab provides basic text wrapping and text alignment settings.
- On the Layout tab, click the Advanced button. The Advanced Layout dialog box opens, as shown in Figure 17-7. Notice that the Advanced Layout dialog box contains two tabs: Picture Position and Text Wrapping.
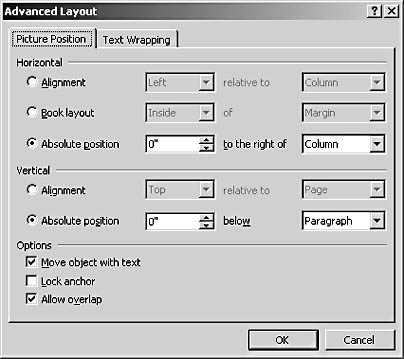
Figure 17-7. The Advanced Layout dialog box enables you to precisely configure a WordArt object's position, alignment, and text wrapping settings.
- Configure your settings on both tabs,click OK to close the Advanced Layout dialog box, and then click OK in the Format WordArt dialog box to apply the settings.
For more information about setting Advanced Layout options, see Chapter 14, "Adding Visual Impact with Pictures."
If you're attempting to apply advanced layout settings to a WordArt object but find that the Picture Position options are unavailable, change the Wrapping Style setting on the Text Wrapping tab to something other than In Line With Text. The Picture Position tab also contains a Move Object With Text check box. If you want to position a WordArt object on a particular page regardless of text flow, be sure to clear this check box.
Changing the Shape of WordArt
After you insert and position a WordArt object, you'll probably want to resize and reshape the object to suit your purposes. You can resize and reshape WordArt using three key tools: handles, WordArt shapes, and the Format WordArt dialog box.
Putting Handles to Work
As with other objects and graphics, you can display handles on WordArt objects and use these handles to modify the size and appearance of the objects. Both inline and floating WordArt objects provide sizing handles, which you can drag to resize the object.
To display a WordArt object's handles, simply click the object. Inline WordArt objects display standard black square sizing handles that you can drag to resize the object horizontally, vertically, and diagonally (which resizes the height and width proportionally). WordArt objects that aren't formatted as inline objects display a more colorful set of handles. Namely, a non-inline object provides clear circle handles for resizing, a green circle handle for rotating, and a yellow diamond handle for angling text. Figure 17-8 shows a WordArt object and its handles. To use any handle, simply drag the handle to the desired position.
Note
Remember, when you are working with an inline WordArt object, you can only drag the sizing handles to resize the WordArt object—you can't rotate or angle the text.

Figure 17-8. Handles enable you to resize, rotate, and angle WordArt text.
Tip
Keep an eye on the dashed lines when you rotate, angle, and resize WordArt text. Dashed lines are displayed as you drag handles so that you can get an idea of how you are reshaping a WordArt object.
Applying WordArt Shapes
In addition to resizing, rotating, and angling WordArt text, you can distort a WordArt object's shape. To do so, select the WordArt object, click the WordArt Shape button on the WordArt toolbar, and choose one of the 40 shapes available on the WordArt Shape menu, shown in Figure 17-9.
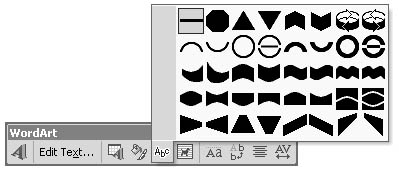
Figure 17-9. To get a feel for WordArt shapes, experiment with the WordArt Shape menu by applying various shapes to selected WordArt objects.
Sizing, Rotating, and Scaling WordArt with Precision
As you've seen, you can use handles to resize, rotate, and adjust WordArt objects until they look just right, but you can also perform these actions by specifying precise measurements. Using precise measurements to define your WordArt objects is an effective method when you want to create a uniform appearance among documents or among similar components within the same document. To precisely control WordArt size and rotation settings, you configure the settings on the Size tab in the Format WordArt dialog box, shown in Figure 17-10. To access the Size tab, right-click a WordArt object, choose Format WordArt on the shortcut menu, and click the Size tab. You can set sizing options for WordArt objects just as you set sizing options for other graphics or objects. After you configure Size And Rotate and Scale options, click OK to apply the settings.
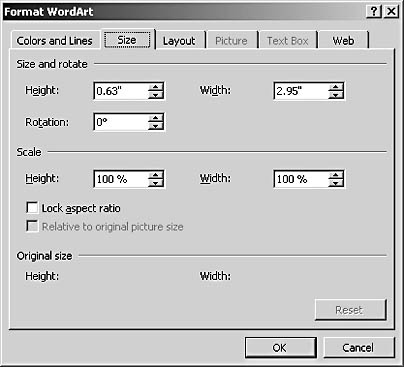
Figure 17-10. The Size tab enables you to precisely configure the size, rotation, and scale settings for your WordArt objects. Notice that the Size tab includes a Lock Aspect Ratio check box, which allows you to proportionally resize the height and width of a WordArt object based on a percentage of its current size.
Modifying WordArt Colors and Line Properties
Whenever you use WordArt, you should modify the default style so that you can present custom graphical text. Because so many people use Word, applying a default WordArt style without adding your own flair can result in others recognizing your use of WordArt. This recognition isn't necessarily a negative factor, but you'd probably prefer people to admire your graphical text, read the content, and move on, without pondering the sources of your design. Originality has its benefits. One of the most notable ways in which you can customize a WordArt object is to change the object's colors, texture, and line properties.
Changing a WordArt object's color scheme is as simple as selecting the WordArt object, clicking the Format WordArt button on the WordArt toolbar, and configuring the Colors And Lines tab in the Format WordArt dialog box. Figure 17-11 shows the Colors And Lines tab with the Color drop-down menu open. The Color setting in the Line section comes into play when you use a WordArt style that incorporates an outline around the graphical text.
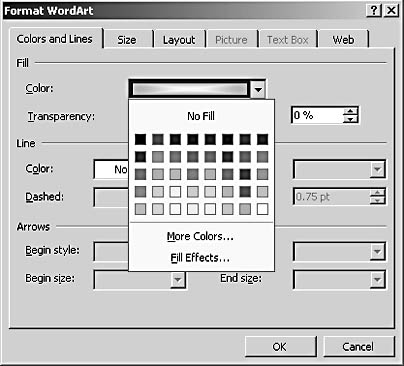
Figure 17-11. You can modify WordArt colors and line settings by configuring the Colors And Lines tab in the Format WordArt dialog box.
The Color drop-down menu includes the standard color palette as well as options that allow you to access additional colors and fill effects. If you click the Fill Effects command, the Fill Effects dialog box appears, as shown in Figure 17-12. You can use this dialog box to configure shading colors and gradients, textures, patterns, and pictures used to fill the WordArt object.
Changing the Shading or Texture of a WordArt Object
Some WordArt objects use a two-color (or more) gradient and shading scheme. If you apply a single color to those types of WordArt objects, the objects will look a bit flat due to the one-dimensional coloring scheme. If you want to change the color of a two-tone WordArt object, you have to modify the object's colors on the Gradient tab in the Fill Effects dialog box. You can also select a preset gradient color scheme by choosing the Preset option on the Gradient tab.
If you want to change the texture used in a default WordArt style, click the Texture tab in the Fill Effects dialog box. You can choose from a number of additional textures as well as navigate to any textures or graphics stored on your system.
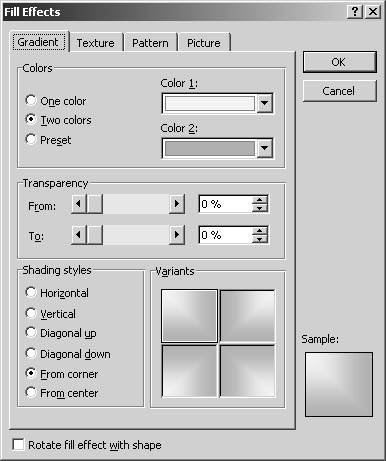
Figure 17-12. If a default WordArt style uses gradients, multiple colors, textures, or patterns, you can change the default configurations using the Fill Effects dialog box.
Formatting WordArt as Vertical Text
At times, you might want to display WordArt vertically instead of horizontally. You can create a vertical WordArt object by choosing one of the five vertical WordArt styles in the WordArt Gallery, or you can select an existing WordArt object and click the WordArt Vertical Text button on the WordArt toolbar.
You can also create columns of WordArt text by pressing Enter after each word you type in the Edit WordArt Text dialog box. Then, after the WordArt is displayed in your document, click the WordArt Vertical Text button. You WordArt text will look something like the example in Figure 17-13.
Aligning and Justifying WordArt Text
If your WordArt object includes multiple words on more than one line, you can control how the WordArt text is aligned. Aligning WordArt text is similar to aligning standard paragraph text. To view the available WordArt alignment options, select the WordArt object, and click the WordArt Alignment button on the WordArt toolbar, as shown in Figure 17-14.
The WordArt Alignment drop-down menu provides the following commands:
- Left Align aligns the text along the left edge of the WordArt frame.
- Center centers the text within the frame.
- Right Align aligns the text along the right edge of the frame.
- Word Justify justifies the text within the frame by adding space between words.
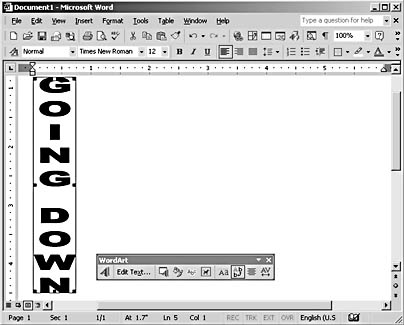
Figure 17-13. You can convert horizontal WordArt to vertical text by using the WordArt Vertical Text button on the WordArt toolbar.
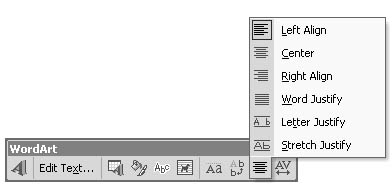
Figure 17-14. You can align WordArt text within the object's frame by choosing alignment options on the WordArt Alignment drop-down menu.
- Letter Justify justifies the text within the frame by adding space between letters and increasing existing spaces between words. Single-word lines are treated the same as they would be using the Word Justify option.
- Stretch Justify justifies the text within the frame by stretching the letters and the spaces between words.
Tip - Align Vertical Columns
You can use the alignment options to align vertical columns of WordArt text as well. To top-align vertical columns of text, choose the Left Align option on the WordArt Alignment drop-down menu; to bottom-align vertical columns of text, choose the Right-Align option.
Using the WordArt Same Letter Heights Option
Another effect you can apply to WordArt is to display lowercase letters the same height as uppercase letters. You might want to use this option to create a somewhat avant-garde artistic effect in a flyer or newsletter. To apply this formatting option, select the WordArt object, and click the WordArt Same Letter Heights button on the WordArt toolbar. Like other WordArt formatting options, you can't selectively apply this format setting within a WordArt object—it's an all-or-nothing proposition unless you use a workaround, as described in the following sidebar.
Adjusting WordArt Character Spacing and Kerning
Before word processing applications came along, most people left concepts like character spacing and kerning to professional typesetters. But now everyone who uses a word processing application is a bit of a typesetter. Thus, character spacing and kerning issues have made it to the fringe of mainstream document creation. If you've been ignoring character spacing and kerning options lately, here are a couple quick definitions to get you going:
- Character spacing refers to the space between characters. You can expand or condense space evenly between all WordArt characters.
- Kerning refers to adjusting spacing between pairs of characters to create the appearance of even spacing. For example, you might want to tighten the space between letter pairs such as YO and WA.
To adjust character spacing and kerning in WordArt objects, you can click the WordArt Character Spacing button on the WordArt toolbar, as shown in Figure 17-15. The WordArt Character Spacing drop-down menu lets you specify whether you want to set character spacing as Very Tight, Tight, Normal, Loose, Very Loose, or Custom. In addition, you can turn on or off the Kerning Character Pairs option to suit your preferences.
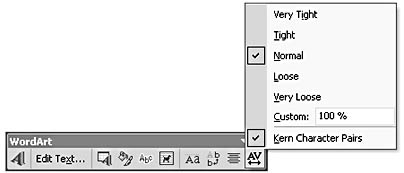
Figure 17-15. The WordArt Character Spacing drop-down menu provides options for expanding or condensing WordArt text.
Troubleshooting
Formatting Applies to the Entire WordArt Object, but I Want to Format Only Part of the Object
Nicely enough, Word provides numerous formatting options when it comes to customizing WordArt objects, but one drawback sticks out like a sore thumb—WordArt formatting options almost always apply to the entire WordArt object. If you want to format various parts of a WordArt object differently, you have to get a little creative. Specifically, you have to create separate pieces of WordArt, format the pieces as individual objects, and then group the objects together. You can accomplish this in two ways: by using the Grouping option, or by using the drawing canvas.
To use the Grouping option, create two or more WordArt objects, apply custom settings, and then group the WordArt objects as follows:
- Verify that the objects aren't configured as inline objects. (To do so, click the Text wrapping button on the WordArt toolbar, and confirm that an option other than In Line With Text is selected.)
- Drag the objects to where you want them to appear relative to each other.
- Select all the objects (by pressing Ctrl and clicking each object).
- Right-click the selected objects, and choose Grouping, Group on the shortcut menu.
When you choose the Group command, the WordArt objects are stored as a group. If you need to modify any portion of the WordArt grouping, right-click the grouped object, and choose Grouping, Ungroup on the shortcut menu.
To use the drawing canvas to combine custom WordArt objects, follow these steps:
- Position the insertion point where you want to create the object, and then choose Insert, Picture, New Drawing to insert a drawing canvas.
- Create and configure as many WordArt objects as necessary in the drawing canvas area. (Notice that the Drawing toolbar includes a WordArt button.)
- Position your WordArt objects where you want them to appear relative to each other.
As an added bonus, when you use the drawing canvas to combine WordArt objects, you can include any other drawing elements in your graphic as well.
For more information about using the drawing canvas, see Chapter 16, "Enlivening Documents with Drawings and AutoShapes."
Formatting WordArt for Web Pages
Web page creation has introduced an entire new genre of word processing, and Word offers a number of Web-friendly features. Among the plethora of Word features, WordArt seems to be a natural fit for creating Web page components. In fact, WordArt can be customized using a couple of Web-specific options. In particular, you can add alternative text (usually referred to as ALT text by Web designers) to WordArt, and you can format WordArt objects as hyperlinks. The next two sections describe these two basic Web formatting options.
For more information about creating Web pages in Word, see Chapter 31, "Creating Professional Web Sites."
Adding ALT Text to WordArt for Web Page Use
ALT text is text that is displayed on Web pages in place of graphics if a user has graphics capabilities turned off or if the user is using a text-only browser. ALT text is also displayed while graphics are loading (to give users a hint about the graphic before it loads) and when users hover the mouse pointer over a graphic. Basically, ALT text helps users identify the purpose of a Web page graphic. To add ALT text to a WordArt object, follow these steps:
- Select the WordArt object, and click the Format WordArt button on the WordArt toolbar, or right-click the WordArt object, and choose Format WordArt on the shortcut menu.
- In the Format WordArt dialog box, click the Web tab. By default, the WordArt text is displayed as the ALT text, as shown in Figure 17-16.
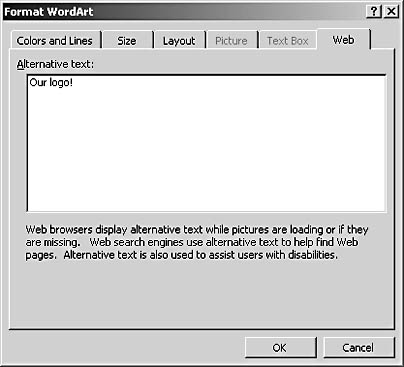
Figure 17-16. The Web tab in the Format WordArt dialog box is used to set the ALT text displayed for a WordArt object.
- To change the ALT text (by default, the ALT text is the same as the WordArt text), select the existing ALT text, type the text you want to associate with your WordArt object, and then click OK.
When your WordArt is displayed as part of a Web page, the ALT text will be displayed in place of your graphic as the graphic downloads and whenever users opt to hide graphics or use a text-only browser.
Formatting WordArt as a Hyperlink
Another Web-related way in which you can configure a WordArt object is to format the object as a hyperlink. Oftentimes, graphics (and remember, graphical text is fundamentally the same as a graphic) also serve as Web page hyperlinks. When you use WordArt on a Web page, you're basically inserting a graphic in your page. You might want to convert your WordArt object to a hyperlink for a number of reasons. For example, you might want to use a WordArt object as a button that links to a subpage, or you might want to use WordArt to create a linked logo image that users can click to return to your home page.
Configuring WordArt as a hyperlink is done using the same procedure as adding a hyperlink to other graphics or objects. To link a WordArt object, follow these steps:
- Select the WordArt object, and click the Hyperlink button on the Standard toolbar, or right-click a WordArt object, and choose Hyperlink on the shortcut menu. The Insert Hyperlink dialog box opens, as shown in Figure 17-17.
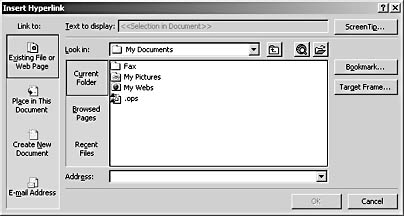
Figure 17-17. The Insert Hyperlink dialog box enables you to format a WordArt object as a hyperlink.
- In the Insert Hyperlink dialog box, specify the type of link you want to create in the Link To list. You can link to an existing file, another place in the current document, a new file, or an e-mail address. Then insert the link's address by navigating to a file or typing the address in the box.
Using linked WordArt, you can easily add clickable banners, logos, buttons, and icons to your online documents.
EAN: 2147483647
Pages: 337