Changing Margins and Orientation
|
| < Day Day Up > |
|
The page setup items you'll adjust most often are likely to be the margins and page orientation settings. The margins of your document control the amount of white space at the top, bottom, right, and left edges of the document. You can also control the amount of space used for the gutter, which is the space reserved on the interior edges of pages to save room for binding. In Word, you can customize the gutter setting along the left or top margin of the page.
| Tip | Plan your margins for double-sided printing If you'll be binding the document you create, be sure to specify a gutter margin large enough to accommodate the binding. If your document is printed single-sided, every gutter margin will show the spacing you enter along the left margin. If your document is to be printed double-sided, display the Page Setup dialog box, click the Multiple Pages arrow, and then choose Mirror Margins to make sure that the margin settings are applied to the left and right interior margins. For more information about printing, see Chapter 3, "Printing with Precision." |
Entering Margin Settings
When you begin working with a new Word document, the left and right margins are set to 1.25 inches, and the top and bottom margins are set to 1 inch. You can change margin settings in Word in two basic ways:
-
Drag the Left Indent and Right Indent markers in the horizontal ruler or the edge of the shaded area in the vertical ruler (in Normal, Web Layout, and Print Layout views) to the margin setting you want.
Tip To show and hide the horizontal and vertical rulers, choose View, Ruler.
-
Display the Page Setup dialog box (choose File, Page Setup), type values in the appropriate Margins options boxes, and then click OK.
Note By default, the Gutter Position option in the Margins tab in the Page Setup dialog box enables you to choose whether to create a left or top gutter. If you choose any option other than Normal in the Multiple Pages list in the Pages section of the Page Setup dialog box, Word disables the Gutter Position option and adds the gutter setting to the left margin (or alternating right and left margins, if Mirror Margins is selected in the Multiple Pages list).
Choosing Orientation
A document's orientation affects the way the content is printed on a page. By default, portrait orientation prints documents in traditional, 8.5-by-11-inch format; landscape orientation prints documents in a horizontal, 11-by-8.5-inch format. When should you use each orientation? Here are a few ideas.
-
Portrait orientation Traditional documents, letters, reports, newsletters, Web pages, and invoices.
-
Landscape orientation Slides, signs, title pages, charts, calendars, tri-fold brochures, and tables.
To change the orientation of a document, open the document, choose File, Page Setup to display the Page Setup dialog box, and then click the Margins tab. Click Landscape to change the orientation so that the document is printed with the long edge of the paper serving as the top of the page, or click Portrait to print the document with the short edge of the paper serving as the top of the page.
| Note | You can change the orientation from landscape to portrait and back again in a single document, if you choose. Simply place the insertion point where you want to change the orientation, display the Page Setup dialog box, click the Margins tab, and then choose the appropriate setting in the Apply To list. Then click the orientation you want. After you click OK, Word inserts a Section Break (Next Page) marker, and begins a new page using the new page setup settings. To view the page setup changes, click Print Preview on the Standard toolbar. |
Working with Varying Page Settings
Depending on a document's complexity, you might want to vary the margins. For instance, a standard report might have equal margins on the right and left, a format that makes setting margins a snap. In contrast, a document you want to bind or fold, or a publication that's designed so that the left and right pages complement each other, might require more finely tuned adjustments to page settings.
When you want to set up a multiple-page document that requires varying page settings, you can simplify your task by using the Multiple Pages setting in the Page Setup dialog box. The Multiple Pages setting enables you to specify whether your document should include mirror margins, two pages per sheet, book fold, or reverse book fold, as described in Table 15-1. To change the page settings for a multiple-page document, follow these steps:
-
Open your document, and then choose File, Page Setup to display the Page Setup dialog box.
-
Enter the Margins, Paper, and Layout settings in their respective tabs.
-
In the Pages section in the Margins tab, click the Multiple Pages arrow. Table 15-1 shows the effects of the Multiple Pages choices.
-
Click your choice, and then click OK. Word applies the changes to the current document.
| Setting | Preview | Description |
|---|---|---|
| Normal | | Creates single pages, with the same margin, header, and footer selections for every page. |
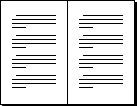
| Mirror Margins | | Creates a document in which the margins on the left and right pages mirror each other. |
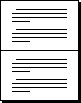
| 2 Pages Per Sheet | | Divides the current page into two pages. |
| Book Fold | | Treats each left and right page as a spread, using a gutter and mirroring margins as applicable. |
| Reverse Book Fold | | Enables you to create a booklet written in a right-to-left text orientation, such as one written in Arabic or Hebrew, or in an East Asian language that has vertical text. (This option is available only when a relevant language is enabled in Microsoft Office 2003 Language Settings.) |


|
| < Day Day Up > |
|
EAN: 2147483647
Pages: 373
- ERP Systems Impact on Organizations
- Challenging the Unpredictable: Changeable Order Management Systems
- Distributed Data Warehouse for Geo-spatial Services
- Intrinsic and Contextual Data Quality: The Effect of Media and Personal Involvement
- Development of Interactive Web Sites to Enhance Police/Community Relations