Format Your Listings with HTML
| Here's a secret known to successful sellers: eBay lets you use HTML to spruce up your item listings. While this isn't a task for the faint of heart, writing your own code lets you create highly individualized item listingsmuch fancier than you can do with a template-driven listing creator. How HTML WorksHTML coding might sound difficult, but it's really pretty easy. HTML is really nothing more than a series of hidden codes that tell web browsers how to display different types of text and graphics. The codes are embedded in a document, so you can't see them; they're visible only to your web browser. Note
These codes are distinguished from normal text by the fact that they're enclosed within angle brackets. Each particular code turns on or off a particular attribute, such as boldface or italic text. Most codes are in sets of "on/off" pairs. You turn "on" the code before the text you want to affect and then turn "off" the code after the text. For example, the code <h1> turns specified type into a level-one headline; the code </h1> turns off the headline type. The code <i> is used to italicize text; </i> turns off the italics. (As you can see, an "off" code is merely the "on" code with a slash before it.) Note
Entering HTML CodesYou enter HTML codes while you're creating your item listing. When you reach the Description section of the Describe Your Item page, click the View HTML link. This displays eBay's HTML editor, shown in Figure 17.7. You can enter your raw HTML code into this form. Figure 17.7. Enter your own HTML code on eBay's Describe Your Item page.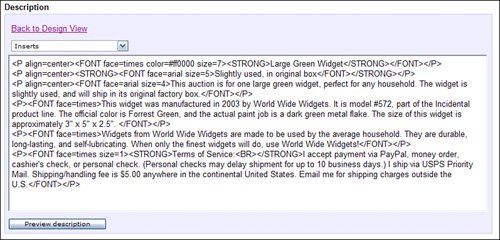 Codes to Format Your TextWe'll start off with some of the most common HTML codesthose used to format your text. Table 17.4 shows some of these text-formatting codes you can use in your item description.
Just surround the text you want to format with the appropriate on and off codes, and you're ready to go. For example, to format a piece of text as strong (bold), you'd write something that looks like this: <strong>this text is bold</strong> Codes for Font Type, Size, and ColorYou can also use HTML to specify a particular font type or size, using the <font> code. Note
To specify a font type for selected text, use the <font> code with the face attribute, like this: <font face="xxxx">text</font> Replace the xxxx with the specific font, such as Arial or Times Romanin quotation marks. Another common use of the <font> code is to specify type size. You use the size attribute, and the code looks like this: <font size="xx">text</font> Replace the xx with the size you want, from 6 to +6, with 6 being the smallest, +6 being the biggest, and 0 (or no size specified) being "normal" size type. You can also use the <font> code to designate a specific text color. In this instance, you use the color attribute, like this: <font color="#xxxxxx">text</font> Replace the xxxxxx with the code for a specific color. Table 17.5 lists some basic color codes.
Caution
Codes for ParagraphsWhen it's time to start a new paragraph, you start the paragraph with a <p> code. Then, when the paragraph is done, you close it with a </p> "off" code. The code looks something like this: <p> This is a normal text paragraph. It consists of multiple sentences. Like these. </p> Note
The <p> code can also contain the align attribute, which indicates how the paragraph is alignedleft, center, or right. Paragraphs are left-aligned by default, so if you want to center a paragraph, you'd use the following code: <p align="center"> This is the paragraph to be centered. All the text in the paragraph is aligned as indicated. </p> Codes for Paragraphs, Line Breaks, and RulesSome of the simplest HTML codes let you break your text into separate lines and add horizontal rules between paragraphs. These codes are inserted into your text just once; there are no matching ending codes. Table 17.6 lists these "on-only" codes.
Note
Codes for GraphicsAs you'll learn in Chapter 18, "Using Pictures in Your Listings," adding pictures and other graphics to your listings really brings some excitement to the normally plain-text world of eBay. You can add pictures the eBay way (described in Chapter 18), which puts all your pictures at the end of your text descriptionor you can put a picture anywhere in your text, using HTML. Before you can insert a graphic into your listing, you need to know the address of that graphic (in the form of a web page URL). Then you use the following code: <img src="URL"> No "off" code is required for inserted graphics. Note that the location is enclosed in quotation marksand that you have to insert the http:// part of the URL. As an example, if your graphic is the file graphic01.jpg located at www.webserver.com/mydirectory/, you insert this code: <img src="/books/2/945/1/html/2/http://www.webserver.com/mydirectory/graphic01.jpg"> The nice thing about inserting graphics this way is that you can include more than just picturesyou can add logos, starbursts, you name it. (And you can put the graphics anywhere in your text description.) You use the same technique to link to any graphic image anywhere in your item listing. Codes for LinksYou can use HTML to add links to your own personal web pages (a great idea if you have additional images of this specific item) or to related sites. Many sellers also like to provide a direct email link in case potential bidders have questions they need answered. To insert a link to another web page in your item listing, you use the following HTML code: <a href="URL">this is the link</a> The text between the on and off codes will appear onscreen as a typical underlined hyperlink; when users click that text, they'll be linked to the URL you specified in the code. Note that the URL is enclosed in quotation marks and that you have to include the http:// part of the address. You can also create a "mail-to" link in your listing; users will be able to send email to you by simply clicking the link. Here's the code for a mail-to link: <a href="mailto:yourname@domain.com">click here to email me</a> Note
Codes for ListsFinally, if you have a lot of features to list for your item, you might want to format them in a bulleted list. Using HTML codes, it's easy to create a neatly bulleted list for your ad. First, you enclose your bulleted list with the <ul> and </ul> codes. Then, you enclose each bulleted item with the <li> and </li> codes. The code for a typical bulleted list looks like this: <ul> <li>item one</li> <li>item two</li> <li>item three</li> </ul> Bulleted lists are great ways to run through a list of attributes or specifications; it's a lot cleaner than just listing a bunch of stuff within a long text paragraph. Tip
|


EAN: 2147483647
Pages: 204