Adding the Pixel Shader
| Once again, this screen is better, but it's still not perfect. What about the texture you have loaded? To use the textures, you have to write a pixel shader. Pixel shaders are just as easy to use as a simple vertex shader. Replace your KartRacers.fx file with the code in Listing 20.5. Listing 20.5. Your Completed Mesh Shader //----------------------------------------------------------------------------- // Global variables //----------------------------------------------------------------------------- // World matrix for object float4x4 worldMatrix : WORLD; // World * View * Projection matrix float4x4 worldViewProjection : WORLDVIEWPROJECTION; float4 lightDirection; // Direction of the light texture SceneTexture; sampler SceneSampler = sampler_state { Texture = <SceneTexture>; }; float4 Transform(in float4 pos : POSITION, in float3 normal : NORMAL, in float2 uv : TEXCOORD0, out float4 Position : POSITION, out float2 texcoords : TEXCOORD0) : COLOR0 { // Transform position Position = mul(pos, worldViewProjection); // Store uv coords texcoords = uv; // Transform the normal float4 transformedNormal = mul(normal, worldViewProjection); return dot(transformedNormal, lightDirection); } float4 TextureColor(in float2 textureCoords : TEXCOORD0, in float4 diffuseColor : COLOR0 ) : COLOR0 { // Get the texture color return tex2D(SceneSampler, textureCoords) * diffuseColor; } //----------------------------------------------------------------------------- // Techniques //----------------------------------------------------------------------------- technique RenderScene { pass P0 { VertexShader = compile vs_1_1 Transform(); PixelShader = compile ps_1_1 TextureColor(); } } I need to address a few new things here. First, you add two new variables to the file, namely, a texture and a sampler. The texture is naturally the one you've already loaded when you loaded the mesh, and the sampler is what the pixel shader uses to read the texture data. Notice that the sampler sets its internal value to the texture variable you've already created. You only need to modify the texture variable directly. You also slightly modify the vertex shader program by adding two new parameters, each a texture coordinate but one marked in and the other marked out. Because the pixel shader requires the texture coordinates, you'll notice that the code simply passes it on here. Next is the TextureColor method, which will be the pixel shader. It has two inputs, the texture coordinates from the vertex shader and the diffuse color, which was the return value of the vertex shader program. Notice that the pixel shader also returns a color, which will be the final color for each pixel in the scene. To get that color, the pixel shader has a simple formula: first, get the color of the pixel in the texture (the tex2D intrinsic), and then, multiply it by the diffuse color returned from the vertex shader. This formula produces an image that is the correct color as the textures show, but it is also shaded correctly, as you saw earlier in Figure 20.2. Now, the only remaining item to cover is actually updating the C# code to ensure that the texture is being set correctly. Back in the OnFrameRender method, find the innermost loop right before the call to DrawSubset and add the following: effect.SetValue("SceneTexture", kartTextures[i]); effect.CommitChanges(); This change updates the effects system with the correct texture and allows it to render the go-kart correctly (as you see in Figure 20.3). Pay attention to the call to CommitChanges, though. This call is informing the effects system that you have changed one of the values used to render and you want the effects system to use this updated value now. Considering that you've only loaded a single texture, this call isn't exactly required, but it is good to get into the habit now before more complex things are rendered and it is required. It's also interesting to point out that depending on which kart you select on the main user interface screen, the resulting kart in the game play mode looks different. Figure 20.3. Finally, the complete model.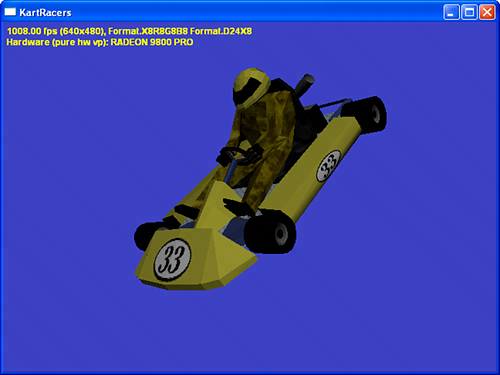 |
EAN: 2147483647
Pages: 191