Sharing an Internet Connection
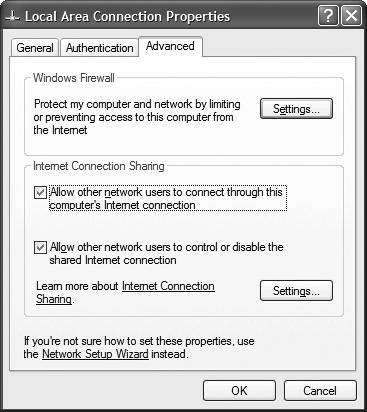
| TIP If you're just now setting up your home network, you can activate ICS via the Network Setup Wizard. Make sure you choose the This Computer Connects Directly to the Internet option, select which Internet connection you want to share, and specify which of your two network cards are connected to what. (One card connects to your broadband modem, the other card connects to your home network probably through a hub.) Do you have more than one PC in your home? If so, you probably want them both to be connected to the Internet. This is particularly true if you have a broadband connection coming into your home. With a broadband connection you have enough bandwidth to connect multiple computers to the Internet at the same time by sharing a single Internet connection. Windows XP includes special Internet Connection Sharing (ICS) technology, which enables a single "gateway" computer to manage a shared Internet connection for other computers on your home network. You activate ICS via the Network Setup Wizard, which I discuss in more detail in Chapter 20, "Setting Up a Home or Small Business Network." With ICS, the gateway computer is called the host, and all the other computers on the network are called clients. The host computer and the clients have to be set up separately. Sharing a Connection via EthernetIf you have a wired Ethernet network connected in your home, you can share your Internet connection between any computer connected to the network. Assuming that all your computers are already connected to the network, you don't even have to run the Network Setup Wizard to set up Internet Connection Sharing. You start by configuring your host computer by following these steps:
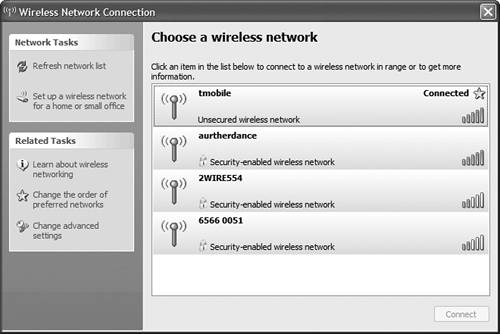
You also have to configure each client computer on your network to share your Internet connection. If the computers are all running Windows XP, the process is fairly straightforward. All you have to do is run the New Connection Wizard, choose the Set Up My Connection Manually option, and then choose the Connect Using a Broadband Connection That Is Always On option. Follow the onscreen instructions and you'll be all set. Repeat these steps for each client computer (but not your gateway computer!) on your network. Sharing a Connection via Wi-FiSharing an Internet connection via a wireless network is even easier than sharing over a wired network. That's because when you set up your wireless router, it functions as an active Wi-Fi hotspot. Any computer with a wireless network adapter should be able to receive the Wi-Fi signals, and thus share the Internet connection. This assumes that you haven't enabled any Wi-Fi security for your network which, of course, you should. As you'll learn in Chapter 20, Windows XP SP2 includes a new Wireless Network Setup Wizard that lets you add wireless security to your network, enabling wireless access only for those computers that share the same protected access code. The thing to do is run the Wireless Network Setup Wizard on every computer connected wirelessly to your network; this way, only your computers can connect to your wireless network, so you won't be sharing your connection with everyone within receiving range. To connect a Wi-Fi-enabled computer to any Wi-Fi network (including public Wi-Fi hotspots), follow these instructions:
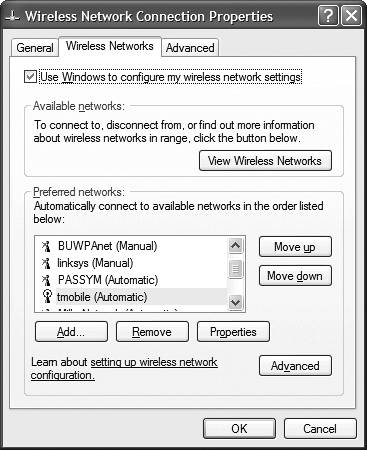
To change the order in which you connect to various wireless networks, click Change the Order of Preferred Networks in the Wireless Network Connection window. When the Wireless Network Connection Properties dialog box appears, as shown in Figure 7.4, click the Wireless Networks tab. You can then select a network from the Preferred Networks list and click the Move Up or Move Down button appropriately. (This is a big help if you connect to a lot of public hotspots especially in locations where more than one hotspot is within range.) Figure 7.4. Configuring the order of wireless network connections.
|
EAN: 2147483647
Pages: 270