Sending and Receiving Email
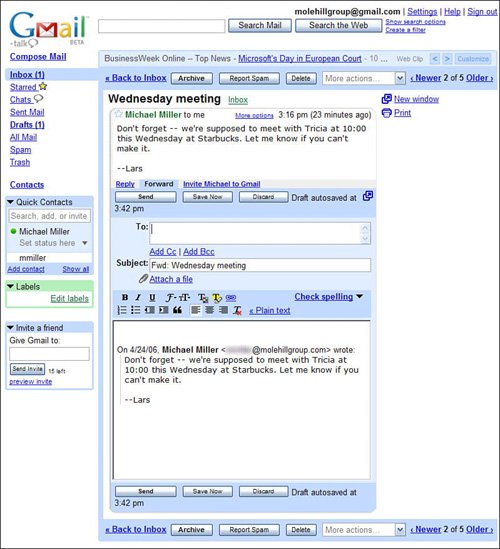
| Obviously, the Gmail interface is fairly easy to understand. (If Google does nothing else, they create simple, easy-to-understand interfaces.) Now let's get down to brass tacks, and learn how to use Gmail for basic message sending and receiving. Reading MessagesTo read a message, all you have to do is click the message title in the inbox. This displays the full text of the message on a new page, as shown in Figure 21.3. Figure 21.3. Reading an email message in Gmail. If you want to display this message in a new window, click the New Window link. To print the message, click the Print link. To return to the inbox, click the Inbox link. Viewing ConversationsOne of the unique things about Gmail is that all related email messages are grouped together in what Google calls conversations. A conversation might be an initial message and all the replies (and replies to replies) to that message; a conversation might also be all the daily emails from a single source with a common subject, such as messages you receive from subscribed-to mailing lists. A conversation is noted in the inbox list by a number in parentheses after the sender name(s), as shown in Figure 21.4. If a conversation has replies from more than one person, more than one name is listed. Figure 21.4. A conversation consisting of three messages.To view all the messages in a conversation, simply click the message title. As you can see in Figure 21.5, all the messages in the conversation are stacked on top of each other, with the text of the newest message fully displayed. To expand any single message within the conversation, simply click that message's subject. To expand all the messages in a conversation, as shown in Figure 21.6, click the Expand All link. Figure 21.5. Viewing all the messages in a conversation.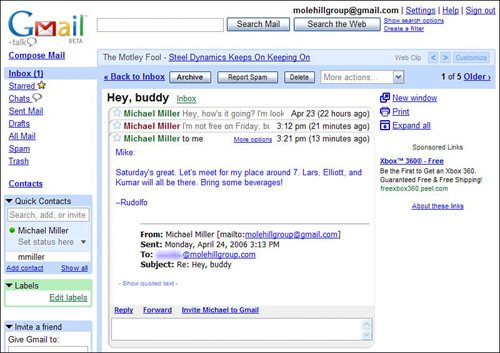 Figure 21.6. A conversation expanded so that all messages are displayed.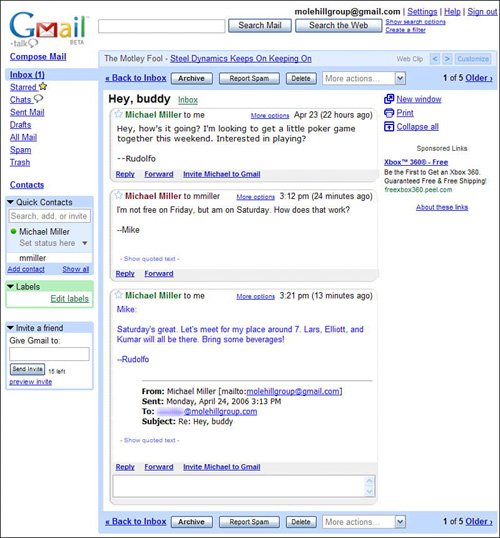 Replying to MessagesWhether you're reading a single message or a conversation, it's easy enough to send a reply. All you have to do is follow these steps:
Forwarding MessagesSometimes you might want to forward a message to a third party, instead of simply replying to the original sender. You do this by following these steps:
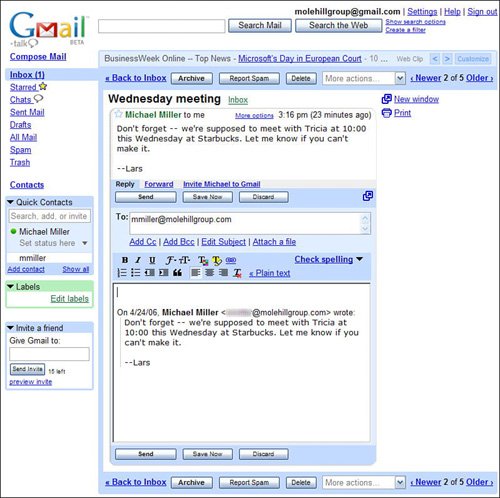
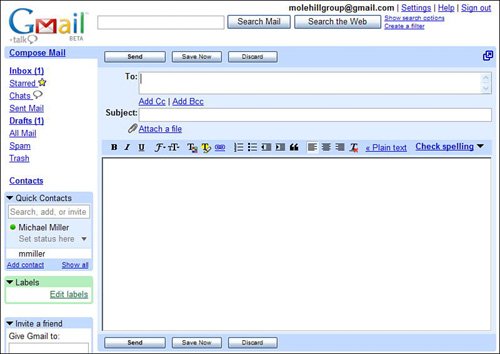
Composing and Sending New MessagesTip You can cc (carbon copy) and bcc (blind carbon copy) additional recipients byvf clicking the Add Cc and Add Bcc links; this expands the message to include Cc or Bcc boxes, into which you enter the recipients' addresses. (A bcc sends the message to the intended recipients, but hides their addresses from the main recipients; a cc displays the recipients' addresses.) Creating a new message from scratch isn't a whole lot harder than replying to a pre-existing message. All you have to do is follow these steps:
Attaching FilesOne of the key features of Gmail is its capability to store large amounts of data. You can use this feature to email files to yourself for backup purposes; of course, you can also email files to other users, as you wish. Tip Gmail provides spell checking for all your outgoing messages. Just click the Check Spelling link, and then accept or reject suggested spelling changes throughout your document. To attach a file to a Gmail message, follow these steps:
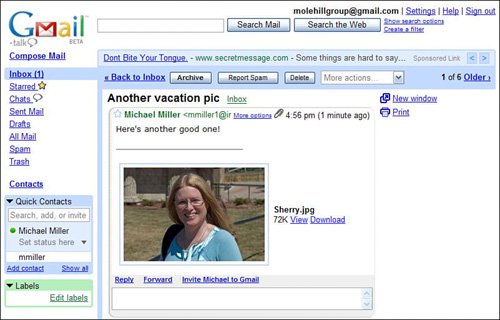
The file you selected now appears under the Subject box on the new message page, as shown in Figure 21.10. To attach another file to this same message, click the Attach Another File link; otherwise, continue composing and sending your message as normal. Figure 21.10. Attaching a file to an email message.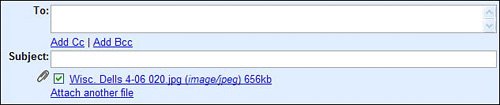 Opening or Viewing Attached FilesWhat do you do if someone sends you a file attached to an email message? First, make sure that you're expecting the attachment, and that it's not a virus tagging along for the ride. If you're confident that it's a legitimate attachment from someone you know and trust, you can opt to either view the attachment (ideal for photos) or save the attachment to your hard drive. Caution While you can send Word documents, Excel spreadsheets, MP3 music files, JPG picture files, and the like, Gmail won't let you send any executable program files. (These are files that have an EXE extension.) You can't even send EXE files when they're compressed into ZIP files. Gmail blocks the transmittal of all EXE files, in an attempt to prevent potential computer viruses. When you receive a message with an attachment, you see a little paper clip icon next to the message subject/snippet, as shown in Figure 21.11. To view or save an attachment, follow these steps:
Figure 21.11. A message with a file attached.Deleting MessagesThere are two ways to delete messages in Gmail:
Either of these two approaches moves the selected message to the Trash bin. Messages stay in the Trash bin for 30 days; after that, they're permanently deleted. |
EAN: 2147483647
Pages: 370