ActiveX Controls and Applications
Creating an ActiveX Control
In this exercise, you will create an ActiveX control using Visual Basic.* To create an ActiveX control
- Start Visual Basic and create a new ActiveX Control project.
- Rename the project, Lab8Control .
- Change the name of UserControl1 to ChangeDateTime .
- From the File menu, click Save Project .
- Save the project in the WA\Practice\Ch08 directory. Click No when prompted to Add this project to SourceSafe .
- Change the BackColor property of ChangeDateTime to Window Background .
- Insert a Label control and a Timer control to the ChangeDateTime as shown in the following illustration.
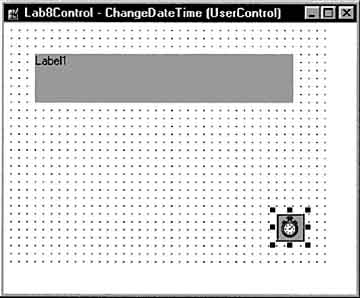
- Set the following properties:
Control Property Value Timer1 Interval = 100 Label1 Caption = "" Label1 Font = Arial 12 point Label1 BackStyle = 0 “ Transparent Label1 Alignment = 2 “ Center
- In the Timer control's Timer event, add the following code:
Label1.Caption = Now()
- Save changes to the project.
- From the File menu, click Make Lab8Control.ocx .
When the Make Project dialog appears, make sure the directory is set to WA\Practice\Ch08 .
Microsoft Windows Architecture for Developers Training Kit
ISBN: B00007FY9D
EAN: N/A
EAN: N/A
Year: 1998
Pages: 324
Pages: 324
Authors: Microsoft Corporation
- Using SQL Data Definition Language (DDL) to Create Data Tables and Other Database Objects
- Working with Comparison Predicates and Grouped Queries
- Working with SQL JOIN Statements and Other Multiple-table Queries
- Working with Ms-sql Server Information Schema View
- Working with SQL Database Data Across the Internet